4B. Upgrading the Nextruder (MMU3)
80 Original Prusa MK4/MK3.9 to MK4S/MK3.9S upgrade
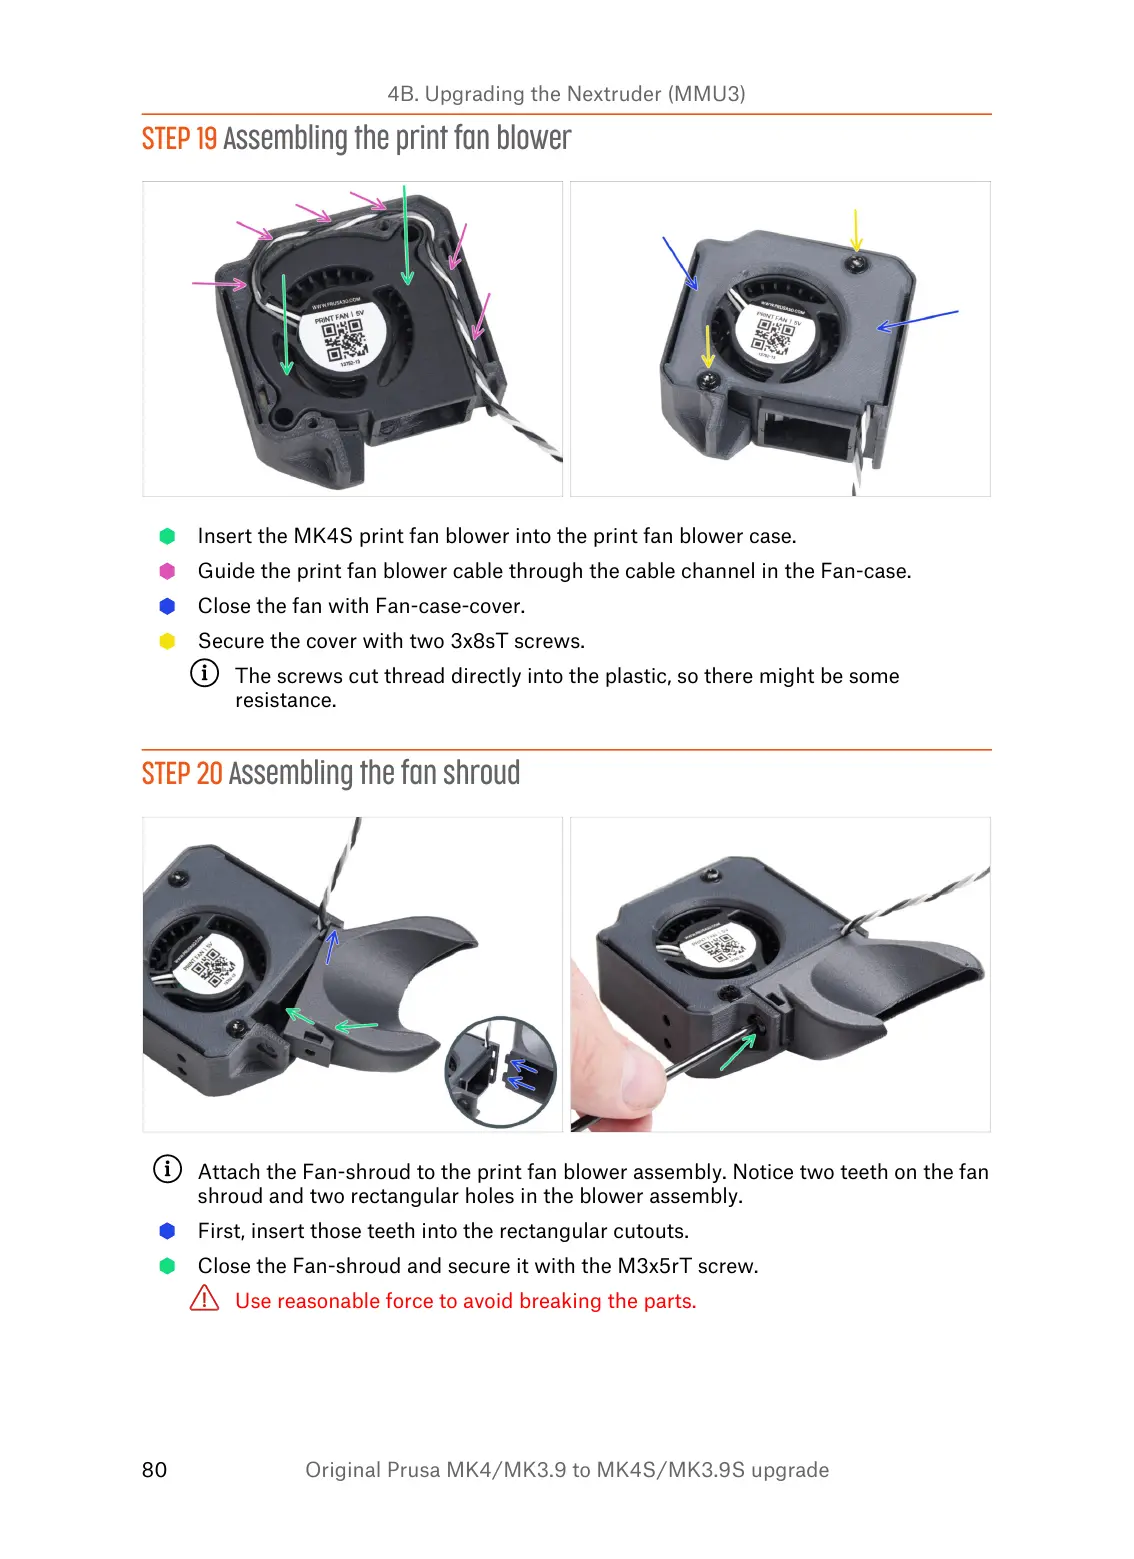
STEP 19 Assembling the print fan blower
Insert the MK4S print fan blower into the print fan blower case.
Guide the print fan blower cable through the cable channel in the Fan-case.
Close the fan with Fan-case-cover.
Secure the cover with two 3x8sT screws.
The screws cut thread directly into the plastic, so there might be some
resistance.
STEP 20 Assembling the fan shroud
Attach the Fan-shroud to the print fan blower assembly. Notice two teeth on the fan
shroud and two rectangular holes in the blower assembly.
First, insert those teeth into the rectangular cutouts.
Close the Fan-shroud and secure it with the M3x5rT screw.
Use reasonable force to avoid breaking the parts.