4B. Upgrading the Nextruder (MMU3)
Original Prusa MK4/MK3.9 to MK4S/MK3.9S upgrade 87
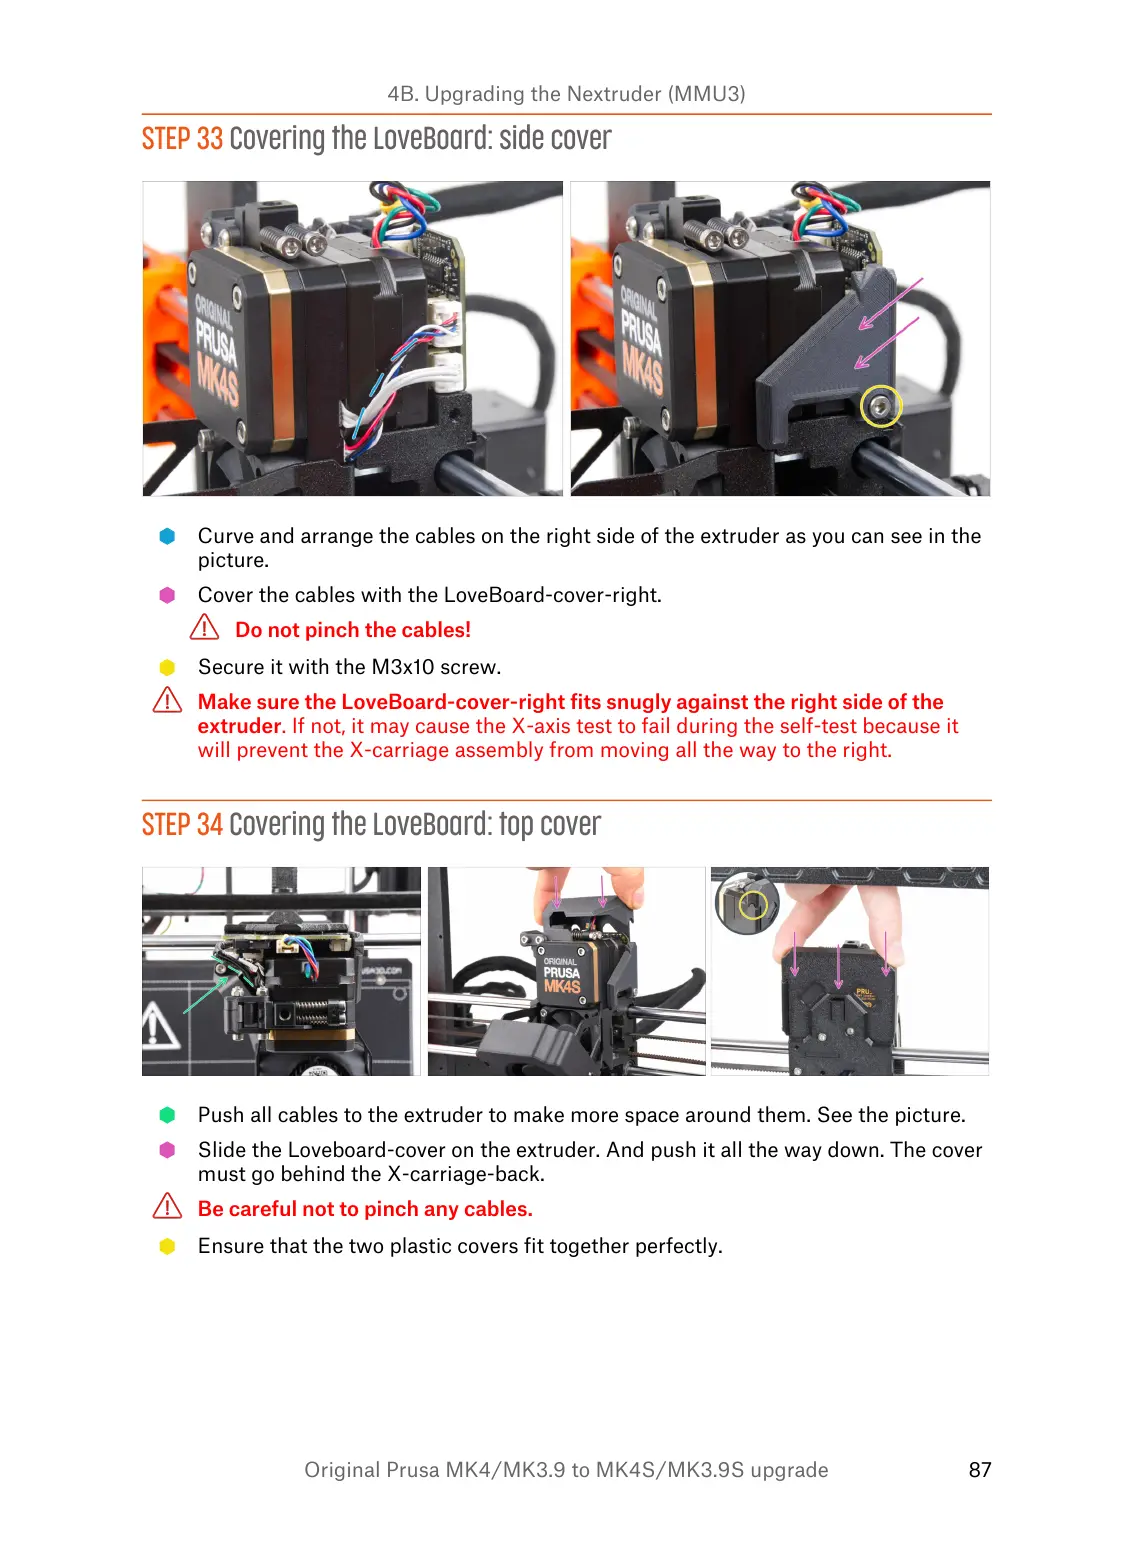
STEP 33 Covering the LoveBoard: side cover
Curve and arrange the cables on the right side of the extruder as you can see in the
picture.
Cover the cables with the LoveBoard-cover-right.
Do not pinch the cables!
Secure it with the M3x10 screw.
Make sure the LoveBoard-cover-right fits snugly against the right side of the
extruder. If not, it may cause the X-axis test to fail during the self-test because it
will prevent the X-carriage assembly from moving all the way to the right.
STEP 34 Covering the LoveBoard: top cover
Push all cables to the extruder to make more space around them. See the picture.
Slide the Loveboard-cover on the extruder. And push it all the way down. The cover
must go behind the X-carriage-back.
Be careful not to pinch any cables.
Ensure that the two plastic covers fit together perfectly.


 To Next Page