4B. Upgrading the Nextruder (MMU3)
Original Prusa MK4/MK3.9 to MK4S/MK3.9S upgrade 71
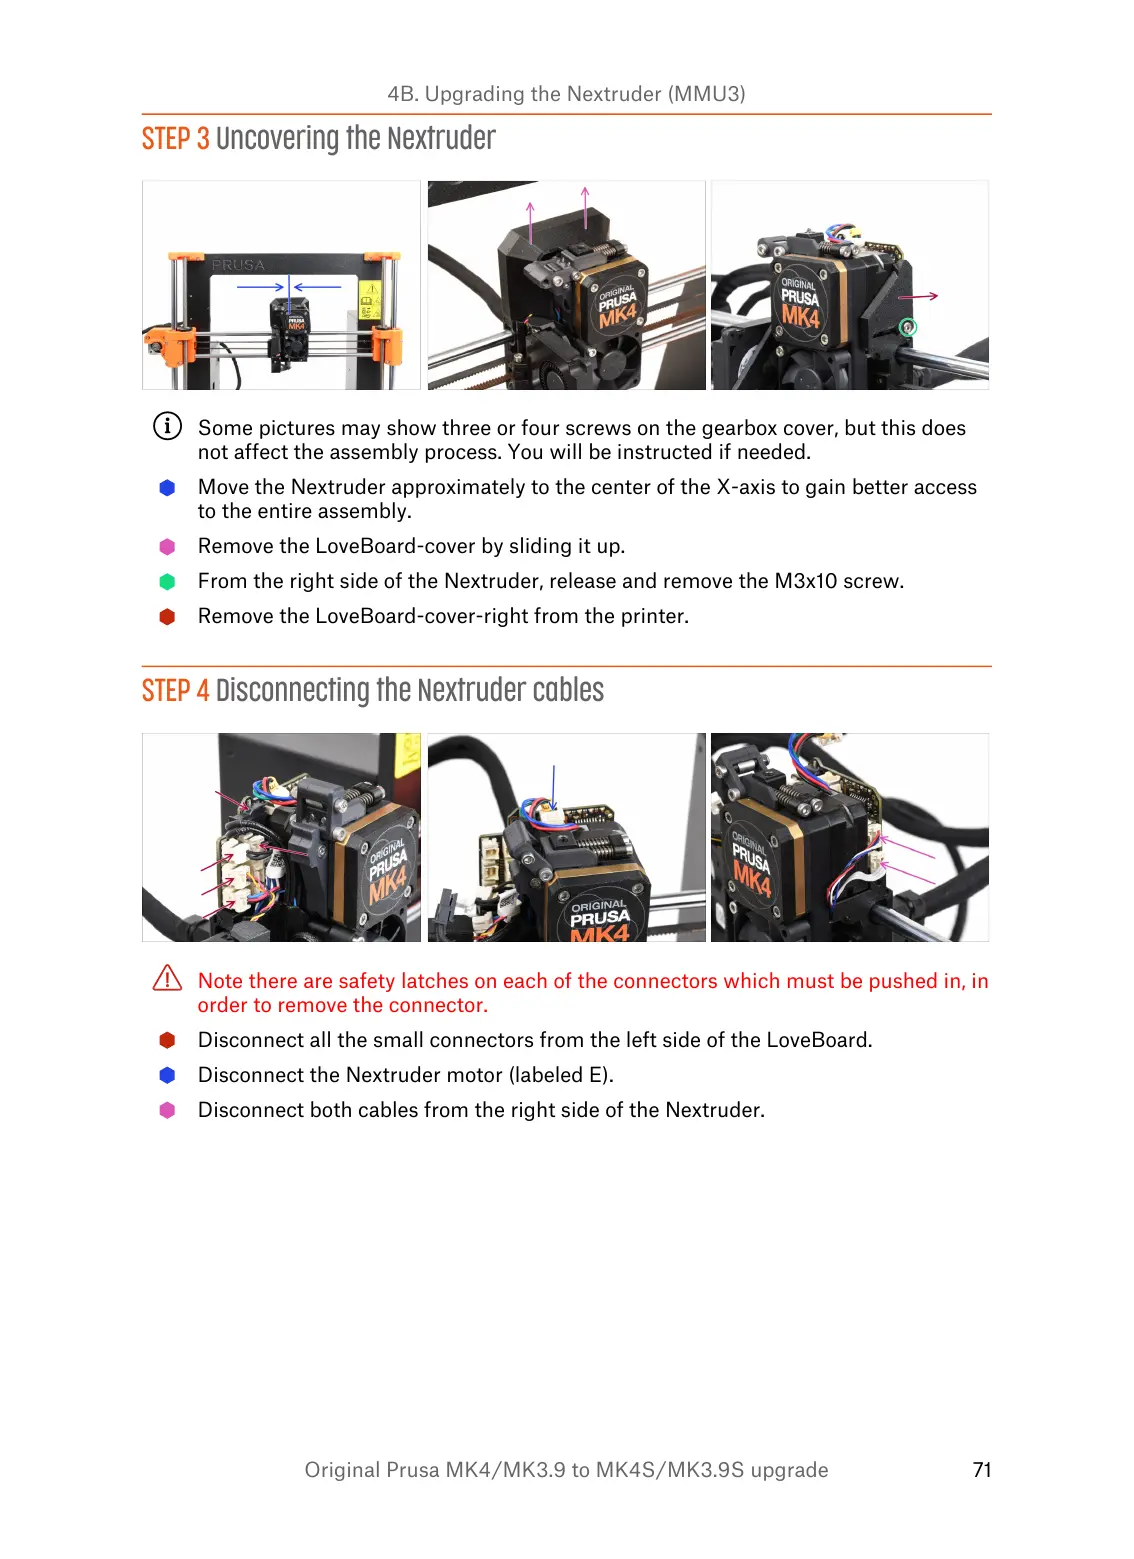
STEP 3 Uncovering the Nextruder
Some pictures may show three or four screws on the gearbox cover, but this does
not affect the assembly process. You will be instructed if needed.
Move the Nextruder approximately to the center of the X-axis to gain better access
to the entire assembly.
Remove the LoveBoard-cover by sliding it up.
From the right side of the Nextruder, release and remove the M3x10 screw.
Remove the LoveBoard-cover-right from the printer.
STEP 4 Disconnecting the Nextruder cables
Note there are safety latches on each of the connectors which must be pushed in, in
order to remove the connector.
Disconnect all the small connectors from the left side of the LoveBoard.
Disconnect the Nextruder motor (labeled E).
Disconnect both cables from the right side of the Nextruder.
 Loading...