4. Upgrading the Nextruder
Original Prusa MK4/MK3.9 to MK4S/MK3.9S upgrade 45
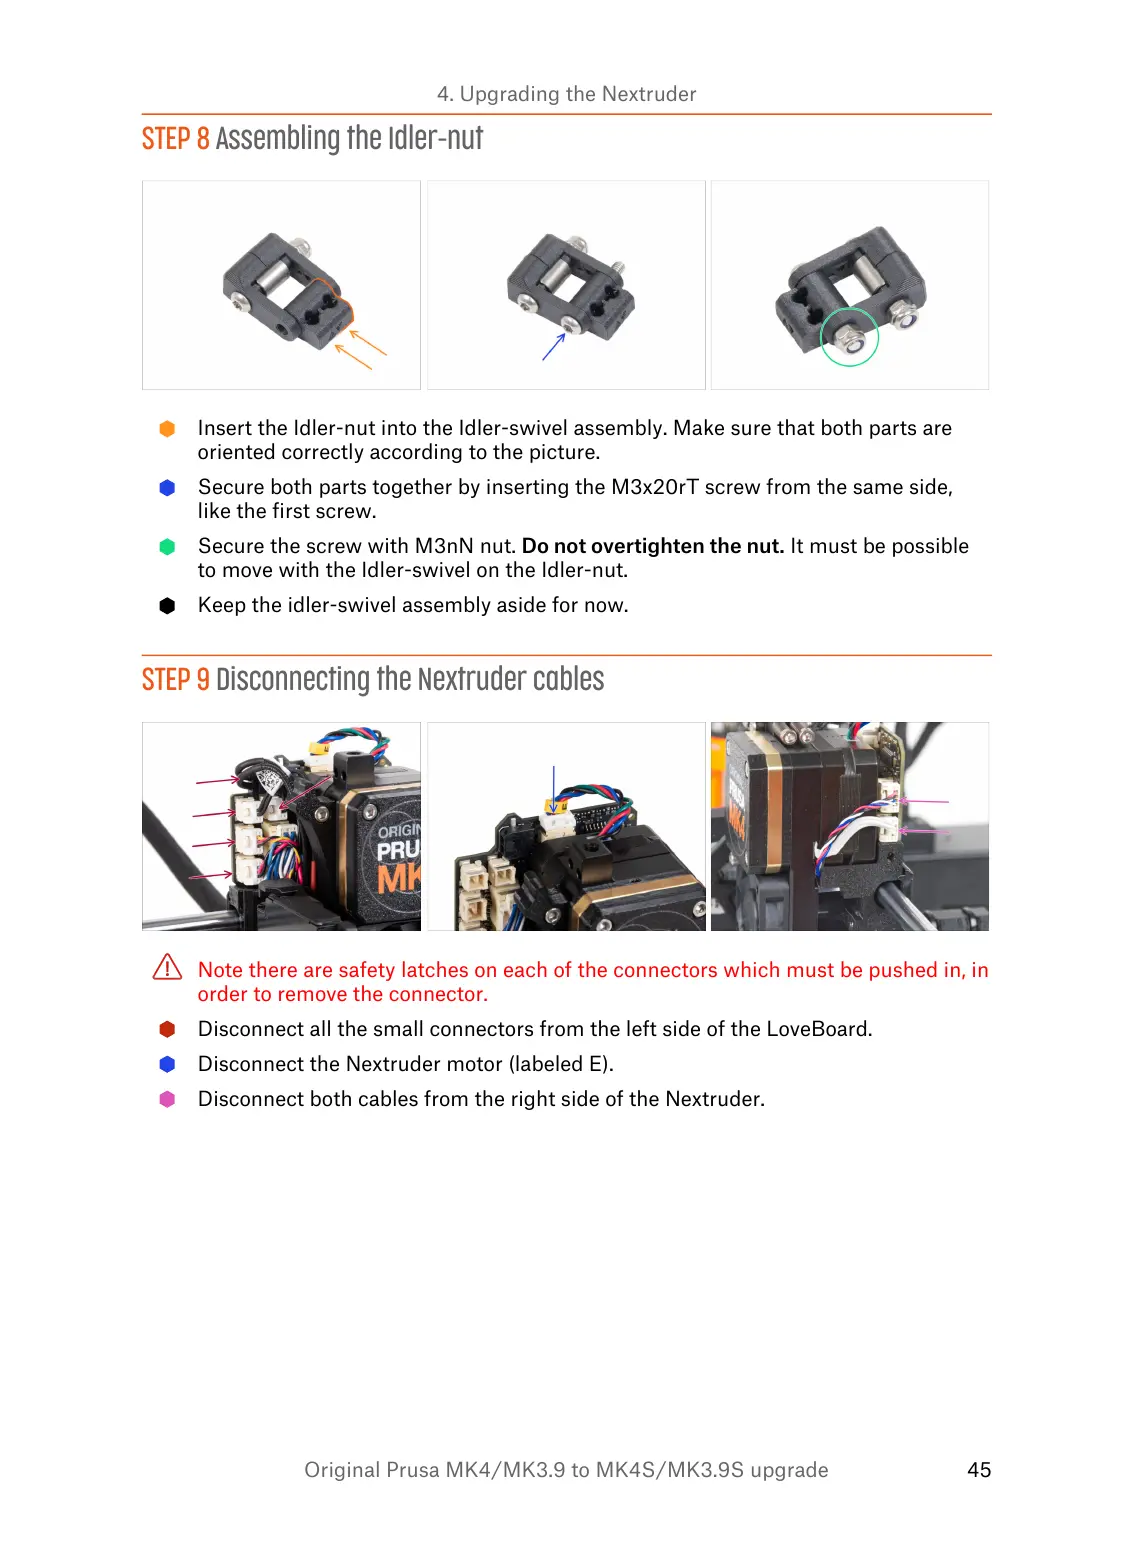
STEP 8 Assembling the Idler-nut
Insert the Idler-nut into the Idler-swivel assembly. Make sure that both parts are
oriented correctly according to the picture.
Secure both parts together by inserting the M3x20rT screw from the same side,
like the first screw.
Secure the screw with M3nN nut. Do not overtighten the nut. It must be possible
to move with the Idler-swivel on the Idler-nut.
Keep the idler-swivel assembly aside for now.
STEP 9 Disconnecting the Nextruder cables
Note there are safety latches on each of the connectors which must be pushed in, in
order to remove the connector.
Disconnect all the small connectors from the left side of the LoveBoard.
Disconnect the Nextruder motor (labeled E).
Disconnect both cables from the right side of the Nextruder.
 Loading...