4B. Upgrading the Nextruder (MMU3)
Original Prusa MK4/MK3.9 to MK4S/MK3.9S upgrade 83
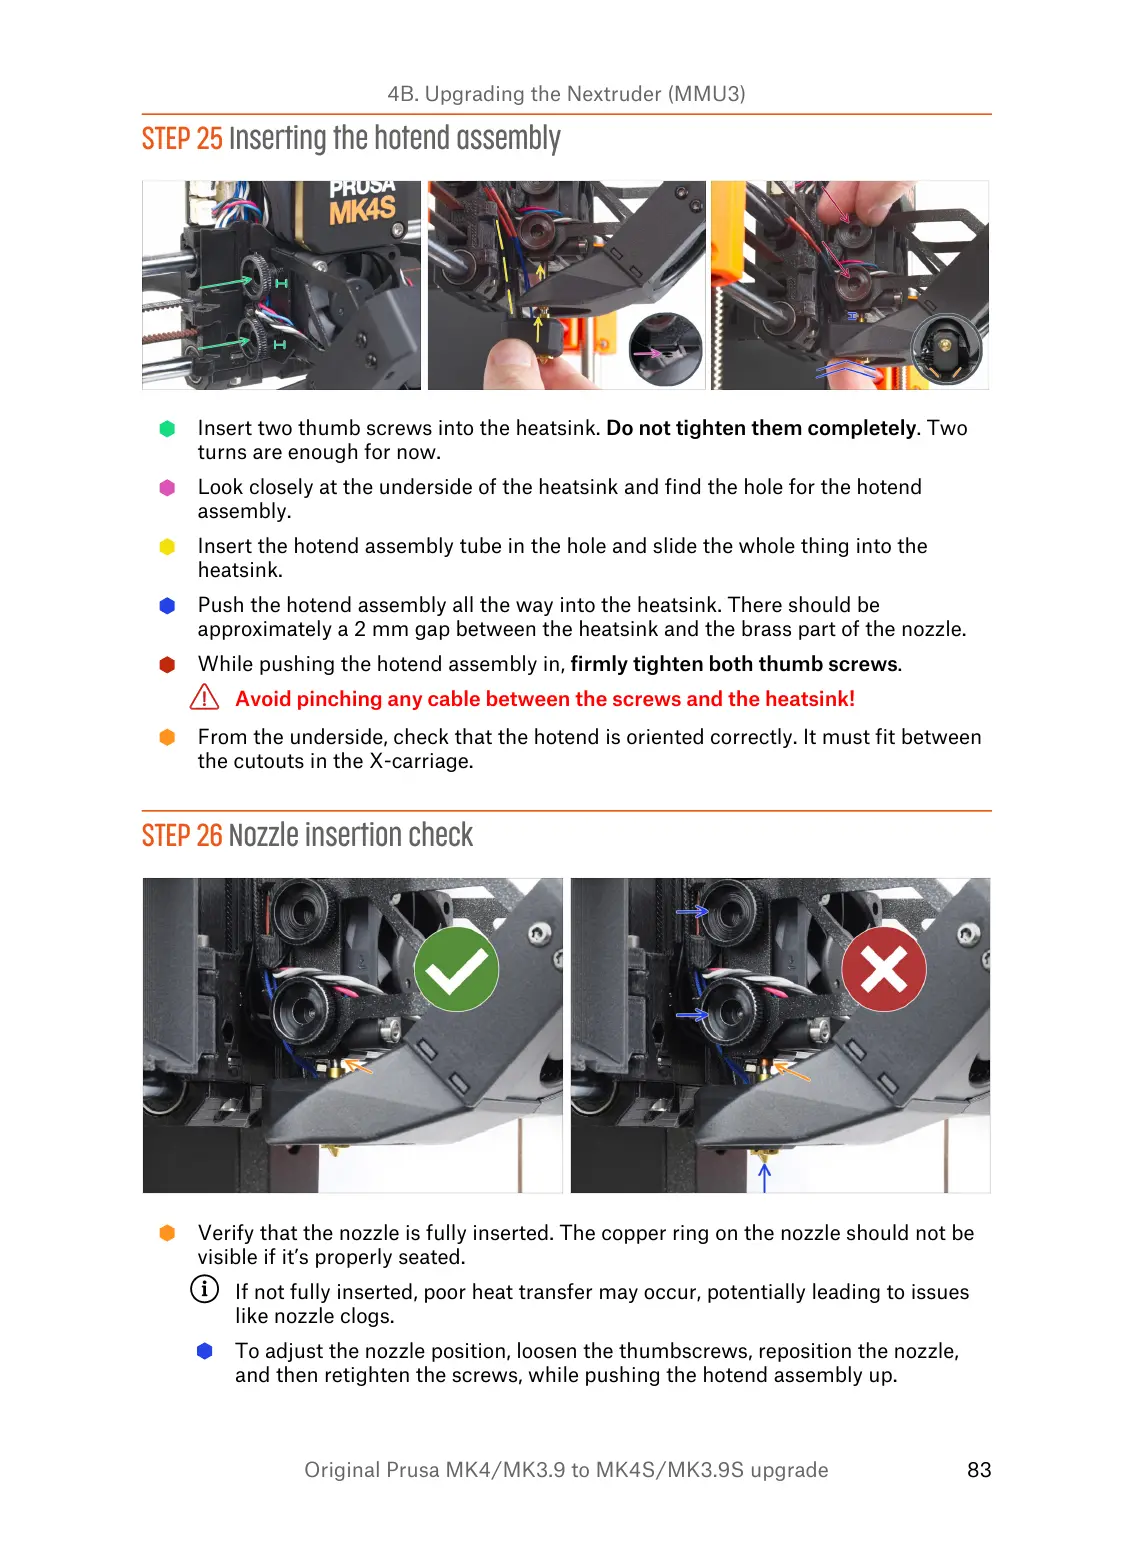
STEP 25 Inserting the hotend assembly
Insert two thumb screws into the heatsink. Do not tighten them completely. Two
turns are enough for now.
Look closely at the underside of the heatsink and find the hole for the hotend
assembly.
Insert the hotend assembly tube in the hole and slide the whole thing into the
heatsink.
Push the hotend assembly all the way into the heatsink. There should be
approximately a 2 mm gap between the heatsink and the brass part of the nozzle.
While pushing the hotend assembly in, firmly tighten both thumb screws.
Avoid pinching any cable between the screws and the heatsink!
From the underside, check that the hotend is oriented correctly. It must fit between
the cutouts in the X-carriage.
STEP 26 Nozzle insertion check
Verify that the nozzle is fully inserted. The copper ring on the nozzle should not be
visible if it’s properly seated.
If not fully inserted, poor heat transfer may occur, potentially leading to issues
like nozzle clogs.
To adjust the nozzle position, loosen the thumbscrews, reposition the nozzle,
and then retighten the screws, while pushing the hotend assembly up.
 Loading...