5. Upgrading the connectivity
Original Prusa MK4/MK3.9 to MK4S/MK3.9S upgrade 97
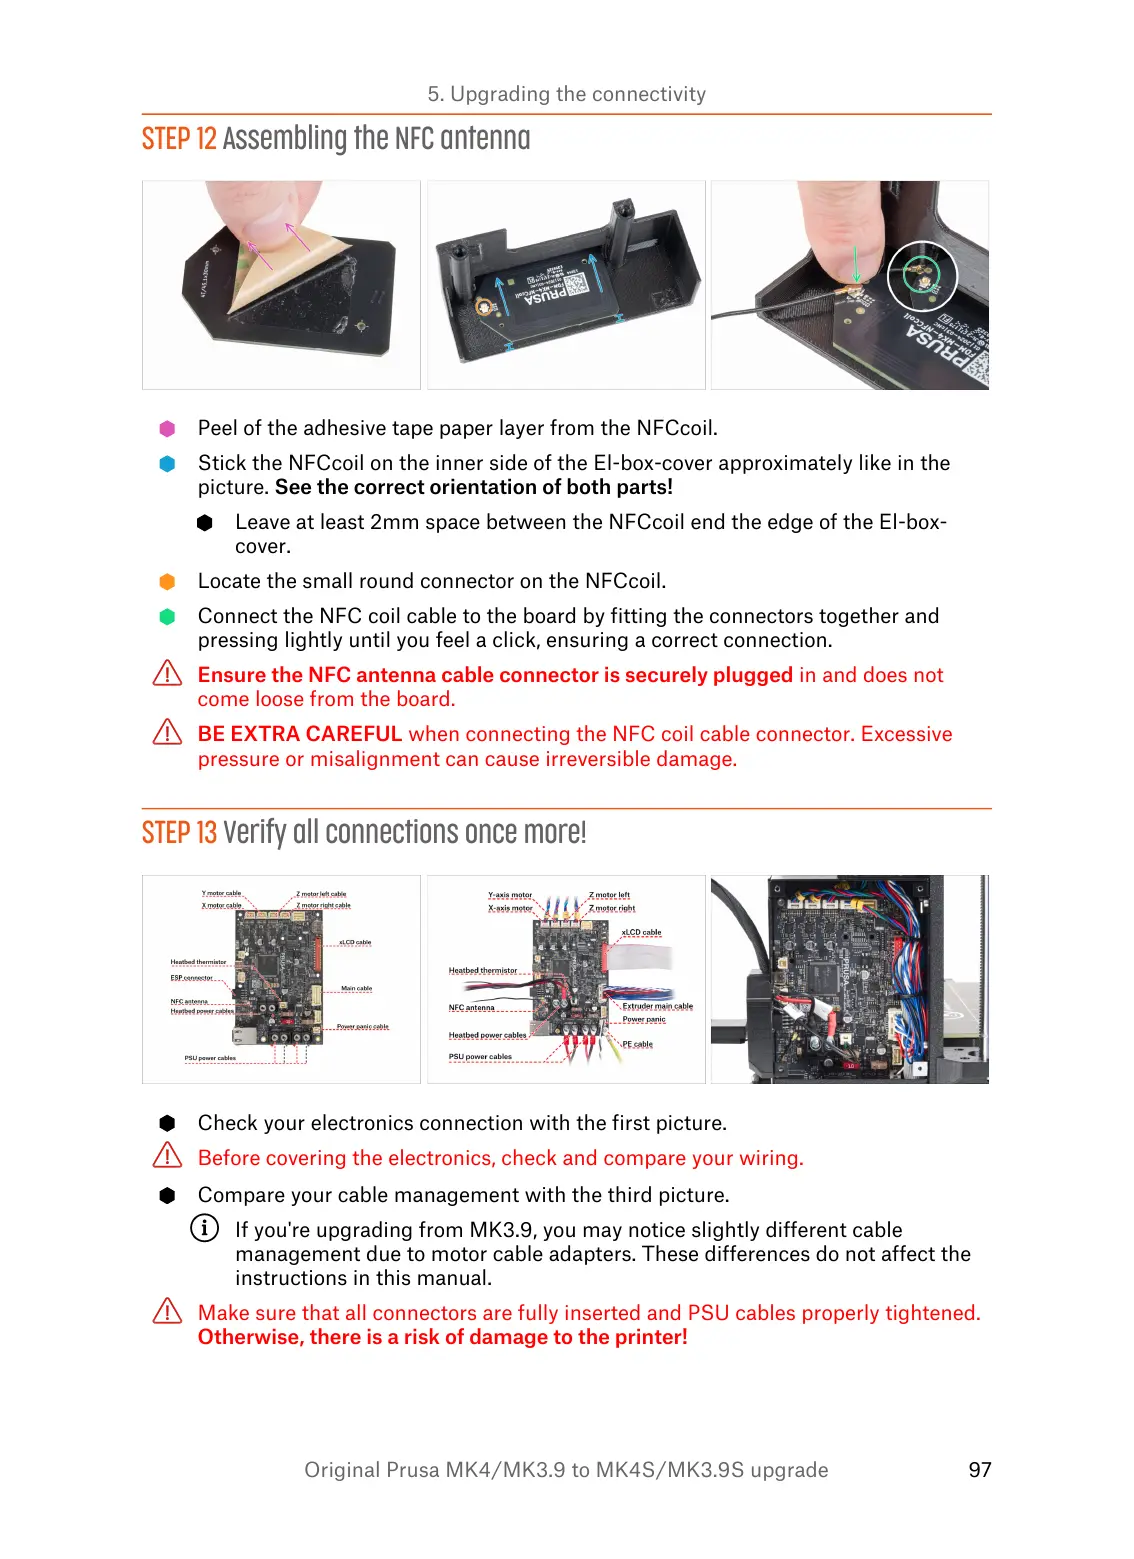
STEP 12 Assembling the NFC antenna
Peel of the adhesive tape paper layer from the NFCcoil.
Stick the NFCcoil on the inner side of the El-box-cover approximately like in the
picture. See the correct orientation of both parts!
Leave at least 2mm space between the NFCcoil end the edge of the El-box-
cover.
Locate the small round connector on the NFCcoil.
Connect the NFC coil cable to the board by fitting the connectors together and
pressing lightly until you feel a click, ensuring a correct connection.
Ensure the NFC antenna cable connector is securely plugged in and does not
come loose from the board.
BE EXTRA CAREFUL when connecting the NFC coil cable connector. Excessive
pressure or misalignment can cause irreversible damage.
STEP 13 Verify all connections once more!
Check your electronics connection with the first picture.
Before covering the electronics, check and compare your wiring.
Compare your cable management with the third picture.
If you're upgrading from MK3.9, you may notice slightly different cable
management due to motor cable adapters. These differences do not affect the
instructions in this manual.
Make sure that all connectors are fully inserted and PSU cables properly tightened.
Otherwise, there is a risk of damage to the printer!

 Loading...