100c User Manual
18
CHAPTER 2: THE TOUCH SCREEN INTERFACE
e Orion touch screen interface is very user friendly. Users have access to every welding
parameter with one touch. Below is an explanation of all the various buttons and options found
on the Orion interface. *Orion touch screens are resistive touch screens. is means they respond
best to a little bit of pressure. e end of your fingernail or the tip of the alligator clip works best
when touching the screen.
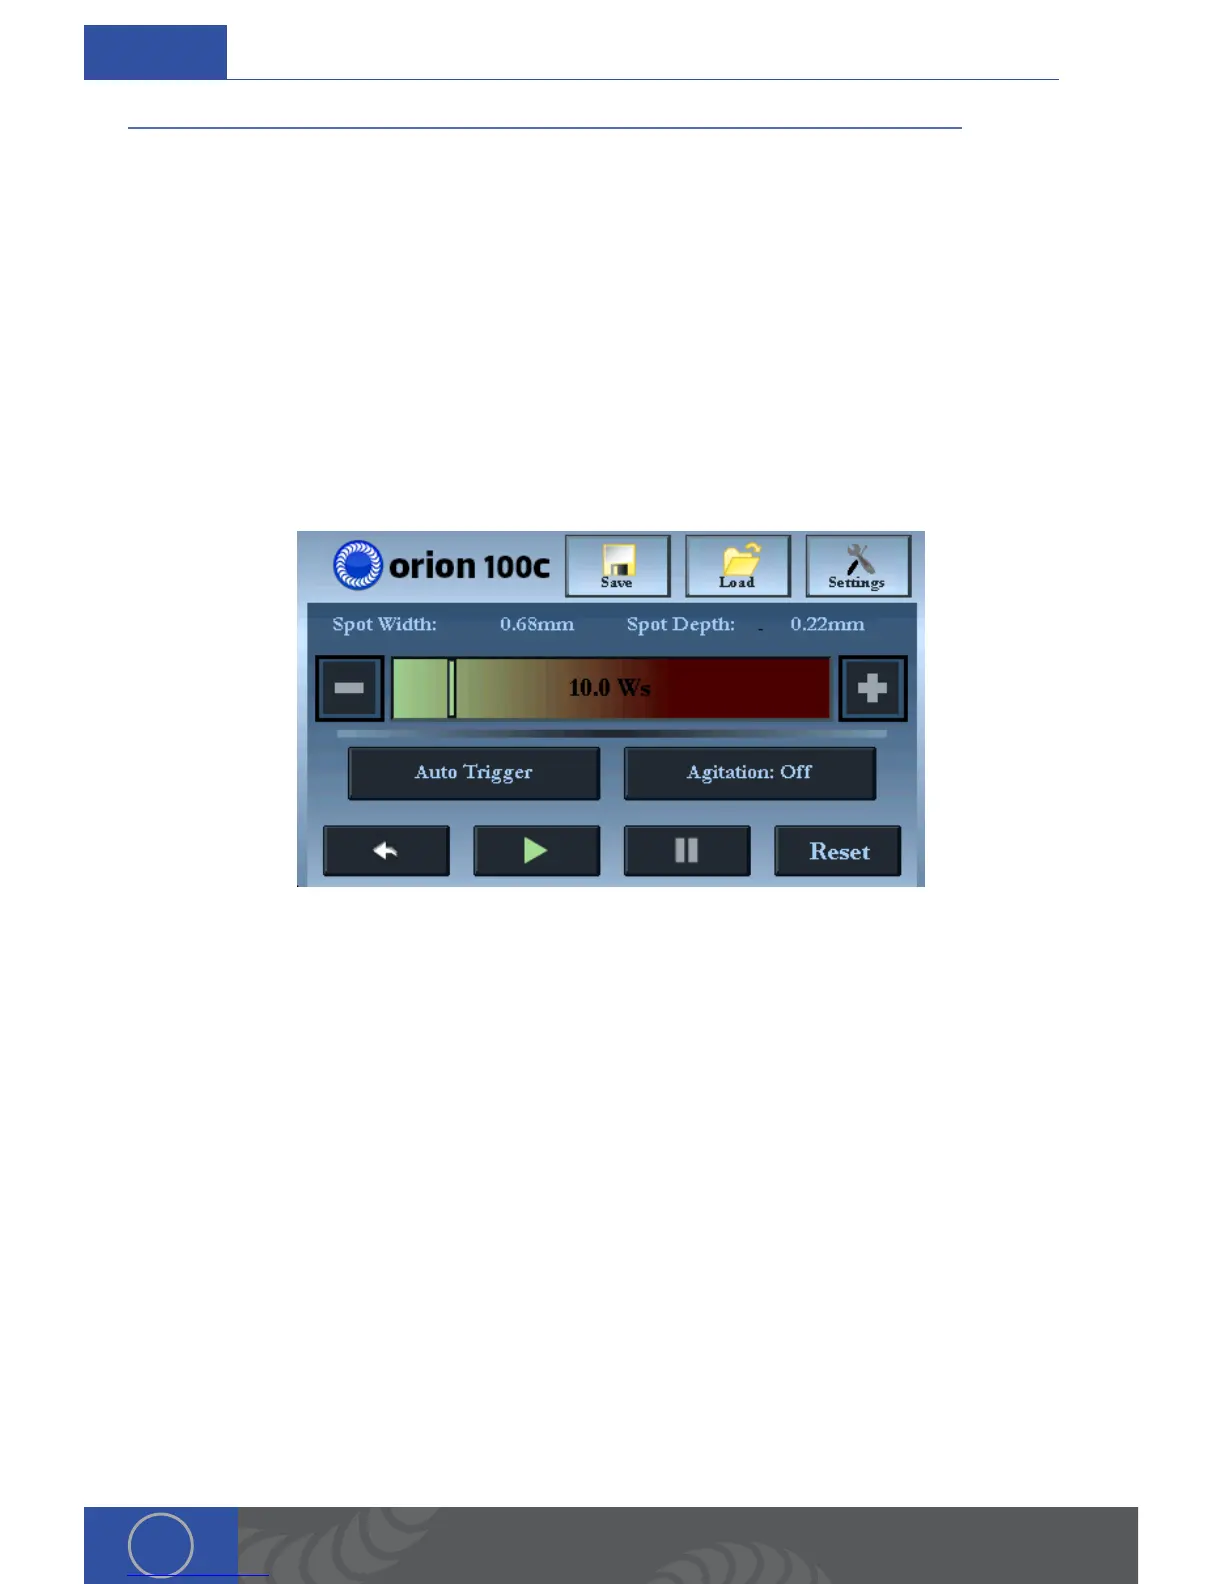
e Main Screen
e arc screen is the main screen that users will be on for pulse arc welding. From this screen
users can make every adjustment necessary for the welding process. Below is a description to
everything you see on the arc screen. We will start at the bottom right and work our way up.
PLAY/PAUSE BUTTONS
Play - In order to weld, the play/pause button must show the green triangle “play“ symbol.
Pause - If the welder is not going to be in used for a period of time, users can push the play/
pause button (a grey pause symbol will appear). is will keep the unit powered on, but welding
functions will be disabled.
RESET BUTTON
e reset button will place all settings on the welder back to their factory default settings. e
factory default settings are “safe” settings and will work well with any metal. If the user is not sure
what settings to use, the factory default settings are a good starting point
BACK BUTTON
e back button will step backwards, allowing users to ‘undo’ up to 10 touch settings made on the
touch screen.
TRIGGER BUTTON
Auto Trigger - When using the Auto Trigger mode (recommended), the unit will automatically
initiate the weld once the work piece touches the electrode tip.
ch.2