Antenna cable with SMA connector, or conversion cable
GNSS antenna with mounting bracket
GNSS antenna surge suppressor (recommended)
GNSS antenna inline amplifier (optional for short cable lengths)
For antenna installation guidelines, see the separate documentation shipped with the
antenna components.
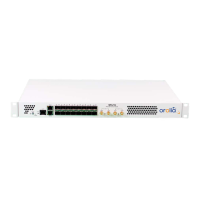
2.4 Mounting the Unit
SecureSync units can be operated on a desktop or in a rack in a horizontal, right-side-up
position.
2.4.1 Rack Mounting
If installing the unit in a rack, install the rack-mount ears on the two sides of the front panel
and mount the unit in a standard 19-inch rack cabinet.
The SecureSync ancillary kit contains the following parts needed for rack mounting:
2 each 1165-1000-0714 rack mounting brackets
2 each MP09-0003-0030 equipment rack handles
4 each H020-0832-0406 #8-32 flat head Phillips screws
6 each HM20R-04R7-0010 M4 flat head Phillips screws
The following customer supplied items are also needed:
4 each #10-32 pan head rack mount screws
1 each #2 Phillips head screwdriver
1 each 3/32" straight screwdriver
To rack mount the SecureSync unit:
1.
Attach an MP09-0003-0030 equipment rack handle to the front of each 1165-
1000-0714 rack mounting bracket, using the holes nearest the right angle bend of
the 1165-1000-0714 rack mounting bracket, with the #2 size Phillips screwdriver,
using 2 each of the H020-0832-0406 #8-32 flat head Phillips screws.
2.
Attach the 1165-1000-0714 rack mount brackets to the sides of the SecureSync
with the rack mounts ears facing outward, aligned with the front edge of the
SecureSync front panel. Use the #2 Phillips screwdrivers, using 3 each of the
HM20R-04R7-0010 M4 flat head Phillips screws.
2.4 Mounting the Unit
SecureSync Getting Started Guide Rev. 12.0 19