Once the unit is up and running, verify that the green link light on the Ethernet port is illu-
minated. The amber “Activity” link light may periodically illuminate when network traffic is
present.
See "Network Setup" on the next page for more information.
2.7 Connecting the GNSS Input
Typical installations include GNSS as an external reference input.
1.
Install a GNSS antenna, surge suppressor, antenna cabling, and GNSS preamplifier (if
required). Refer to the documentation included with your GNSS antenna for inform-
ation regarding GNSS antenna installation.
2.
Connect the GNSS cable to the rear panel antenna input jack.
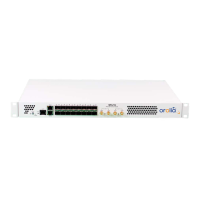
2.8 Powering Up the Unit
1.
After installing your SecureSync unit, and connecting all references and network(s),
verify that power is connected, then turn ON the unit using the switch on the rear
panel (only if equipped with AC power input), and wait for the device to boot up.
Note: DC input power is not switched, so SecureSync will be
powered up with DC input connected, unless you installed an
external power switch.
2.
Observe that all of the front panel LEDs momentarily illuminate (the Power LED will
then stay lit) and that the Information display LCD back light illuminates. The fan may
or may not run, depending on the model year of your SecureSync unit.
The time display will reset and then start incrementing the time. About 10 seconds
after power-up, “Starting up SecureSync” will be displayed in the information dis-
play. After approximately 2minutes, the information display will then show the cur-
rent network settings.
By default, the 4-line information display shows the unit’s hostname, IPv4 address,
mask, and gateway.
The time display shows the current time: UTC (default), TAI, GPS or local timescale,
as configured.
2.7 Connecting the GNSS Input
SecureSync Getting Started Guide Rev. 12.0 23