Part 3 - Conguration
61
Text-In
t Setup: Congure text-in devices.
t It's possible to batch congure all text-in devices
with the exception for port settings.
t An inux of large amounts of text-in data from
multiple channels can hinder system performance.
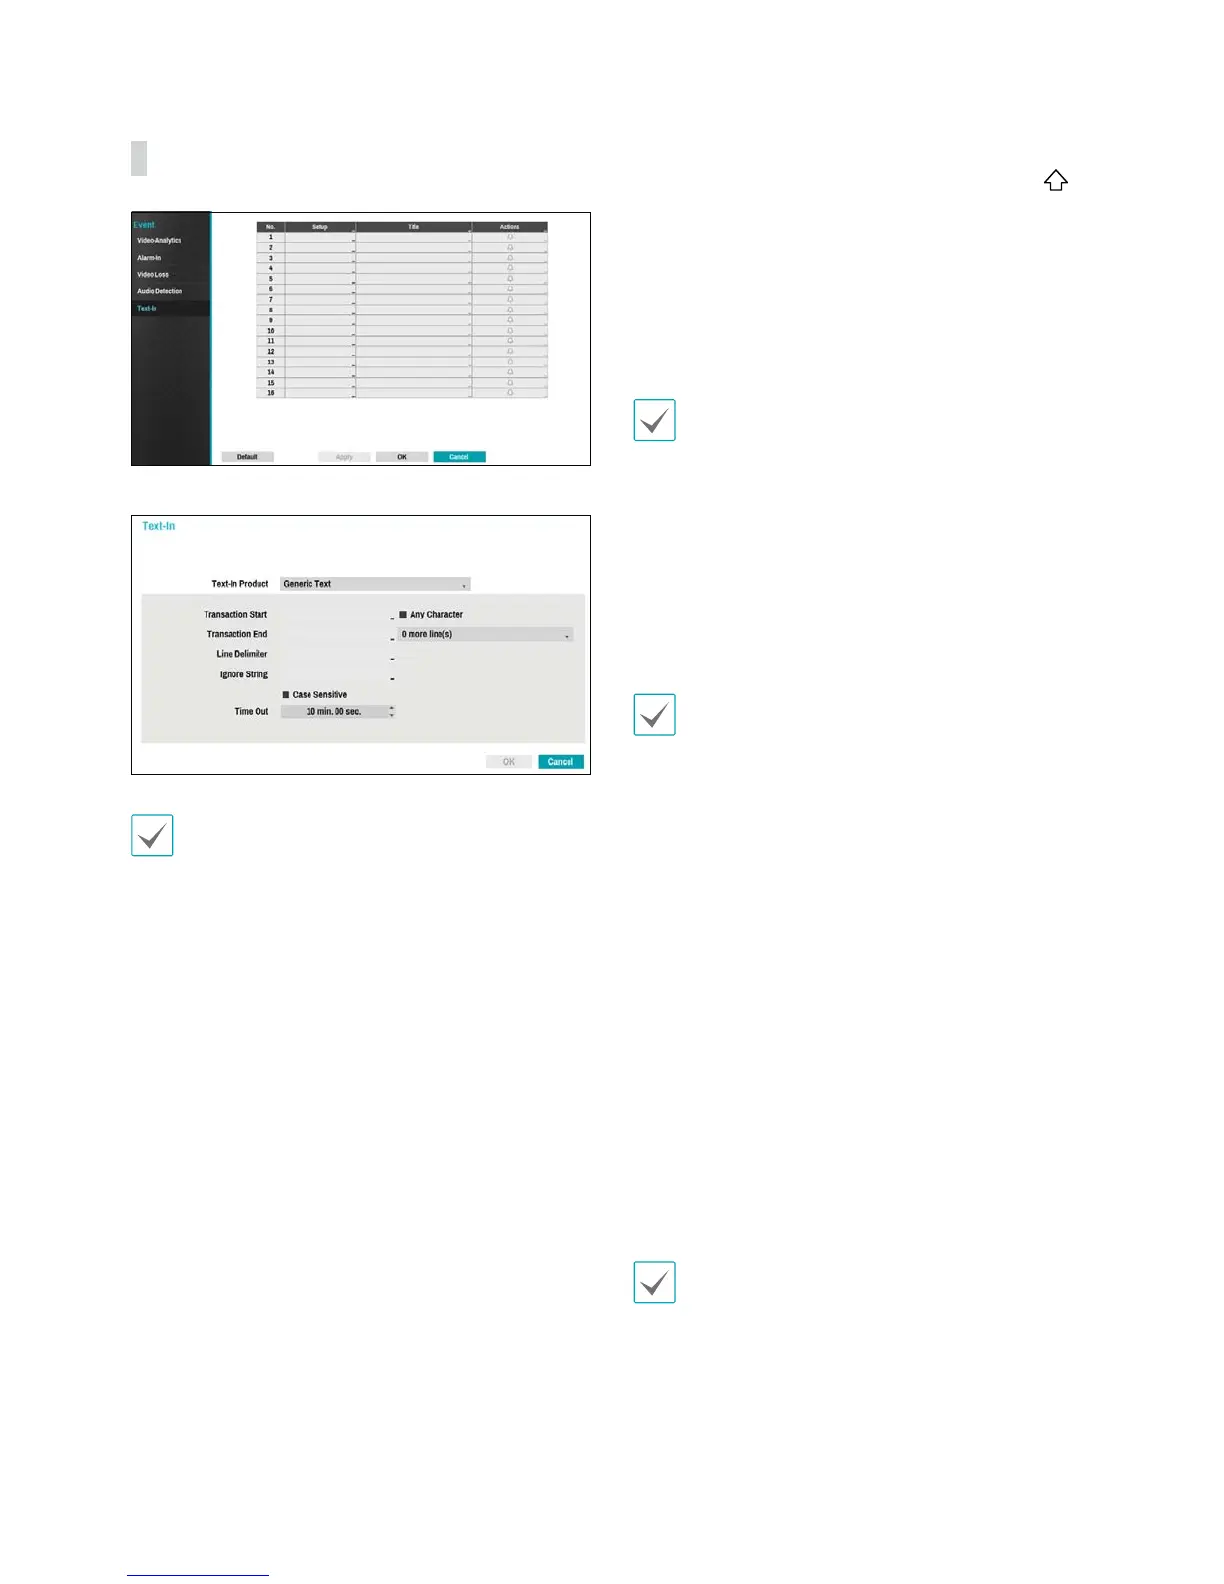
t Text-In Product: The setup window is updated so
that the portion below the port setting matches the
corresponding text-in device. Displayed screenshot
illustrates Generic Text settings.
t Transaction Start: Once Transaction Start has been
designated, the system will recognize the specied
string as the beginning of a transaction. You can
choose the Any Character setting. Under this setting,
any character will trigger the system into recognizing
the start of a new transaction.
t Transaction End: Once Transaction End has been
designated, the system will recognize the specied
string as the end of a transaction. Select 0 more
line(s) next to Transaction End and specify a value
between 1 and 10. The system will recognize the
specied Transaction End string plus the number of
lines as being the end of a transaction.
t Line Delimiter: Designate a string to mark the end of
a line. You can enter control strings by selecting
and then entering ^, followed by a letter. For example,
Carriage Return is ^M and Line Feed (new line) is ^J.
t Ignore String: Specify a string to ignore from
transaction records.
t Case Sensitive: Ignores case in strings designated
under Transaction Start, Transaction End, Line
Delimiter, and Ignore String.
Case Sensitive does not apply to control strings.
t Time Out: Once Time Out has been enabled, the
system will assume the end of a transaction if no new
string is entered within the specied duration of time.
Select between 5 secs and 15 mins.
Selecting RS232, RS485, USB-Serial 1 through 8, or LAN 1
through 16 as the port activates the Port Setup button.
Select Setup and congure the Baud Rate, Data Bit,
Stop Bit, and Parity settings.
t If any one of LAN1 through 16 has been selected as
the port, select the Port Setup button and congure
the network port setting.
t If using a USB-serial port, the Text-In feature may
malfunction if the USB cable is removed while the
system is in operation.
t Title: Designate a name for the text-in device.
t Actions: Specify which actions to take when text-in is
detected.
- Record: Specify which cameras to begin linked
recording on when an event occurs. If the schedule
is set to Event or Time & Event mode, the selected
cameras will begin linked recording when an event
occurs.
- Alarm-Out: Designate event-triggered alarm-out
channels (each for the NVR and camera) and beeps.
- Notify: Congure to be notied of events by Mail,
LAN1 through 5, SNS, and/or Alert Window.
- PTZ: Moves the PTZ camera to a specic preset
position when an event occurs.
In order to use the Callback feature, the NVR must be
registered on the remote program.