Part 3 - Conguration
54
t Limit Time-Lapse Recording: You can store event
recording data for longer. If you do not wish to use
Limit Time-Lapse Recording, select Never. This
function is activated when data has been stored for
longer than as congured because the recording
disk has sucient capacity and saves new data by
overwriting Time Lapse Recording data that are
older than as specied under Recycle mode.
t If the recording stored on the disk is shorter than
the duration specied under Limit Time-Lapse
Recording, the older of Event Recording or Time
Recording data is deleted rst.
t The system's recording time may change depending
on recording quality, resolution, motion, and other
congurations made by the user. The duration
specied under Limit Time-Lapse Recording may
not be guaranteed in certain situations.
t Recording Failover Service: If the network goes
down, this feature will transfer temporary data stored
in the camera's buer to the NVR when the network
goes online again.
t Use Panic Recording: Enable/disable Panic
Recording.
t Panic Recording Duration: Disable Panic Recording
automatically. Select between 5 mins and 1 hr. If you
do not wish to disable the feature automatically,
select No Limit.
t Video Prole: Select a recording prole value for
Panic Recording.
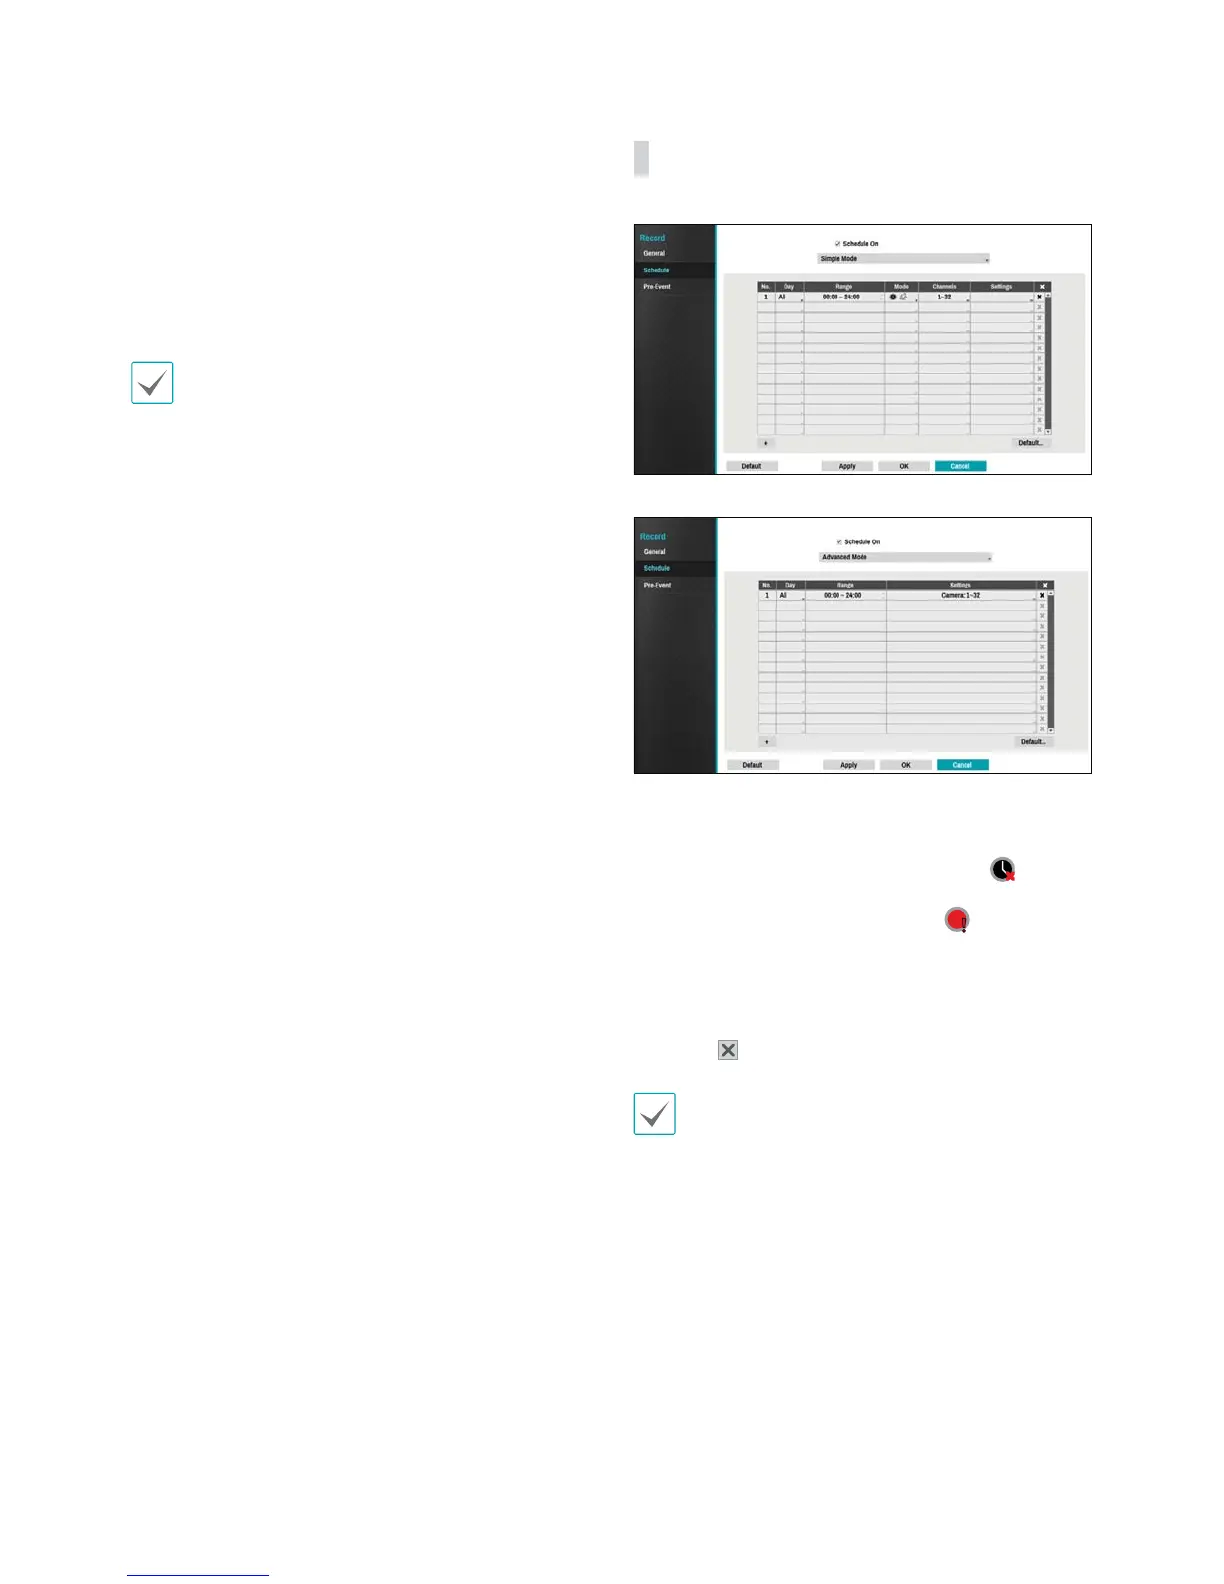
Schedule
<Simple Mode>
<Advanced Mode>
Disabling Schedule On suspends schedule recording
regardless of the schedule and displays the
icon on
the upper left corner of each camera screen. Pressing
the Panic Record button displays the
icon and
commences panic recording.
Set Record Schedule mode as Simple Mode or
Advanced Mode. Advanced Mode allows you to
congure a unique recording schedule for each event.
Select the
icon to delete a schedule.
t Changing the recording schedule mode suspends
all active event-linked actions.
t Select the + button on the bottom left of the screen
to add a schedule. Select Day to specify the Day
setting or select All. Select Scope to specify the
time frame.