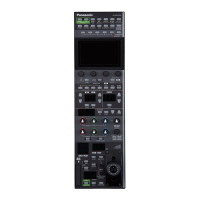
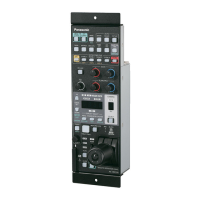
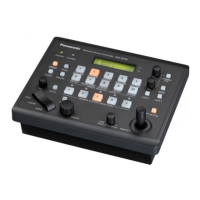
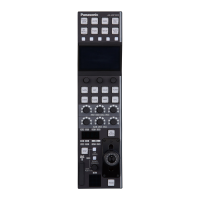
Front panel 6
1 Memory card slot Insert a memory card into this slot. You can save the settings of the unit and the scene
files,user files, and other files to a memory card.
“Memory cards” (see page 10)
2 Memory card access indicator This indicator lights when data is read from or written to a memory card.
3 Camera number/tally display This display shows the camera number information and tally information.
4 [IRIS RELATIVE] button Use this button to switch the variable range of the iris lever.
You can also use this to display the [IRIS RELATIVE] menu on the LCD panel.
Status displays
On: RELATIVE
Off: IRIS FULL
5 Torque adjustment screw Use a flat-bladed screwdriver to adjust the torque of the iris lever.
6 IRIS lever Use this lever to adjust the iris level.
The iris can be adjusted manually.
For details on adjusting the iris, see the following page.
“Iris (IRIS)” (see page 41)
Lever position
Forward: Adjusts in the CLOSE direction.
Backward: Adjusts in the OPEN direction.
7 Master pedestal Use this dial to adjust the master pedestal level.
For details on adjusting the master pedestal, see the following page.
“Master pedestal (M.PED)” (see page 40)
8 PREVIEW button Use this button to output a preview signal from the preview connector.
Status displays
On: Preview output is On
Off: Preview output is Off
- 32 -
Parts and their functions
 Loading...