50
RQT8858
Copying
Refer to the control reference on page 49.
[RAM] [-R] [-R]DL] [-RW‹V›] [+R] [+R]DL] [+RW]
You can copy programmes recorded on a video cassette onto a disc
from the location
§
of playback as of the copying start of the tape.
§
When you set the recording mode to “FR” (➡ below) and “Time
Setting” to “Off” (➡ right), you can copy the whole tape from the
beginning to the end.
1 While both DVD and VHS are stopped
Press [FUNCTION MENU].
2 Press [3, 4] to select “Copy” and
then press [OK].
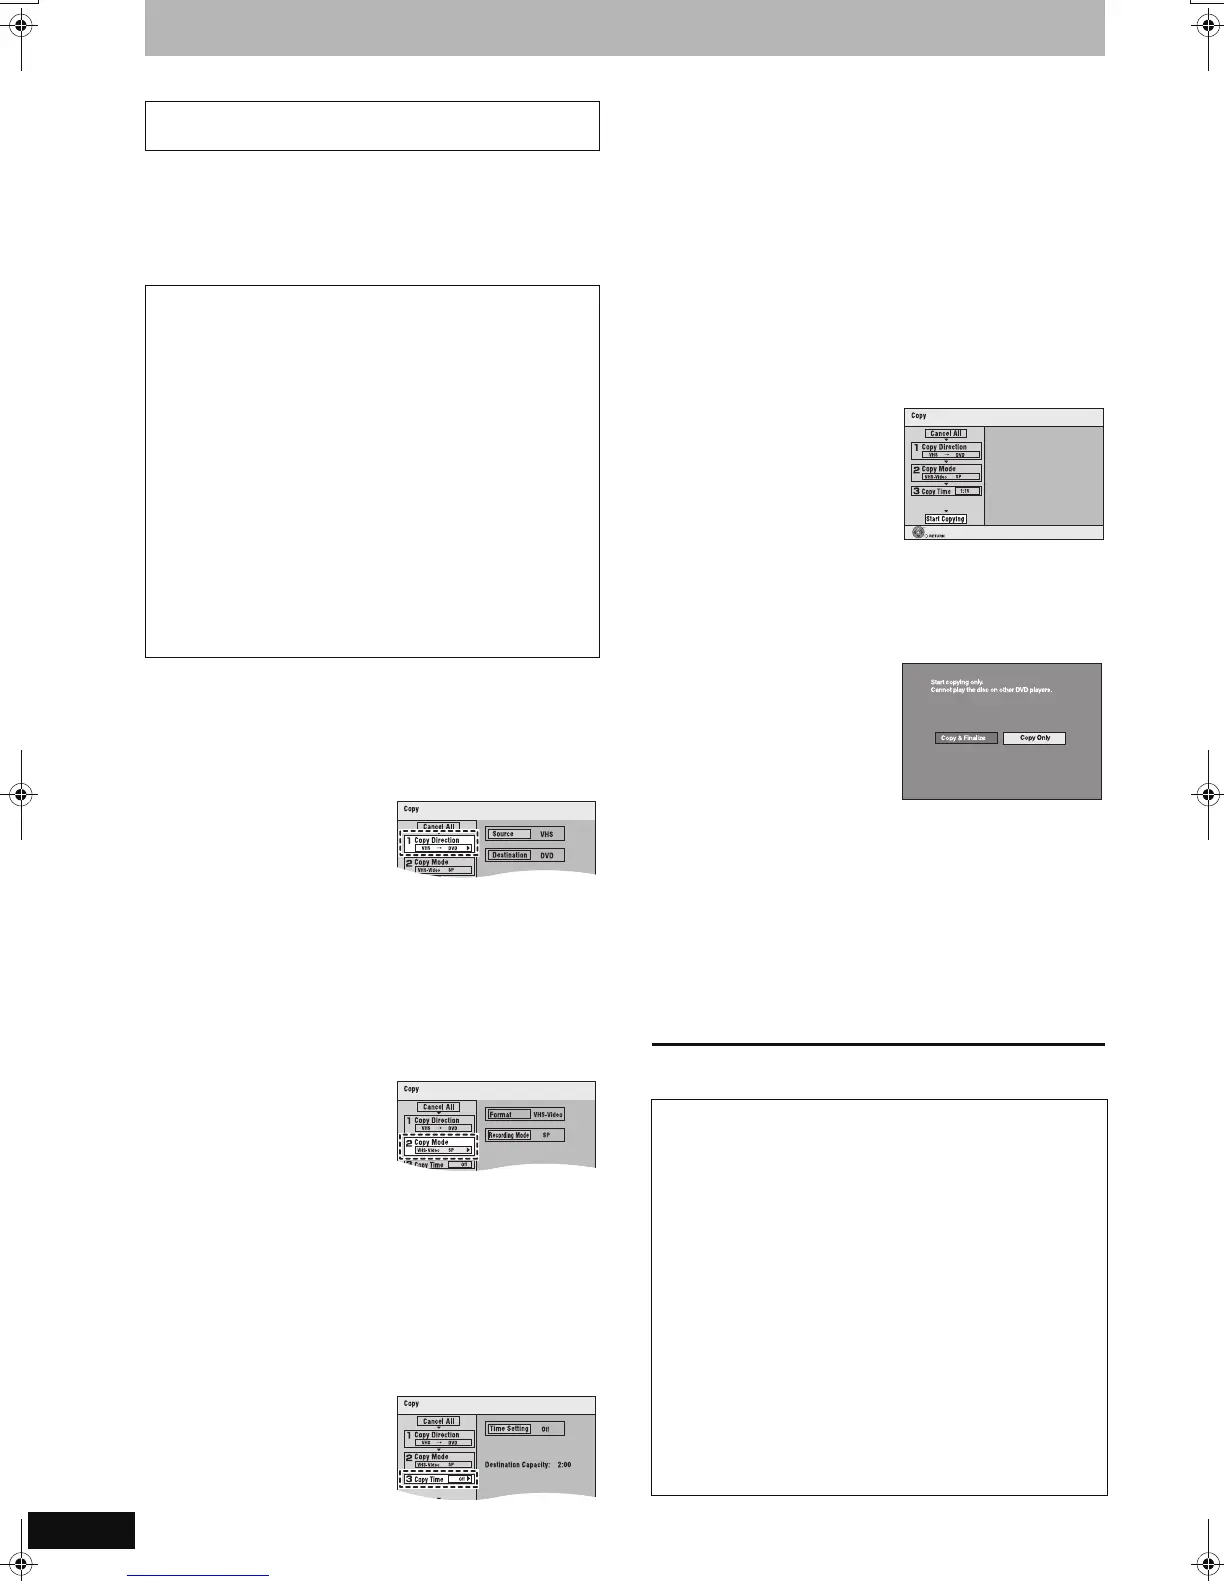
3 Set the copying
direction.
≥Set “Source” to “VHS”.
≥If you are not going to
change the copy direction, press [4] and skip to step 4.
∫To change the setting
1 Make sure “Copy Direction” is selected and press [1].
2 Make sure “Source” is selected and press [OK].
3 Press [3, 4] to select “VHS” and then press [OK].
≥When you set “Source” to “VHS”, “DVD” is automatically
selected in “Destination”.
4 Press [2].
5 Press [4].
4 Set the recording
mode.
≥If you are not going to
change the recording mode,
press [4] and skip to step 5.
∫To change the setting
1 Make sure “Copy Mode” is selected and press [1].
≥“Format” is automatically set to “VHS-Video”.
2 Make sure “Recording Mode” is selected and press [OK].
3 Press [3, 4] to select the recording mode (XP, SP, LP, EP
or FR) and then press [OK].
≥About FR mode (➡ right)
4 Press [2].
5 Press [4].
5 Set the time limit.
≥If you are not going to
change the recording time,
press [4] and skip to step 6.
∫To change the setting
1 Make sure “Copy Time” is selected and press [1].
2 Make sure “Time Setting” is selected and press [OK].
≥Setting the unit to copy all the content on the video cassette
3 Press [3, 4] to select “Off” and press [OK].
4 Press [2].
5 Press [4].
≥Setting the copying time
3 Press [3, 4] to select “On” and press [OK].
4 Press [4]
to select “Copy Time” and press [OK].
5 Press [2, 1] to select “Hour” and “Min.” and press
[3, 4] to set the recording time and then press [OK].
≥You can also set the time with the numbered buttons.
≥Maximum recording time is 8 hours.
6 Press [2].
7 Press [4].
6 Make sure “Start
Copying” is
selected and
press [OK].
≥The confirmation screen
appears.
7 Press [2] to select “Yes” and then
press [OK].
[-R] [-R]DL] [-RW‹V›] [+R] [+R]DL]
Press [2, 1] to
select “Copy &
Finalise” or “Copy
Only” and then press
[OK].
≥Copying starts.
≥Copying is automatically
stopped when the tape
reaches the end, the remaining capacity of the disc is filled.
≥If “Copy & Finalise” is selected;
After finalising, the disc becomes play-only and you can
play them on other DVD equipment.
However, you can no longer record or edit.
≥Finalising will not start if copying is not completed (e.g.,
due to shortage of remaining disc space).
∫ To stop copying in the middle (process)
Press and hold [RETURN] for about 3 seconds or more.
≥However you cannot stop finalise after it has started.
To return to the previous screen
Press [RETURN].
GUI (Graphical User Interface) Copying
(VHS l DVD)
Preparation
≥Turn on the television and select the appropriate video input to
suit the connection to this unit.
≥When copying an NTSC tape to a DVD, change the “TV
System” to “NTSC” in the Setup menu (➡ 69). This unit cannot
record NTSC signals to discs that already have PAL signal
recordings.
VHS (Recording source)
≥Press [DRIVE SELECT] to select the VHS drive.
≥Insert the video cassette containing the programme to be
copied. (➡ 12)
≥Press [1] (PLAY) to play the video cassette and then press
[AUDIO] to select the audio type you wish to record.
≥Stop the tape at the position where you wish to start recording.
DVD (Recording target)
≥Press [DRIVE SELECT] to select the DVD drive.
≥[RAM] Release protection. (disc ➡ 58, cartridge ➡ 58)
≥Insert a disc and confirm there is sufficient empty space for
recording on it. (➡ 12, 43)
∫ About FR mode
When “Time Setting” is set to “Off” in step 5 above:
≥The recording mode is automatically selected by estimating the
remaining capacity of the disc for copying of only the recorded
parts in the video cassette (unrecorded parts will not be
recorded).
≥When you press [OK] to start copy, the tape is automatically
fast-forwarded to the end and then fast-rewound to the
beginning before the copying is actually started. It may take
time to start copy. If the remaining capacity of the disc is
insufficient, the copying will be stopped in the middle.
≥The recording is divided into titles every time the tape index
signals are detected.
When “Time Setting” is set to “On” in step 5 above:
≥The recording mode is automatically determined by estimating
the remaining capacity of the disc for copying of the contents
equivalent to the recording time set from the start point of the
copying on the video cassette (unrecorded parts will also be
recorded).
≥The recording is not divided into titles.
OK
Press OK to start copying.
Finalizing is to enable the disc to be played on
other DVD players.
EZ47VGN.book 50 ページ 2007年6月18日 月曜日 午後2時12分

 Loading...