54
RQT8858
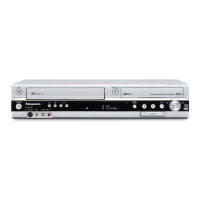
Copying from an external device
e.g., Connecting to the AV2 or DV input terminals on the front
You can also connect to the AV1 input terminals on the rear.
≥Turn off the unit and other video equipment before connecting.
If the audio output of the other equipment is monaural
Connect to L/MONO on the AV2 input terminals at the front.
§
The S VIDEO terminal achieves a more vivid picture than the
VIDEO terminal.
When recording from the unit’s DV terminal
≥Select the type of audio recording from “Audio Mode for DV Input”
in the Setup menu (➡ 64).
≥When recording from DV equipment (e.g., digital video camcorder),
you can record audio/video recordings from DV tape only.
About the aspect when recording a programme (➡ 7)
[Note]
≥If it becomes time for a timer recording to start while copying, the
recording will start and the copying will stop.
≥If video is copied from another piece of equipment to this unit, then
the video quality will be degraded.
[RAM] [-R] [-R]DL] [-RW‹V›] [+R] [+R]DL] [+RW] [VHS]
Preparation
≥Press [DRIVE SELECT] to select the DVD or VHS drive.
≥Insert a disc or video cassette with enough remaining blank space
(➡ 12).
≥Press [REC MODE] to select the recording mode.
≥Check the time on the unit is correct.
≥To reduce noise in input from a video cassette recorder, set “Copy
NR” to “On” in the on-screen menu (➡ 43).
≥When recording bilingual programmes (➡ 7, Selecting Audio for
Recording)
≥When the output signal from the external device is NTSC, change
the “TV System” to “NTSC” in the Setup menu (➡ 69).
[RAM] [-R] [-R]DL] [-RW‹V›] [+R] [+R]DL] [+RW]
≥[RAM] Release protection (disc ➡ 58, cartridge ➡ 58).
≥This unit cannot record NTSC signals to discs that already have
PAL signal recordings.
1 While stopped
Press [INPUT SELECT] to select the
input channel for the equipment you
have connected.
e.g., If you have connected to AV2 input terminals, select “A2”.
Follow the above step 1.
2 Start play on the other equipment.
3 When you want to start recording
Press [¥ REC].
Recording starts.
≥Using Flexible Recording (➡ 25), you can record the content
of a video cassette (approx. 1–8 hours) to a 4.7 GB disc with
the best possible quality of recording without wasting disc
space.
Follow the above step 1.
2 Press [1](PLAY).
≥Start playing the video cassette and find the recording start
point.
3 Press [;] and then press [¥ REC].
≥Put the unit in recording standby mode.
4 Start play on the external device.
5 Press [;] at the point where you want
to start recording.
To skip unwanted parts
Press [;] to pause recording. (Press again to restart recording.)
To stop recording
Press [∫].
STATUS
REC MODE
REC
MANUAL SKIP
CREATE
CHAPTER
F
U
N
C
T
I
O
N
M
E
N
U
D
I
R
E
C
T
N
A
V
I
G
A
T
O
R
G
U
I
D
E
RETURN
PAUSE
STOP
SLOW/SEARCH
CH
SELECT
INPUT
0
9
8
7
6
54
3
2
1
CH
AV
¦
TV
DRIVE
SELECT
¦
VOL
DELETE
EXIT
OK
OPTION
ANALOGUE
CH
G-Code
AUDIO
DISPLAY
TIME SLIP
PROG/CHECK
REW
FF
JET REW
,,,
OK
INPUT SELECT
REC MODE
q REC
FUNCTION
MENU
w
DRIVE
SELECT
S VIDEO
IN 2
VIDEO
/MONO
AUDIO
R
L
S VIDEO
VIDEO
/MONO
AUDIO
R
L
AV2 I N
DRIVE SELECT
REC
CH
OPEN/CLOSE
EJECT
COPYING
L/MONO - AUDIO- RVIDEO
S VIDEO
AV2 I N
Audio/Video
cable
S Video
cable
§
Ye l l o w W h i t e R e d
This unit
Other video equipment
Connect to Audio/Video output terminals.
DV cable
(IEEE 1394,
4-pin)
Manual recording
Recording to DVD
Recording to VHS
Almost all videos and DVD-Video on sale have been treated
to prevent illegal copying. Any software that has been so
treated cannot be recorded using this unit.
EZ47VGN.book 54 ページ 2007年6月18日 月曜日 午後2時12分

 Loading...