Do you have a question about the Panasonic KX-MB1500HX and is the answer not in the manual?
Information on CLASS 1 LASER PRODUCT and radiation exposure.
Guidelines for safe viewing of CIS LED light to prevent eye damage.
Warning about the hot fuser unit during and after printing.
Precautions for optimal performance and handling of the toner cartridge.
Guidance on selecting a suitable location and environment for the unit.
Steps to prevent damage from static electricity to internal components.
Lists all items included in the product packaging.
Details on replacement accessories, focusing on toner cartridges.
Explanation of the function of each button on the unit's control panel.
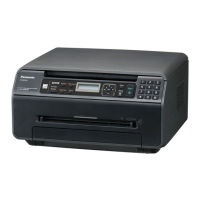
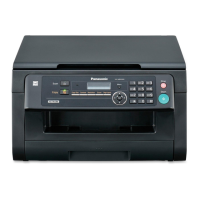
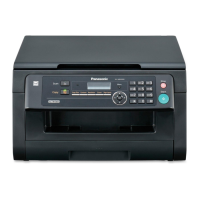
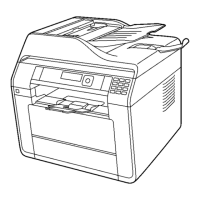
Diagram illustrating the front view of the unit with numbered parts.
Diagram illustrating the rear view of the unit with numbered parts.
Step-by-step instructions for installing the toner cartridge.
Guide to connecting the unit to power and telephone lines.
Instructions on how to switch the unit's power ON.
Important notes regarding recording paper and USB connection.
Details on recommended and prohibited paper types and sizes.
Instructions for loading paper into the main paper input tray.
Guide to using the manual input tray for single-page printing/copying.
How to set the dialling mode (Pulse/Tone) for telephone line compatibility.
Guide to selecting the unit's primary operation mode (Fax, Copy, Scan).
Instructions for placing documents on the scanner glass or ADF.
How to place originals on the scanner glass for scanning or copying.
How to load documents into the ADF for multi-page scanning/copying.
How to adjust ringer and speaker volume levels.
Procedure to set the unit's internal date and time.
How to program a logo for display on sent documents.
How to program the unit's fax number for outgoing faxes.
System requirements for installing the Multi-Function Station software.
Step-by-step guide to installing the MFS software on a computer.
Instructions on how to launch and use the Multi-Function Station application.
How to print documents from Windows applications using the unit's printer driver.
Using the Easy Print Utility for advanced printing features like preview and PDF saving.
How to initiate scanning directly from the unit's control panel.
Methods for scanning documents from a computer using MFS or other applications.
Basic instructions for making copies using the scanner glass.
Detailed steps for copying documents placed on the scanner glass.
How to make copies using the ADF for multi-page documents.
Introduction to advanced copying functions.
How to enlarge or reduce document size during copying.
How to collate multiple copies in the same order as originals.
Features for copying 2-sided docs or repeating an image on one page.
How to divide a document into sections for enlarged poster-style copies.
How to save paper by copying multiple pages onto a single sheet.
How to copy documents without copying outer edges, useful for dirty documents.
How to set margins for binding copied documents.
Instructions for sending faxes manually using the unit.
How to send faxes using documents placed on the scanner glass.
How to send faxes using documents loaded into the ADF.
Guide to saving telephone numbers and names in the unit's phonebook.
How to send faxes by selecting entries from the phonebook.
How to send documents from a computer as a fax message.
Choosing the operating mode: Fax Only, Telephone, or Tel/Fax.
Setting the unit to receive faxes automatically on a dedicated fax line.
Setting the unit to answer calls manually and receive faxes manually.
Receiving faxes automatically without rings while answering calls manually.
Connecting and configuring the unit to work with an external answering machine.
Setting the unit to automatically answer and receive all incoming calls as faxes.
Procedure to set the unit to FAX ONLY mode for automatic reception.
How to manually answer calls and receive fax documents.
Procedure to set the unit to TEL mode for manual call answering.
Setting the unit to answer calls manually and receive faxes automatically.
Steps for connecting and setting up an answering machine with the unit.
Configuration steps for using the unit with an answering machine.
How to retrieve documents from another compatible fax machine.
Preventing fax reception from undesired callers and managing junk fax lists.
How to receive fax documents directly on your computer.
Information on subscribing to and using the Caller ID service.
How to view received caller information and initiate a call back.
How to edit a caller's number before calling back or storing it.
Methods for erasing all or specific caller information.
How to save received caller contact details into the unit's phonebook.
General procedure for accessing and setting programmable features using codes.
Configuration of fundamental features like date, time, language, and dialling mode.
Adjusting transmission speed for DSL/ADSL lines to improve reliability.
Changing the brightness and contrast of the LCD display.
Setting or changing the password for remote feature programming.
Setting the time for automatic toner maintenance cycles.
Procedure to reset all settings and clear all stored data from memory.
Enabling or disabling confirmation/error beep sounds and keytones.
Activating an alert for when the line is left off-hook without dialling.
Setting an alert for when a print job is finished.
Adjusting the number of rings before the unit answers in FAX ONLY mode.
Setting the unit to automatically print the Caller ID list.
Automatically adjusting unit date/time based on received caller information.
Configuring paper size for the main and manual input trays.
Specifying paper type for main and manual input trays.
Setting the delay before the unit enters power save mode.
Retaining previous settings for contrast, page layout, zoom, and collate.
Selecting the default mode (Copy or Fax) after a timer expires.
Setting a timer for returning to the default operation mode.
Enabling toner save to extend cartridge life, potentially reducing print quality.
Enabling the feature to reorder documents fed through the ADF.
Configuration options specific to the fax functionality of the unit.
Setting the number of rings before the unit answers in TEL/FAX mode.
Procedure to erase all entries stored in the phonebook.
Configuring when sending reports are printed (always, error, or never).
Setting the unit to print journal reports automatically.
Changing the unit's receiving mode (TEL or TEL/FAX).
Improving fax transmission reliability for overseas calls.
Scheduling faxes to be sent at a later, specific time.
Enabling ECM for reliable fax transmission by correcting errors.
Enabling detection of fax tone, ring back, and busy tones.
Selecting the maximum transmission speed for faxing.
Enabling the quick scan feature for immediate document storage.
Confirming the destination number before sending a fax.
Restricting manual dialling via the keypad.
Requiring re-entry of fax numbers for verification before sending.
Automatically reducing received faxes to fit recording paper.
Setting or changing the activation code for using extension telephones for faxes.
Setting the code for automatic disconnection when using extension telephones.
Adjusting the number of rings before the unit answers in TEL/FAX mode.
Setting an alert for when a received fax is stored in memory.
Receiving faxes automatically when answering a call.
Enabling and configuring reception of faxes directly to the computer.
Setting up computer notifications when a fax is received.
Clearing all received fax documents stored in the unit's memory.
Restoring all fax-related features to their factory default settings.
Customization options for the unit's copying functions.
Choosing between the paper input tray or manual input tray for copying.
Setting the default resolution for copy operations.
Retaining previous settings for page layout, zoom, collate, edge, and margin.
Settings related to printing documents from a computer.
Configuring the time before the unit prints remaining data when the computer is inactive.
Enabling printing between A4 and Letter sizes regardless of loaded paper.
Settings for the unit's scanning functions.
Selecting the destination (Viewer, File, Email, OCR) for push scans.
Retaining previous scan settings for each push scan mode.
Guide to entering characters and numbers using the unit's keypad.
Checking the unit's current status and settings via computer.
Operating unit functions remotely from a computer.
Viewing detailed status information and updating unit status.
How to cancel ongoing operations like printing, scanning, or faxing.
Restoring the original order of multi-page documents fed via ADF.
Explanation of messages displayed during fax transmission/reception and their solutions.
List of unit status messages and their corresponding causes and solutions.
Troubleshooting guide for common issues with unit functions.
Solutions for general operational problems and connectivity issues.
Troubleshooting common issues related to print quality and paper handling.
Troubleshooting common issues encountered during scanning operations.
Troubleshooting common issues related to the copying function.
Troubleshooting common issues related to sending and receiving faxes.
Troubleshooting problems when using an answering machine with the unit.
Information on unit operation and data loss during a power failure.
Instructions for users of older series software to update.
Steps to clear recording paper jams from inside the unit.
Procedure to remove jammed paper from the rear cover area.
Procedure to remove jammed paper from the front cover area.
Troubleshooting steps when paper is not fed correctly into the unit.
Steps to clear document jams from the ADF.
How to clean scanner glass and plates to ensure clear scans and copies.
Instructions for cleaning ADF rollers to prevent misfeeds and improve document handling.
How to print various system lists and reports for reference.
Technical specifications of the unit, including document size, resolution, and speed.
Information on the approximate page yield of toner cartridges and factors affecting life.
| Brand | Panasonic |
|---|---|
| Model | KX-MB1500HX |
| Category | All in One Printer |
| Language | English |