41
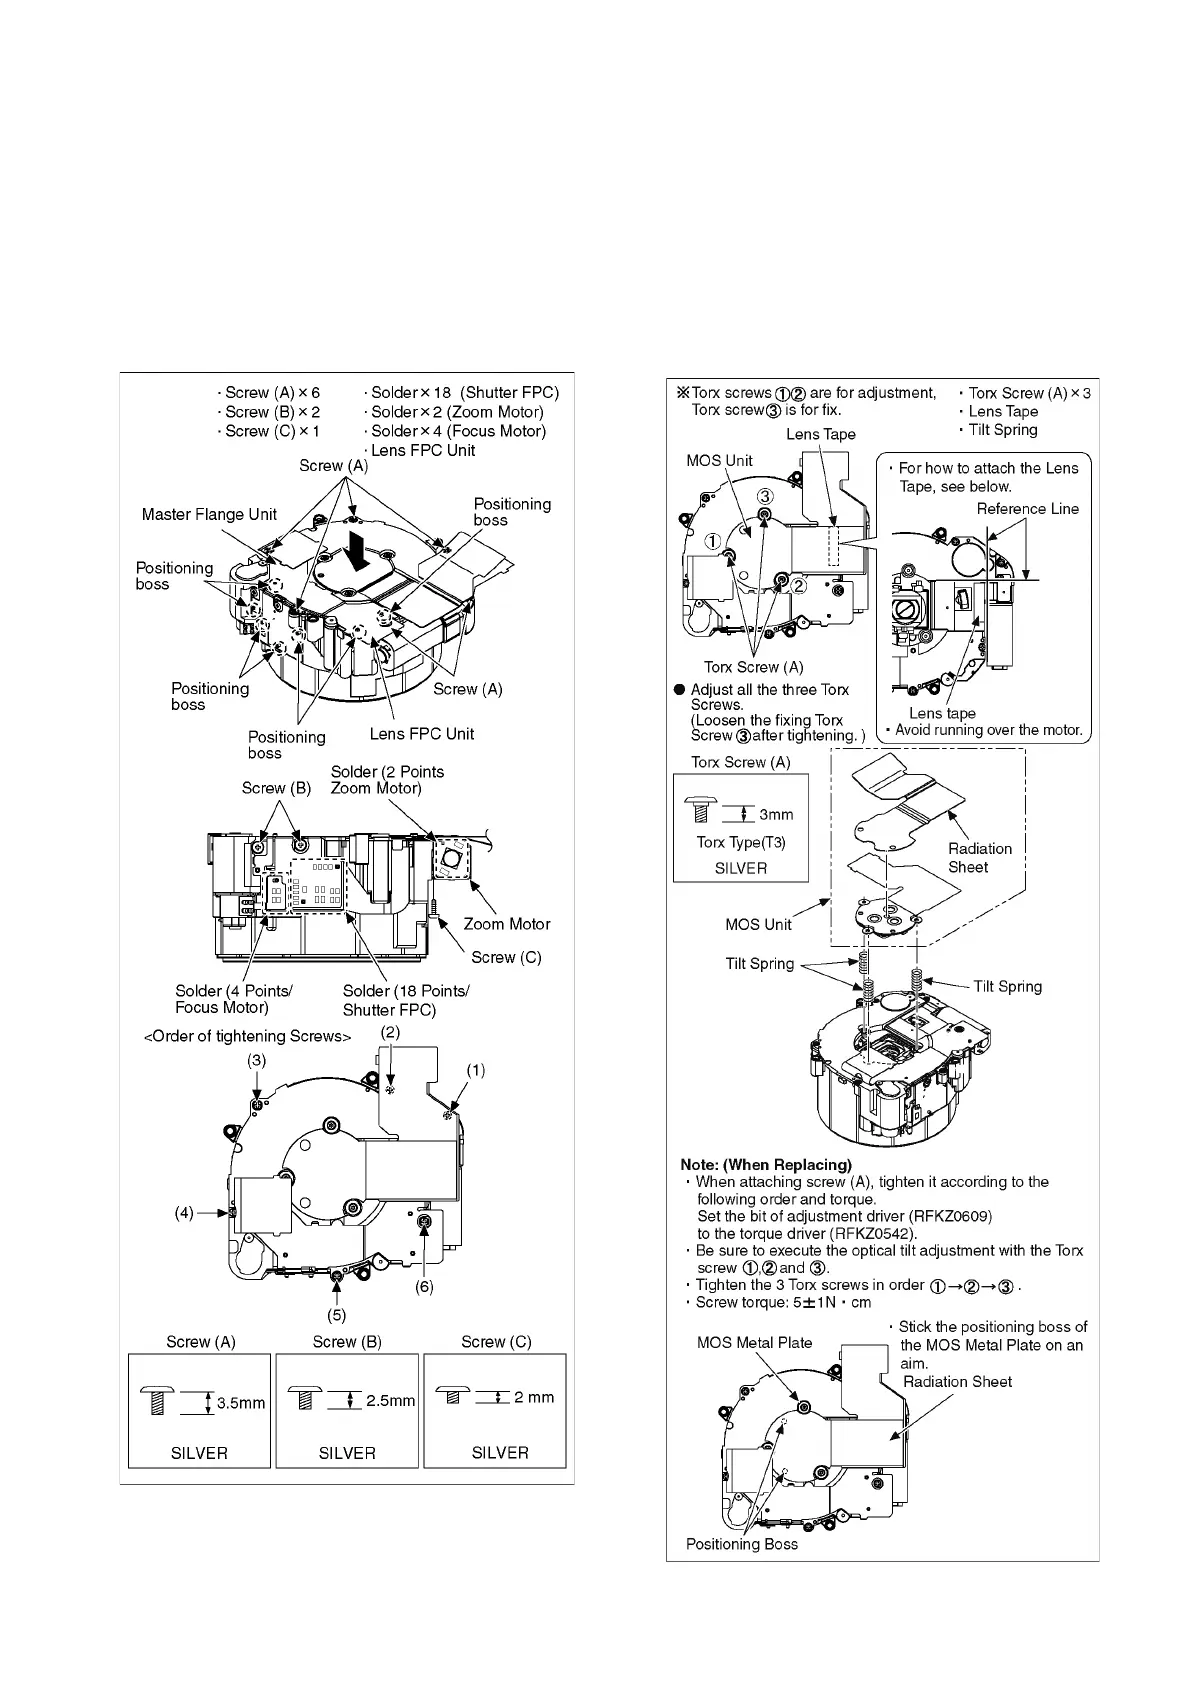
4. Attach the Master Flange Unit, then tighten 6 screws (A).
5. Attach the sensor for Focus Motor of Lens FPC Unit, then
tighten 2 screws (B).
6. Attach the sensor for Focus Motor of Lens FPC Unit, then
tighten 1 screw (C).
7. Soldering the Lens FPC Unit and the Shutter FPC. (18
points)
8. Soldering the Lens FPC Unit and the Zoom Motor. (2
points)
9. Soldering the Lens FPC Unit and the Focus Motor FPC.
(4 points)
9.6. Removal of the MOS Unit
When remove the MOS Unit once (the Torx screw (A) is
loosened even a little), the optical tilt adjustment is
required.
When loosen the Torx screw (A), necessary the optical tilt
adjustment at the end of assembling. (Refer to item
"10.3.2.")
To prevent the MOS Unit from catching the dust and dirt,
do not remove the MOS Unit except for replacing.
1. Remove the 3 Torx screws (A) to remove the MOS Unit
and 3 Tilt Springs.
 Loading...