Mini VRF SYSTEM
Test Run
7 - 19
7
5. Test Run Using the Remote Controller
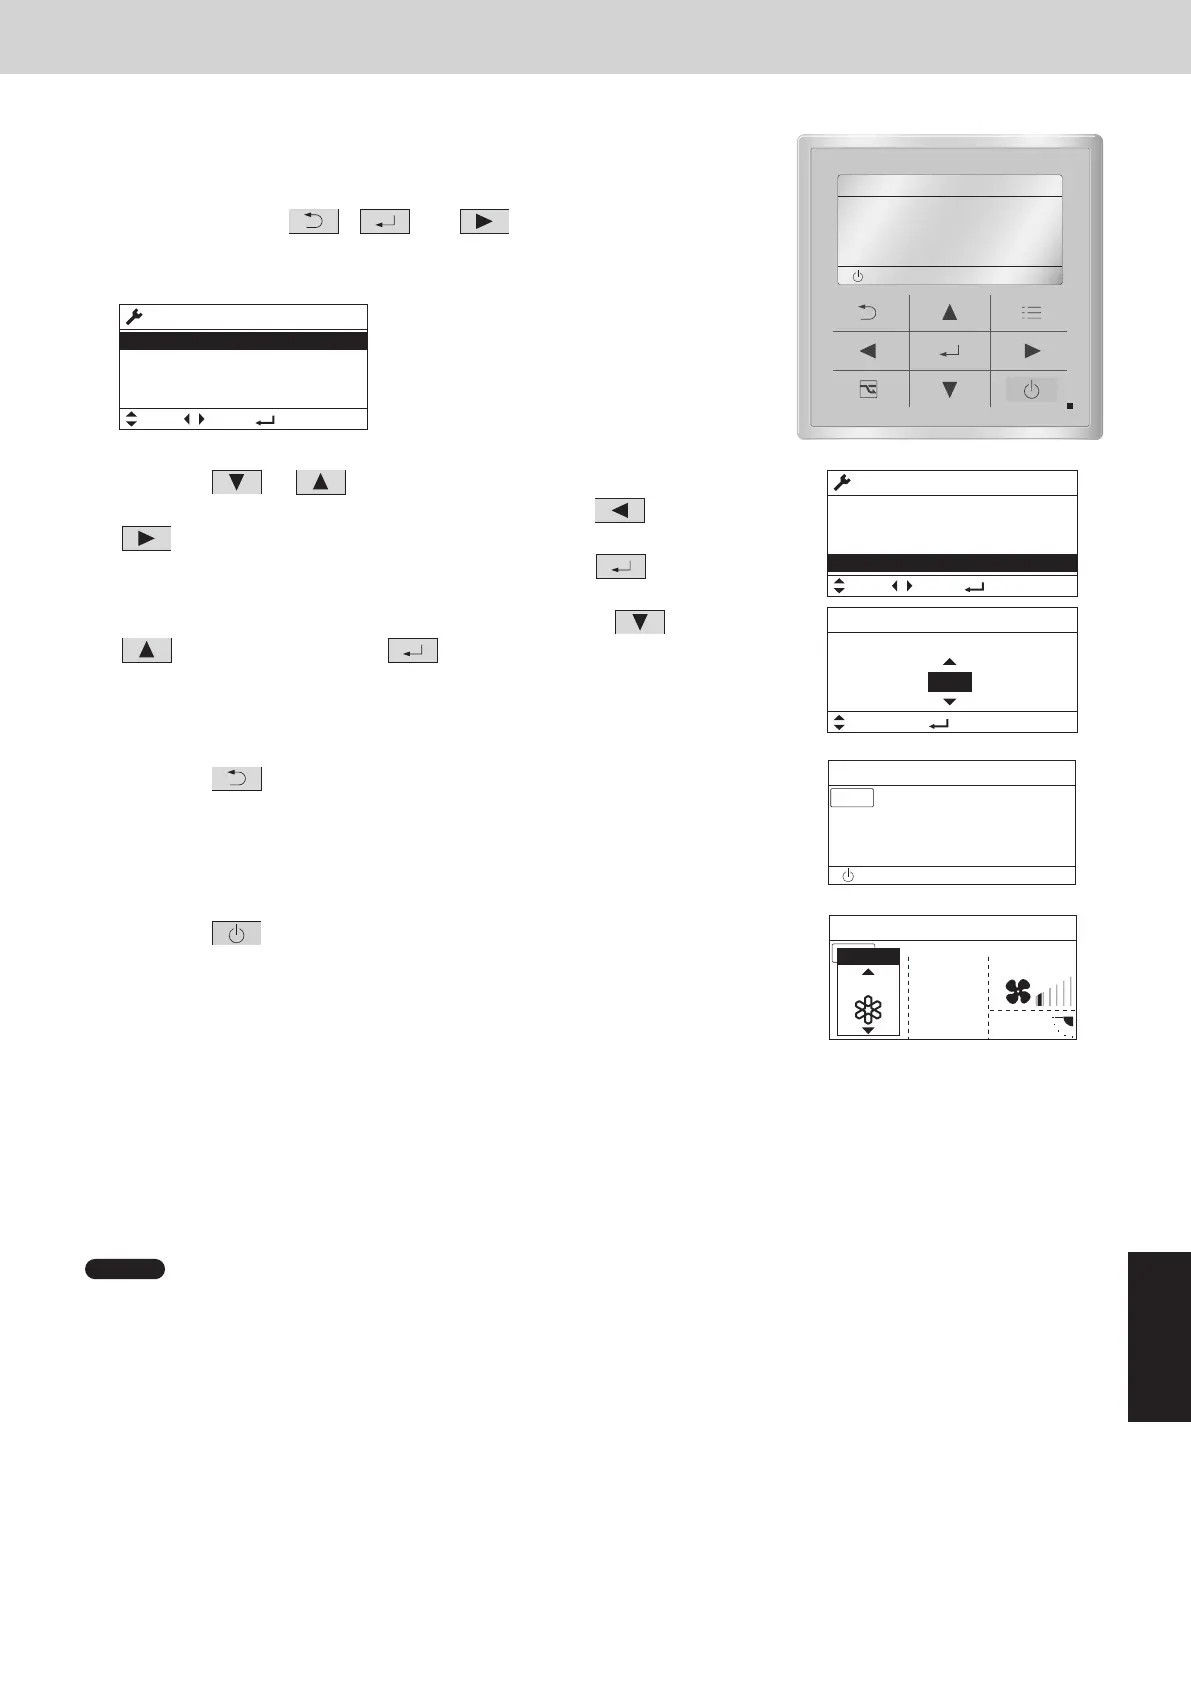
CZ-RTC6 series (Wired Remote Controller)
This mode places a heavy load on the machines. Therefore use it only
when performing the test run.
(1) Keep pressing the , and buttons simultaneously for 4 or
more seconds.
The “Maintenance func” screen appears on the LCD display.
Maintenance func
XX / XX
[][]
ECONAVI
nanoeX
RC. setting mode
(2) Press the or button to see each menu.
Select “Test run” on the LCD display and press the button.
Change the display from “OFF” to “ON” by pressing the or button.
Then press the button.
(3) Press the button.
“TEST” will be displayed on the LCD display.
(4) Press the
button. Test run will be started.
Test run setting mode screen appears on the LCD display.
• The test run can be performed using the HEAT, COOL, or FAN
operation mode.
• The temperature cannot be adjusted when in test run mode.
• If correct operation is not possible, a code is displayed on the remote controller LCD display. (See “7. Self-
Diagnosis Function Table and Contents of Alarm Display” and correct the problem.)
(5) After the test run is completed, proceed from Step (1) and change to “OFF” at Step (2).
• To prevent continuous test run, this remote controller includes a timer function that cancels the test run after
60 minutes.
NOTE
• The outdoor units will not operate for approximately 3 minutes after the power is turned ON and after operation is
stopped.
Maintenance func
XX / XX
[][]
Test run
Sensor info.
Service check
Test run
Confrm
[][]
ON
TEST
TEST
5. Test Run Using the Remote Controller
CZ-RTC5B (High-spec wired remote controller)
This mode places a heavy load on the machines. Therefore use it only
when performing the test run.
(1) Keep pressing the
, and buttons
simultaneously for 4 or more seconds.
The “Maintenance func” screen appears on the LCD display.
Maintenance func
1. Outdoor unit error data
2. Service contact
3. RC setting mode
4. Test run
Sel. Page [ ] Confirm
20:30 (THU)
(2) Press the or button to see each menu.
If you wish to see the next screen instantly, press the or
button.
Select “4. Test run” on the LCD display and press the
button.
Change the display from “OFF” to “ON” by pressing the or
button. Then press the button.
(3) Press the
button. “TEST” will be displayed on the LCD
display.
(4) Press the
button. Test run will be started.
Test run setting mode screen appears on the LCD display.
• The test run can be performed using the HEAT, COOL, or FAN
operation mode.
• The temperature cannot be adjusted when in test run mode.
• If correct operation is not possible, a code is displayed on the remote controller LCD display. (See “7. Self-
Diagnosis Function Table and Contents of Alarm Display” and correct the problem.)
(5) After the test run is completed, proceed from Step (1) and change to “OFF” at Step (2).
• To prevent continuous test run, this remote controller includes a timer function that cancels the test run after
60 minutes.
NOTE
• The outdoor units will not operate for approximately 3 minutes after the power is turned ON and after operation is
stopped.
Maintenance func
1. Outdoor unit error data
2. Service contact
3. RC setting mode
4. Test run
Sel. Page [ ] Confirm
20:30 (THU)
[ ] Confirm
Test run
Change
20:30 (THU)
Test run
ON
START[]
20:30 (THU)
TEST
FAN SPEED
FLAP
TEST
20:30 (THU)
COOL
MODE
20:30 (THU)
START
[]
SM830289-01_欧州向け R32 mini VRF 8,10HP SM&TRSM.indb 19SM830289-01_欧州向け R32 mini VRF 8,10HP SM&TRSM.indb 19 2021/05/07 10:16:512021/05/07 10:16:51