About your projector
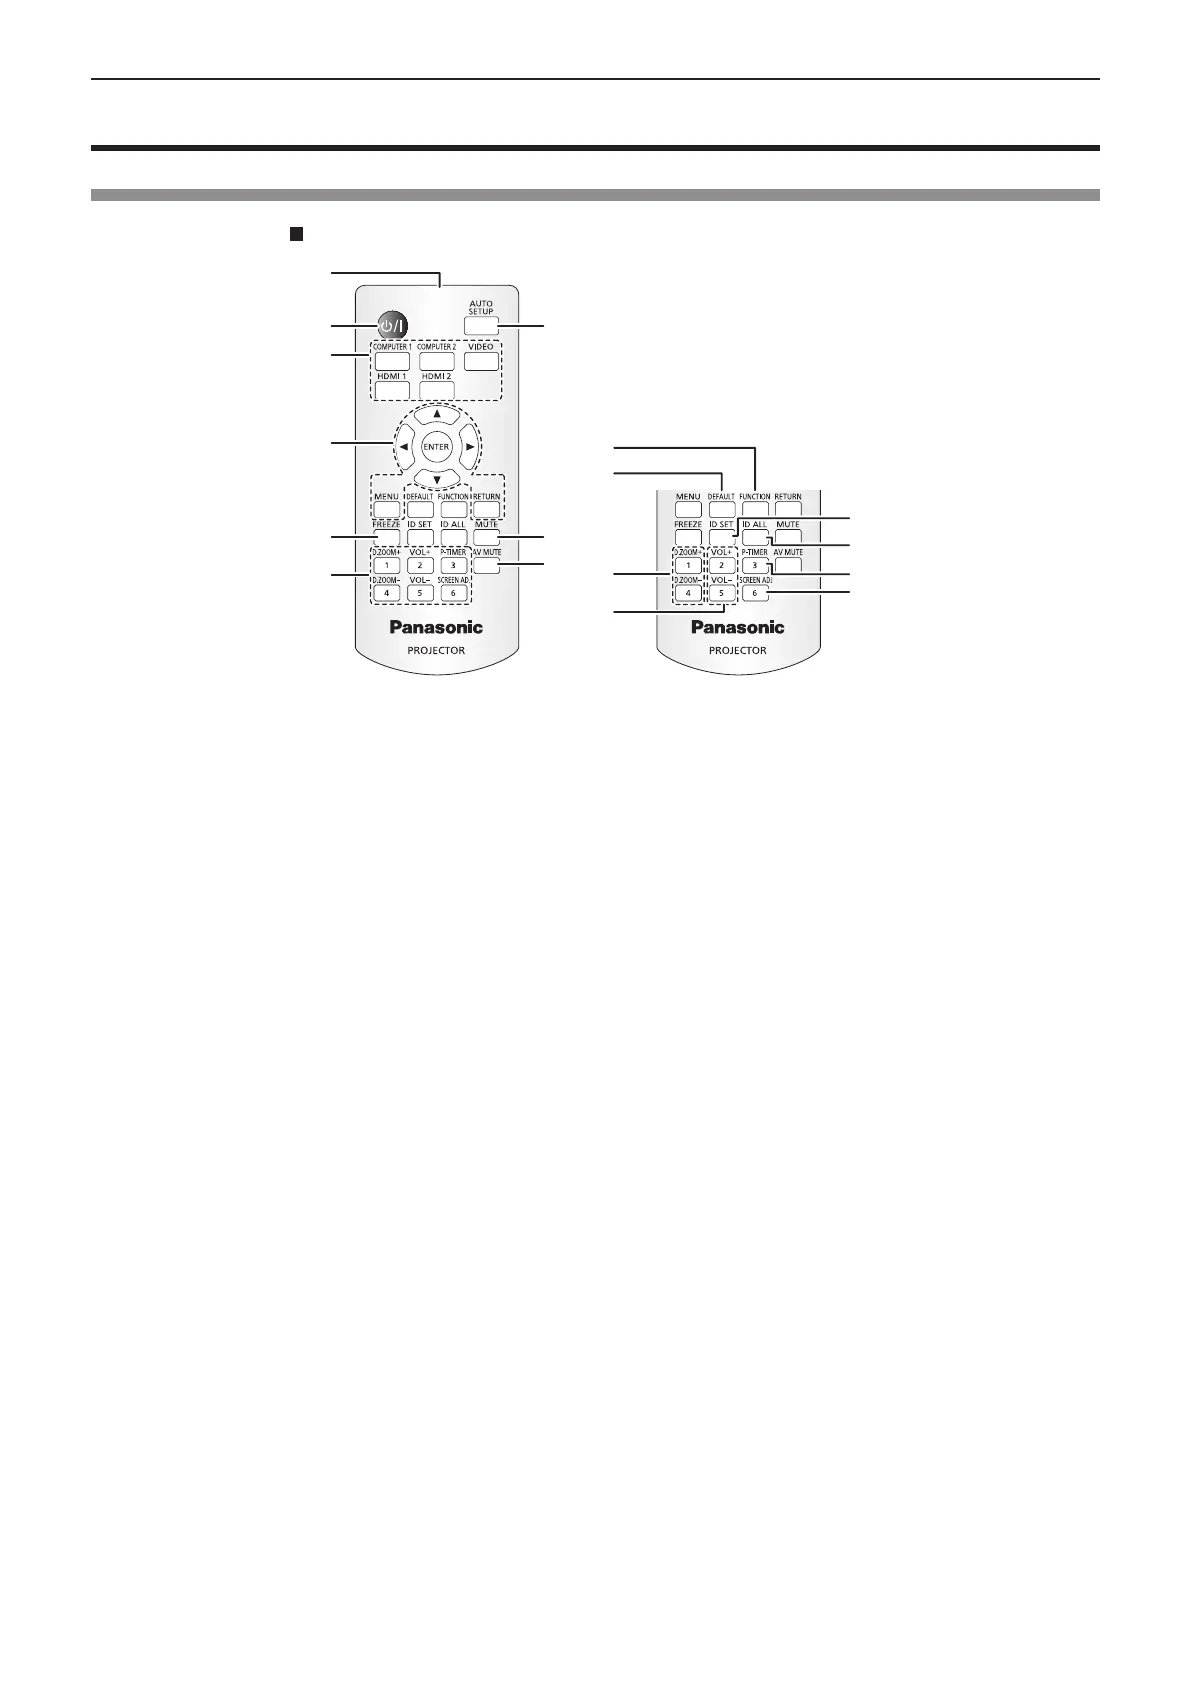
Remote control
2
1
3
7
5
8
6
9
10
11
4
13
12
14
15
16
17
Front
1 Remote control signal transmitter
2 Power <v/b> button (v standby / b power on)
Sets the projector to the state where the projector is switched
off (standby mode). Also starts projection when the power is
switched off (standby mode).
3 Input selection buttons (<COMPUTER 1> / <COMPUTER 2> /
<VIDEO> / <HDMI 1> / <HDMI 2>)
Switches the input signal to project. (
Æ
page 44)
4 <MENU> button / <RETURN> button / asqw buttons
/
<ENTER> button
Used to operate the menu screen. (
Æ
page 53)
The asqw buttons are also used to enter password or
characters for [SECURITY].
5 <FREEZE> button
Pauses the projected image and mute the audio temporarily.
(
Æ
page 49)
6 Number (<1> - <6>) buttons
Used for entering an ID number in a multiple projector
environment or a password.
7 <AUTO SETUP> button
Used to perform automatic adjustment while projecting the
image. (
Æ
page 49)
8 <MUTE> button
Used to temporarily mute the projector. (
Æ
page 48)
9 <AV MUTE> button
Used to turn off the audio and video temporarily. (
Æ
page 48)
10 <FUNCTION> button
Assigns a frequently used operation as a shortcut button.
(
Æ
page 50)
11 <DEFAULT> button
Resets the content of the sub-menu to the factory default.
(
Æ
page 54)
12 <D.ZOOM +> button / <D.ZOOM -> button
Zooms in and out the images. (
Æ
page 50)
13 <VOL +> button / <VOL -> button
Adjusts the volume level of the built-in speaker or the audio
output. (
Æ
page 48)
14 <ID SET> button
Sets the ID number of the remote control in a multiple projector
environment. (
Æ
page 26)
15 <ID ALL> button
Used to simultaneously control all the projectors with one
remote control when using multiple projectors. (
Æ
page 26)
16 <P-TIMER> button
Operates the presentation timer function. (
Æ
page 51)
17 <SCREEN ADJ> button
Corrects the distortion of the projected image.
(
Æ
page 49)
22 - ENGLISH
Chapter 1 Preparation - About your projector

 Loading...