23
RQT8824
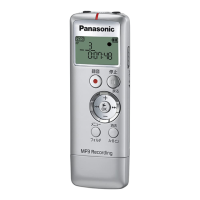
Using the unit with a computer
* Voice Editing Ver. 2.0 Premium Edition (hereinafter ) is included for RR-US470 and RR-US450.
* Voice Editing Ver. 2.0 Standard Edition (hereinafter ) is included for RR-US430.
*
There are 2 CD-ROMs for
for Canada.
for the U.S.A. and
for both countries occupy 1 CD-ROM only.
1
Installing Voice Editing
1Start Windows.
2Insert the included CD-ROM (or CD-ROM #1) into your computer’s CD-ROM drive.
The program installer starts automatically.
• When the installer does not automatically start
(1) From the “Start” menu click “Run”.
(2) Type “
Ú
:\Launcher\VEdV1Launcher.exe” and click “OK”.
Ú
is the CD-ROM drive ID.
3Click “Voice Editing Ver. 2.0”.
Installation starts.
Follow on-screen instructions for any subsequent operations.
For the U.S.A.
For Canada
• The voice recognition engine and text to speech/translation engine should start installing while
Voice Editing is being installed. (Alternatively, you can install them afterwards.)
For Canada
• Change the CD-ROM #1 for #2 according to the message that will appear in the middle of
installation. Installation continues automatically.
•
Change the CD-ROM #2 for #1 according to the message that will appear when the installation of #2 is complete.
4Click “Finish” from the InstallShield Wizard Complete screen.
Selecting “Yes, I want to restart my computer now” automatically re-starts the computer and
completes installation.
Advanced use / Reference