Parker Hannifin Corporation
Chelsea Products Division
Olive Branch, MS 38654 USA
3
Bulletin HY25-1650-M1/US
Installation Instructions
Under the Dash:
Select a convenient location where the indicator lights will be visible and
the ON-OFF button is accessible to the operator. Mark two mounting hole
locations, using the control panel mounting bracket as a template.
CAUTION: Do not drill into wires or a vital part on the opposite side of the
dashboard – check before drilling.
Then, drill two holes and temporarily mount the control to the dashboard, us-
ing the 1/4" screws, lock-washers and nuts provided.
On the Engine Housing:
Tilt cabs may require the control to be mounted on the engine housing,
with the mounting bracket and screws provided. Mark two mounting hole
locations, using the mounting bracket as a template.
CAUTION: Do not drill into wires or a vital part on the opposite side of the
engine housing – check before drilling.
Then drill two holes and temporarily mount the control and mounting bracket
to the engine housing.
NOTE: Adjustments will be required at the bottom of the control.
(See Page 21)
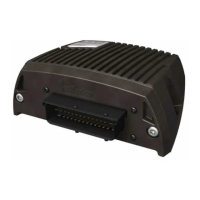
The Control
On/Off = Red when
System is “On”
Over Speed = Yellow
P.T.O. Engaged = Red
Owner’s Manual
Electronic Overspeed Control

 Loading...