Parker Hannifin Corporation
Chelsea Products Division
Olive Branch, MS 38654 USA
5
Bulletin HY25-1650-M1/US
Installation Instructions
Input Power-the Red Wire: Connect to a source of power that is “switched”
or hot only when the key is in the ON position, using the instant connector
provided. This unit can be wired to 12V or 24V DC supply (Mininum 5 amp).
Input Ground-the Black Wire: Good ground connections are important . . .
directly on the frame is best . . . fiberglass panels won’t work at all.
Wiring the Solenoid Valve
Ground-either Red wire: Attach the ring connector provided and make a
good ground connection, preferably on the truck frame.
Power-the “other” Red wire: Connect the other red wire to the green wire
with the butt connector provided. Route this green wire to the control unit and
connect it to the green wire.
Wiring the Pressure Switch
Ground: Using the black wire provided in the kit, push the bullet connector
end onto either terminal of the pressure switch. Make a good ground connec-
tion with the other end of the black wire, on the truck frame. Using the blue
wire provided in the kit, push the bullet connector onto the other terminal of
the pressure switch. Route the wire to the control unit and connect it to the
blue wire.
Wiring the Speed Pick-up
Selecting the Cable: A ten foot long cable is provided in the kit, which
should be adequate for most installations. Additional five or ten foot long
cables are available and can be connected end-to-end if necessary.
Dealing with Cable “Extra” Length: The cables are specially shielded and
must not be cut or spliced. Any extra length should be coiled up and tucked
away under the dash.
Routing & Protecting the Cables: Bundle together the speed pick-up cable,
the pressure switch wire and the solenoid wire. Route the wires away from
moving parts, hot pipes, sharp edges and up out of the way.
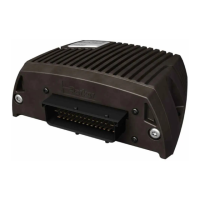
Wiring the Control Unit
Owner’s Manual
Electronic Overspeed Control

 Loading...