8200w² Monitor Instruction Manual
6.2.5 Sensor Removal
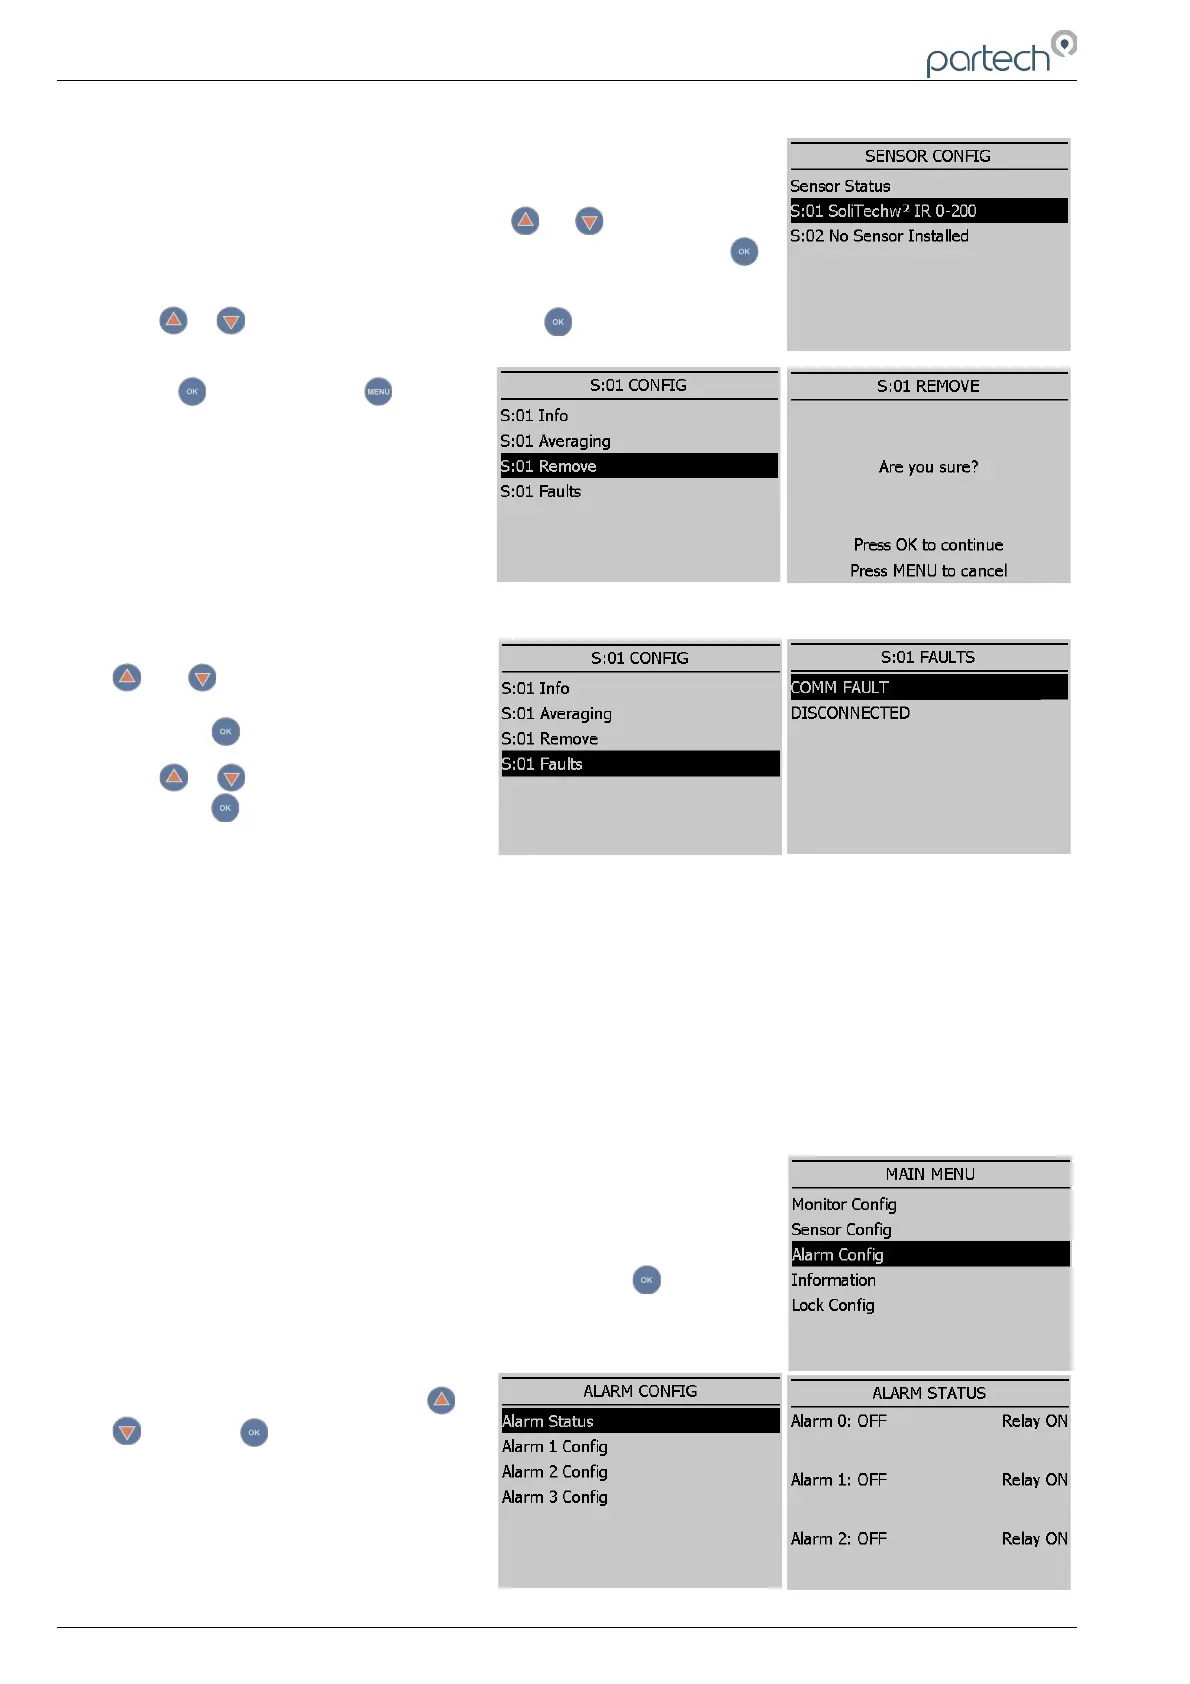
If a sensor is no longer required, the sensor configuration can be
removed from the 8200w² monitor in the following way:
From the SENSOR CONFIG screen, use or to highlight the
sensor to be removed; i.e. ‘S:01 SoliTechw² IR (0-200)’, then press
to select.
Use or to highlight REMOVE and press .
Screen will display “Are you sure?”.
Press to remove or to exit
without removing.
6.2.6 S0x Faults
From the SENSOR CONFIG screen, use
or to highlight the required
sensor. i.e. ‘S:01 SoliTechw² IR (0-200)’,
then press to select.
Use or to highlight S:0x FAULTS
and press .A tick will appear next to
the identified fault if there is a sensor
fault alarm.
6.3 Alarm Config (Relay outputs)
The 8200w² monitor leaves the factory with alarms configured but not active. Alarms will be active after
installing the relevant sensor(s). The default condition is OFF.
The ALARM CONFIG menu defines the functions of the 3 relay outputs within the 8200w² monitor.
Alarm relays within the monitor will be shown as “ALARM # (M)”, whereas # denotes relays 1 to 3 and
(M) denotes the monitor.
Important: Alarms 1 & 2 have sensor 1 & 2 measurements allocated to
them respectively. Alarm 3 is the sensor fault relay allocated to both
measurement inputs.
From the MAIN MENU, select ALARM CONFIG and press .
6.3.1 Alarm status
Highlight ALARM STATUS using or
and press .
This screen will show the current status
of the three relays, including type.
Page 22 of 34 229844IM Issue 01 Issue Date 24/06/2019