5 of 42
ISSUED: 03-08-07 SHEET #: 095-9264-1
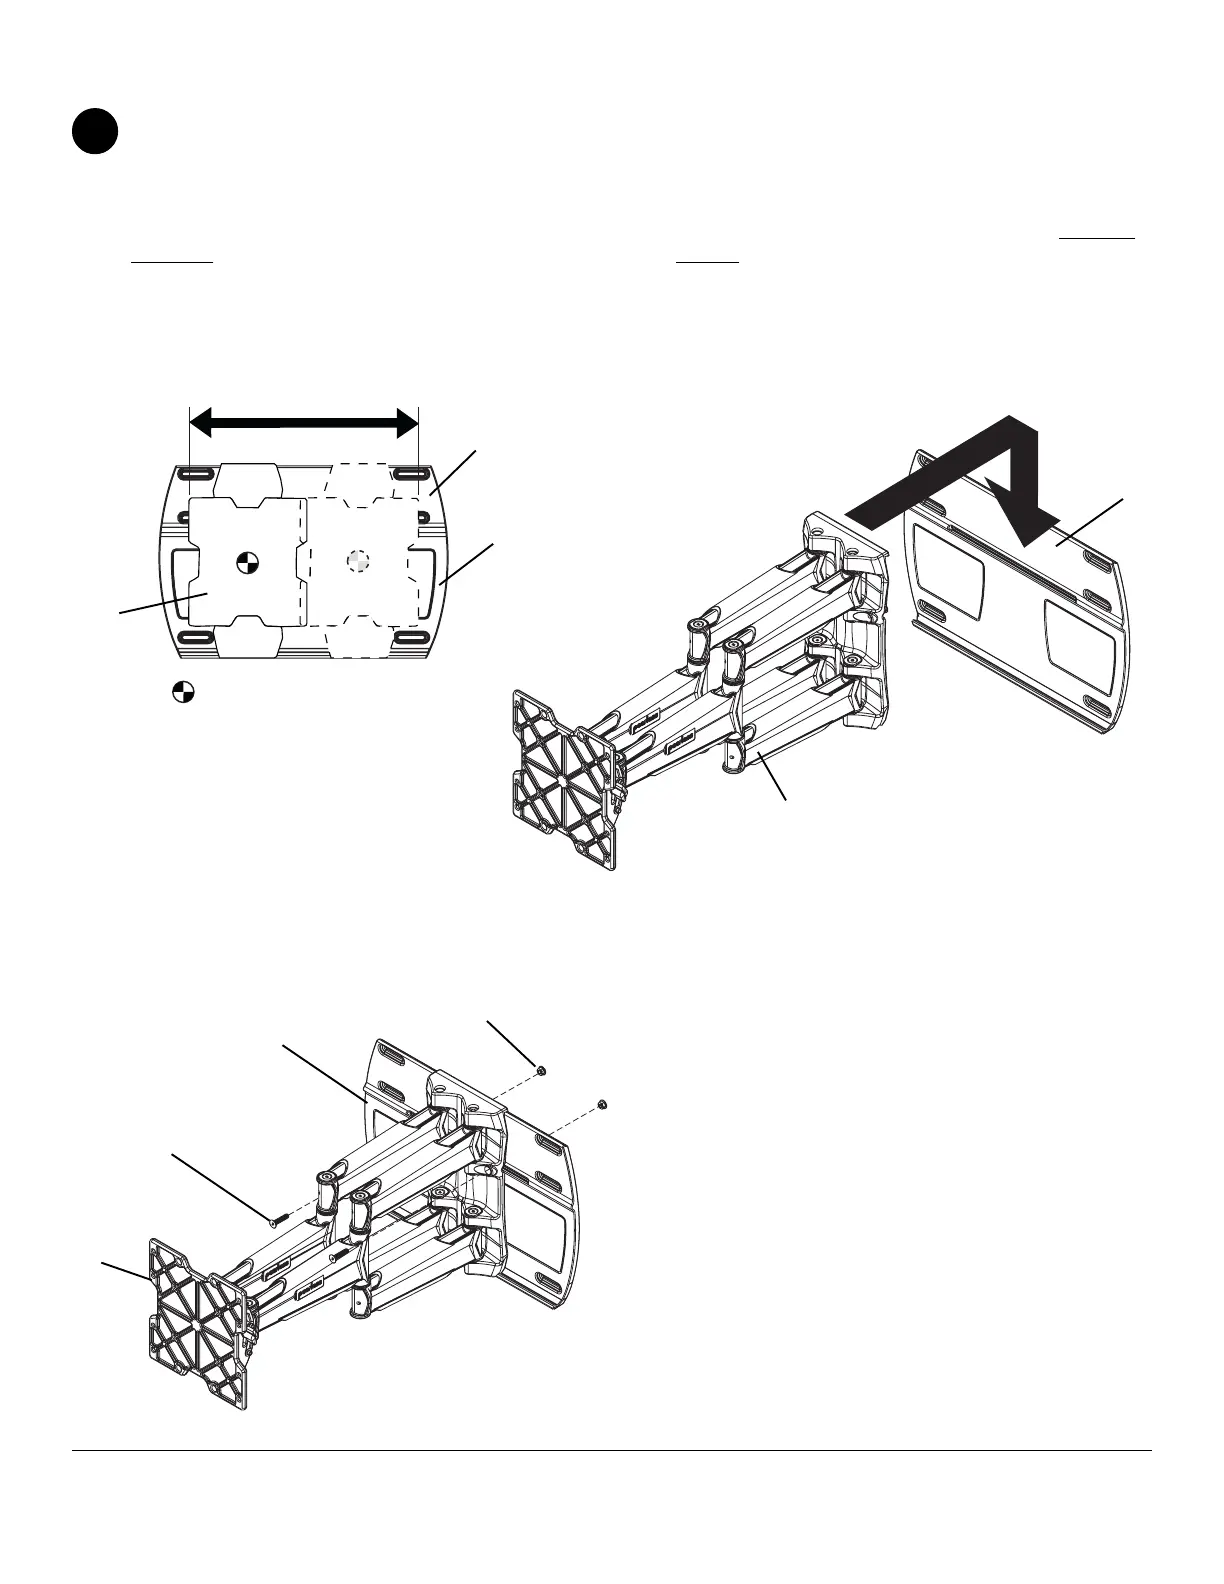
NOTE: If mounting wall plate (D) to wood stud wall surface, slots on wall plate (D) must align to studs.
Determine desired location of screen center (refer to step 2) as shown in fig. 1.1, then hook arm onto wall plate (D)
as shown in fig. 1.2.
Using 3/16" allen wrench (L), secure arm (A) to wall plate (D) using two 5/16-18 x 1.75" flat head socket screws (I)
and two 5/16"-18 nuts (J) as shown in fig. 1.3. NOTE: BOTH 5/16-18 x 1.75" flat head socket screws (I)
must be
fastened to to wall plate securely using 5/16"-18 nuts (J). Do not adjust arm while screen is attached.
Adjustment of Arm on Wall Plate
1
fig. 1.1
fig. 1.3
fig. 1.2
A
D
J
I
A
D
CS = center of screen
Slots will align
on studs
A
D