13
TAURUS™ VS Variable Speed Pump Installation and User’s Guide
MAINTENANCE
Pump Strainer Basket
The pump strainer basket (or ‘strainer pot’, ‘hair and lint
pot’), is located in front of the volute. Inside the chamber
is the basket which must be kept clean of leaves and
debris at all times. View basket through the ‘See Through
Lid’ to inspect for leaves and debris.
Regardless of the length of time between filter cleaning,
it is most important to visually inspect the basket at least
once a week.
THIS SYSTEM OPERATES UNDER HIGH PRESSURE. When any part of the circulating system (e.g., Lock Ring, Pump, Filter,
Valves, etc.) is serviced, air can enter the system and become pressurized. Pressurized air can cause the lid to separate which can
result in serious injury, death, or property damage. To avoid this potential hazard, follow above instructions.
DO NOT open the strainer pot if Taurus™ VS Variable Speed Pump fails to prime or if pump has been operating without water in
the strainer pot. Pumps operated in these circumstances may experience a build up of vapor pressure and may contain scalding
hot water. Opening the pump may cause serious personal injury. In order to avoid the possibility of personal injury, make sure the
suction and discharge valves are open and strainer pot temperature is cool to touch, then open with extreme caution.
To prevent damage to the pump and for proper operation of the system, clean pump strainer and skimmer baskets regularly.
Cleaning the Pump Strainer Basket
1. Press the Start/Stop button to stop the pump and
turn off the pump at the circuit breaker.
2. Relieve pressure in the system by allowing the water
to cool.
3. Gently tap the clamp in a counter-clockwise direction
to remove the clamp and lid.
4. Remove debris and rinse out the basket. Replace
the basket if it is cracked.
5. Put the basket back into the housing. Be sure to align
the notch in the bottom of the basket with the rib in
the bottom of the volute.
6. Fill the pump pot and volute up to the inlet port with
water.
7. Clean the cover, O-ring, and sealing surface of the
pump pot.
Note: It is important to keep the lid O-ring clean and
well lubricated.
8. Reinstall the lid by placing the lid on the pot. Be sure
the lid O-ring is properly placed. Seat the clamp and
lid on the pump then turn clockwise until the handles
are horizontal.
9. Turn the power on at the house circuit breaker. Reset
the time clock to the correct time, if applicable.
10. Open the manual air relief valve on top of the filter.
11. Stand clear of the filter. Start the pump.
12. Bleed air from the filter until a steady stream of water
comes out. Close the manual air relief valve.
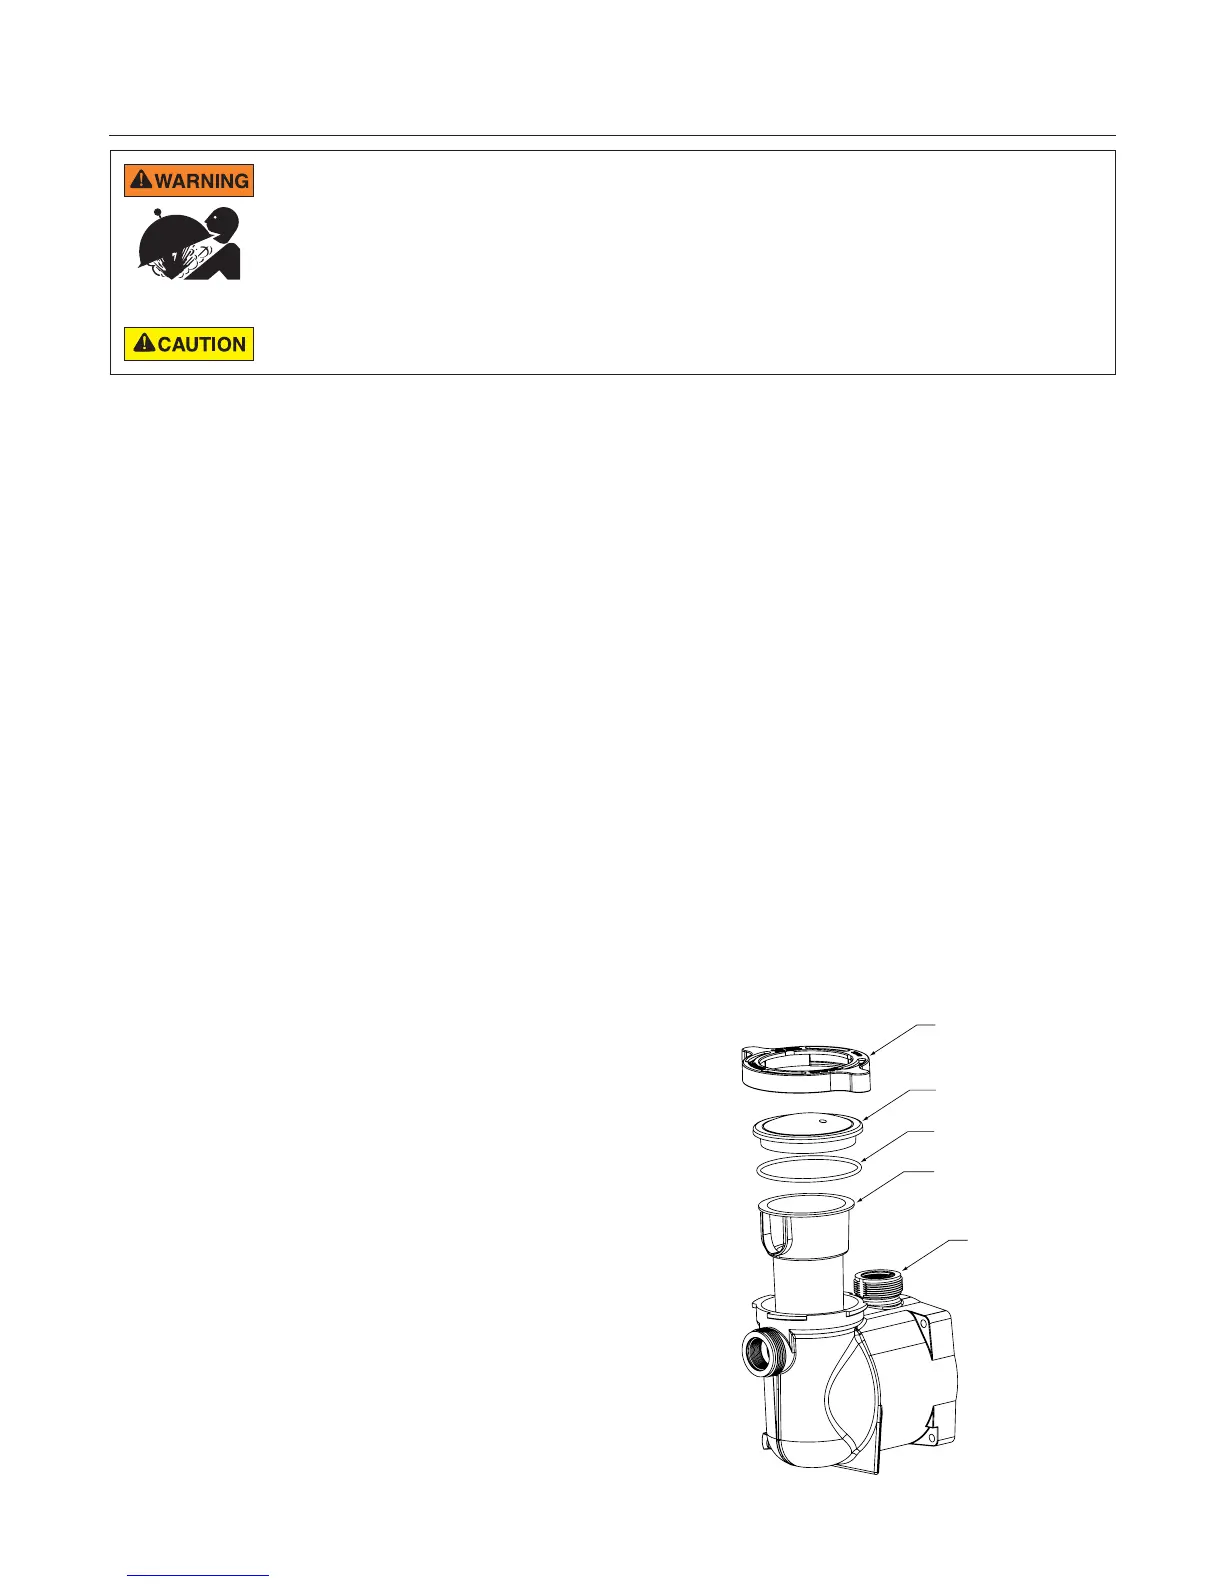
Strainer Pot Assembly
Winterizing
You are responsible for determining when freezing
conditions may occur. If freezing conditions are
expected, take the following steps to reduce the risk
of freeze damage. Freeze damage is not covered
under warranty.
To prevent freeze damage, follow the procedures
below:
1. Press the Start/Stop button to stop the pump and
shut off electrical power for the pump at the circuit
breaker.
2. Drain the water out of the pump housing by
removing the two thumb-twist drain plugs from the
housing. Store the plugs in the pump basket.
3. Cover the motor to protect it from severe rain,
snow and ice.
Note: Do not wrap motor with plastic or other air tight
materials during winter storage. The motor may be
covered during a storm, winter storage, etc., but never
when operating or expecting operation.
Note: In mild climate areas, when temporary freezing
conditions may occur, run your filtering equipment all
night to prevent freezing.
CLAMP
LID
O-RING
BASKET