permaPROC-8-
4. Assembly and Mounting of the Lubrication System
4.1 Mounting the Drive Unit onto a Fixing Device for Wall-Mounting
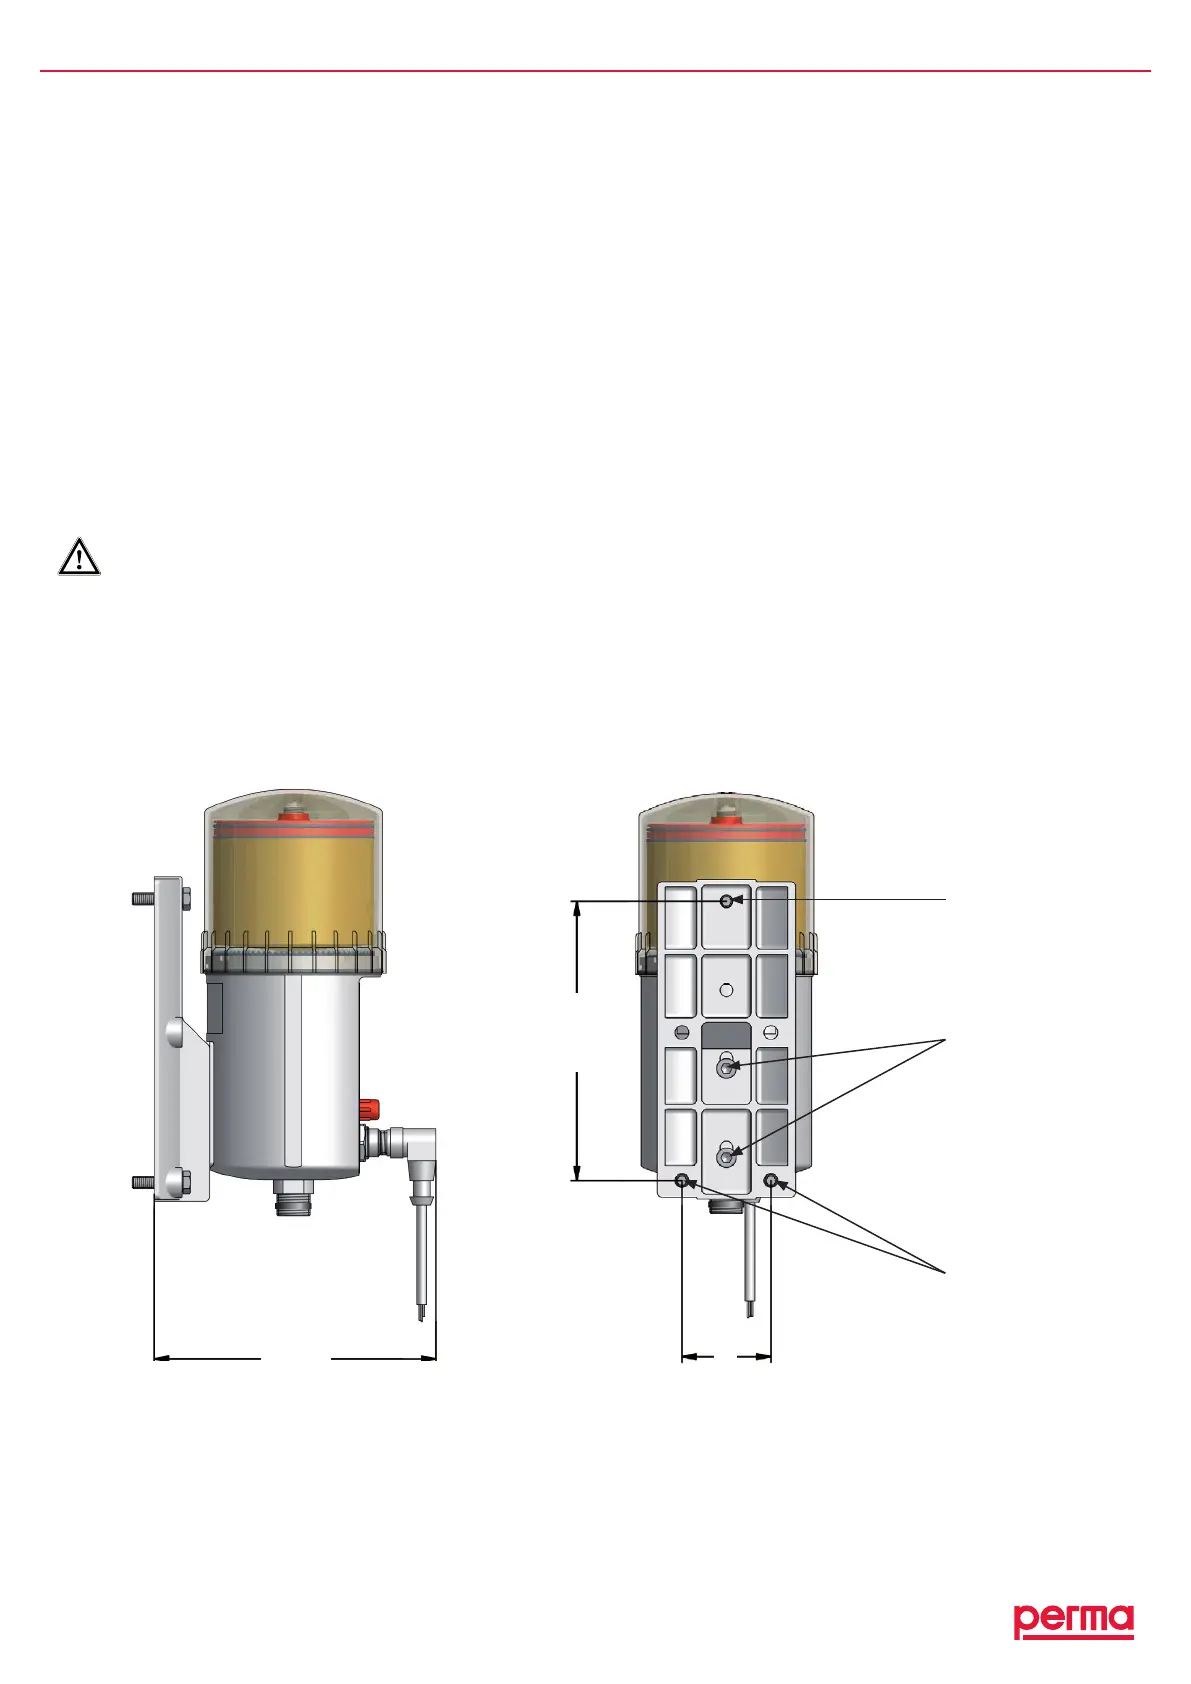
♦ Attachthesuppliedmountingdevicetothedriveunitusingthetwoenclosedhexheadbolts(M6x16)and
thetwowashers.
♦ Screwthemountingdevicewiththedriveunitontoasupportofyoursystem.Theboringtemplateofthethree
mountingscrews(141.5x45)canbeseenbelowingure3oronthetemplatethatisincluded.Youhaveto
useatleastthreehexagonscrewsM6x25(e.g.onmetalground).
♦ Beforeyouconnecttheoutletofthedriveunittothelubricanttube,youhavetomakesurethatthelubrication
pointsandthecompletelubricanttubeispre-lubricatedwiththesamelubricantthatiscontainedinthePRO
LCunit.Forthat,perma-tecoffersa400glubricationcartridgeformanually-operatedgreasepresseswiththe
requestedlubricant.
♦ Connectthelubricanttube(connectionG3/8)totheoutletofthedriveunitandinstallthetubecorrectly
betweentheoutletandthelubricationpoint.Thelubricanttubemustnotbelongerthanvemeters.
Make sure that you assemble the connections and lubricant tubes correctly and tightly to avoid possible
leakage.
gure3
2hexheadbolts
M6x16,maximum
torque3Nm
(supplied
forattachingthe
permaPROCtothe
mountingdevice)
Hexagonscrew
M6x25(forwall
mountingonmetal)
2hexagonscrews
M6x25(forwall
mountingonmetal)
143
45
141,5