loosen the nut on the knife pinion stud brocket set screw (Fig. 49), and take
out this screw. Next, remove the knife pinion stud bracket and the knife
assembly.
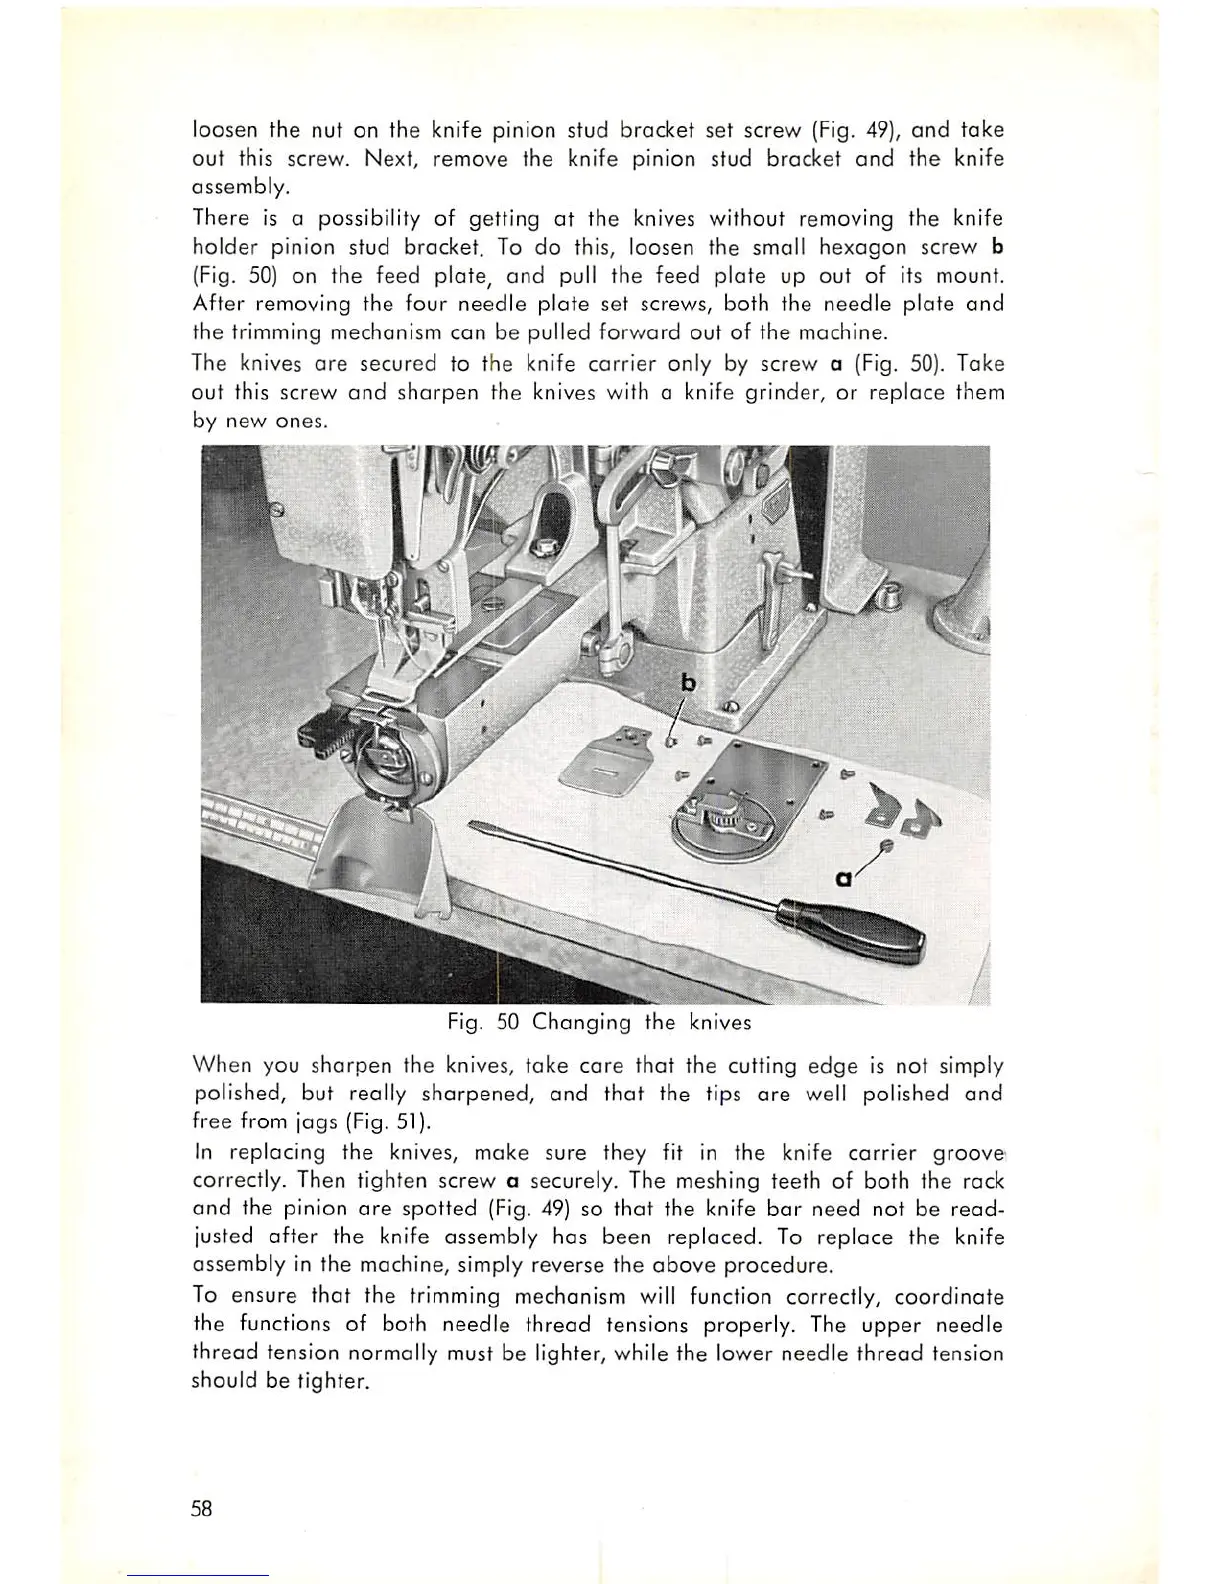
There is a possibility of getting
at
the knives without removing the knife
holder pinion stud bracket. To do this, loosen the small
hexagon
screw b
(Fig. 50) on the feed plate, and pull the feed plate up out of its mount.
After removing the four
needle
plate
set screws, both the
needle
plate
and
the trimming mechanism
can
be pulled
forward
out of the machine.
The knives
are
secured to the knife
carrier
only by screw a (Fig. 50). Take
out
this screw
and
sharpen
the knives with a knife grinder, or
replace
them
by new ones.
Fig. 50
Changing
the
knives
When you sharpen the knives, take
care
that the cutting edge is not simply
polished, but really sharpened, and that the tips
are
well polished
and
free from jags (Fig. 51).
In replacing the knives, make sure they fit in the knife
carrier
groove
correctly. Then tighten screw a securely. The meshing teeth of both the rack
and
the pinion
are
spotted (Fig. 49) so that the knife
bar
need not be read
justed
after
the knife assembly has
been
replaced.
To
replace
the knife
assembly in the machine, simply reverse the
above
procedure.
To ensure that the trimming mechanism will function correctly, coordinate
the functions of both needle thread tensions properly. The upper needle
thread tension normally must be lighter, while the lower needle thread tension
should be tighter.
58