EasyManuals Logo

Pfaff creative 2170 User Manual

Pfaff creative 2170
179 pages
To Next Page IconTo Next Page
To Previous Page IconTo Previous Page
Page #109 background imageLoading...
Page #109 background image
Embroidery
5:12
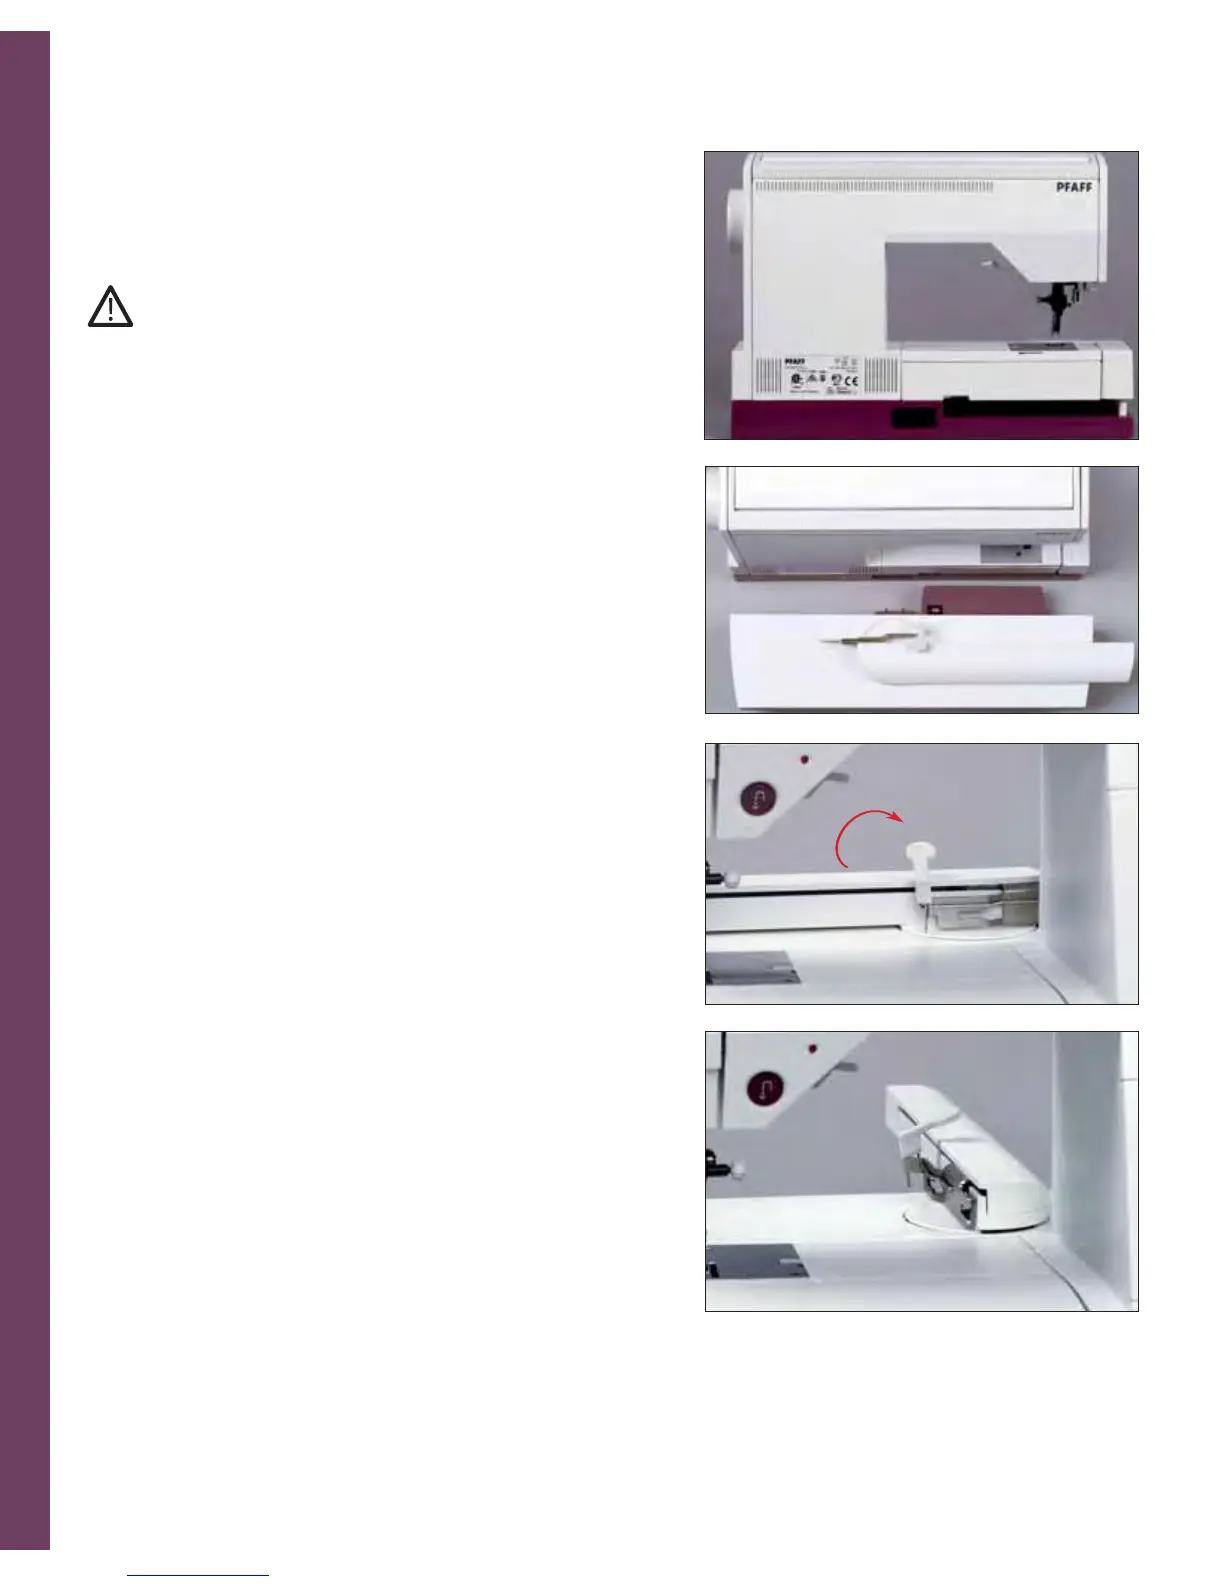
Connecting the embroidery unit
Embroidery unit socket
1. The socket for the embroidery unit (A) is located at the back
of the machine.
Switch off the main switch.
2. Place the embroidery unit directly behind the machine and
pull it into the socket.
Make sure that the guide (B) is slid between the base plate
and the free arm as far as it will go.
3. Raise the embroidery arm in the area of the recessed grip
and turn it to the back.
4. The embroidery arm locks in embroidery position.
Note: You can change bobbin with the unit attached, but make sure that the
accessory tray is not swung too far to the rear. The angle of the accessory tray
should not exceed 90°. Otherwise the embroidery unit could be pushed out of
its socket.
B
A

Table of Contents

Other manuals for Pfaff creative 2170

Questions and Answers:

Question and Answer IconNeed help?

Do you have a question about the Pfaff creative 2170 and is the answer not in the manual?

Pfaff creative 2170 Specifications

General IconGeneral
DisplayLCD
Built-in MemoryYes
Speed850 stitches per minute
Needle ThreadingAutomatic
Bobbin TypeTop Loading
Stitch Width7 mm
Stitch Length5 mm
Presser FeetMultiple Included
Automatic Needle ThreaderYes
Speed ControlYes
Free ArmYes

Related product manuals