8:12
Embroidery mode - edit
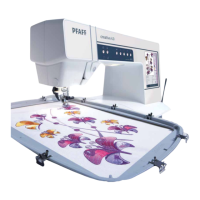
'HÀQLWLRQRIDcontrol point
A control point is a point affecting the selected
shape. Each shape is built by several control points.
7RJHWKHUWKH\GHÀQHZKDWWKHVKDSHZLOOORRNOLNH
$VHOHFWHGFRQWUROSRLQWLVPDUNHGZLWKDÀOOHG
square (L). An unselected control point is marked
with an outlined square (M). All control points are
visible when you are editing the points.
By adjusting the control points, the selected shape
can be changed with unlimited possibilites.
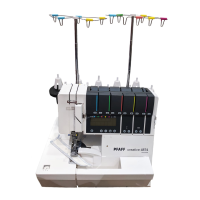
Select FRQWUROSRLQWV(
Touch the select control points icon (E) to open a
SRSXS)RUHDFKVKDSHWKHUHDUHSUHGHÀQHGVHWV
of control points. Select all or some of the control
points.
When you have selected a set of control points, you
can make adjustments to the shape. Use the touch
functions or your stylus to move, rotate and scale
your selected control points. The adjustments made
will only affect the selected control points.
Use the slider to increase or decrease the attraction
percentage of the selected control points. The higher
the attraction percentage, the closer the baseline will
be to the selected control points.
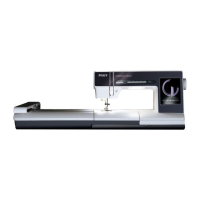
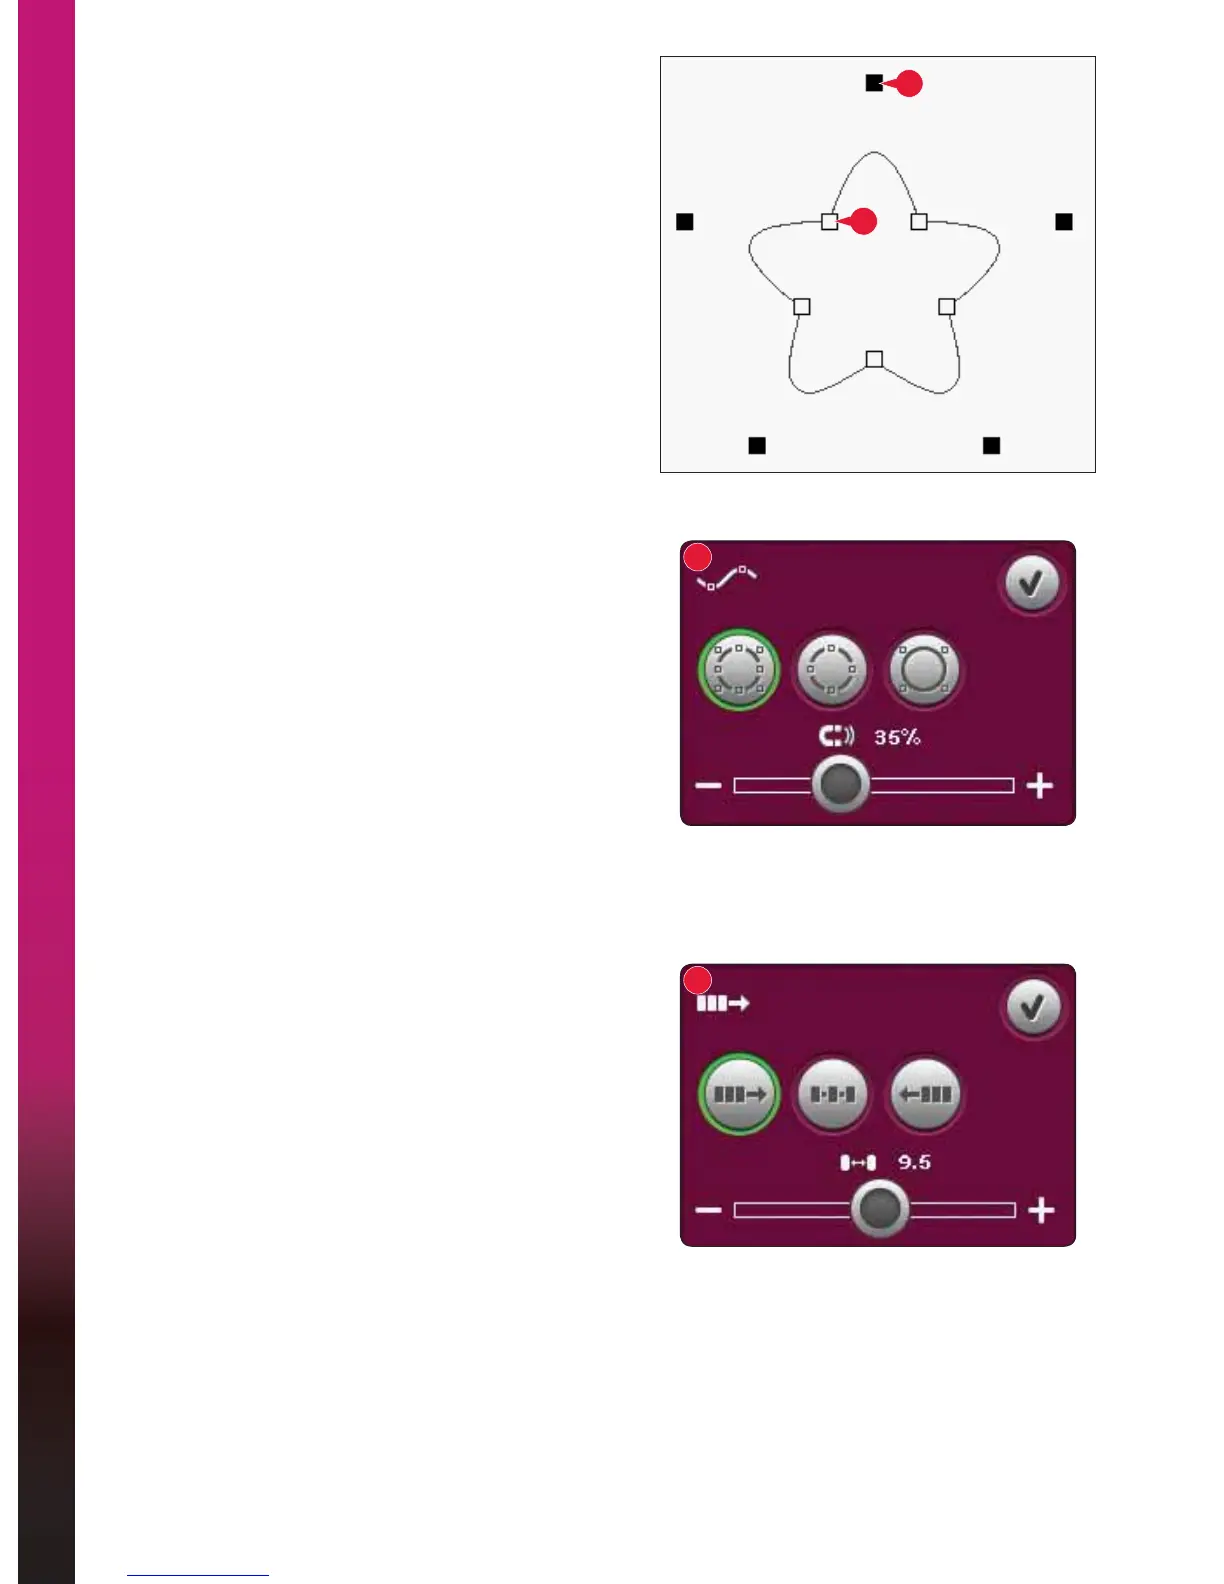
Select VSDFLQJ)
Touch the select spacing icon (F) to open a pop-up.
The default setting spaces the objects evenly along
the baseline (placing the same distance between
each).
<RXFDQFKRRVHOHIWRUULJKWMXVWLÀFDWLRQRQWKH
baseline. The gap between the objects can be
increased or decreased by using the slider. The
actual gap is shown above the slider in the pop-up.
If there are too many objects in the shape, the
baseline will be red. Enlarge the shape or delete
VRPHREMHFWVXQWLOWKHREMHFWVÀWLQWKHVKDSH7KH
baseline will change to black again.
L
M
E
F