2:2
C A B
Preparations
8QSDFNLQJ
3ODFHWKHER[RQDVWHDG\ÁDWVXUIDFH/LIWWKHPDFKLQHRXWRIWKHER[DQGUHPRYHWKHRXWHUSDFNDJLQJ
and lift off the machine carrying case.
2. Remove all other packing material and the plastic bag.
3. Slide off the accessory tray and remove the styrofoam inside.
Note: Styrofoam left in the accessory tray while sewing may affect stitch quality. The styrofoam is for packing
purposes only and should be removed.
Note: Your creative
™
4.5 sewing and embroidery machine is adjusted to provide the best stitch result at normal room
temperature. Extreme hot and cold temperatures can affect the sewn result.
Some fabrics have a lot of excess dye which can cause discoloration on other fabric but also on your sewing machine.
7KLVGLVFRORULQJPD\EHYHU\GLIÀFXOWRULPSRVVLEOHWRUHPRYH)OHHFHDQGGHQLPIDEULFHVSHFLDOO\UHGDQGEOXHRIWHQ
contain a lot of excess dye. If you suspect that your fabric/ready-to-wear garment contains a lot of excess dye, always
pre-wash it before sewing to avoid the discoloring.
For the USA and Canada
This sewing machine has a polarized plug (one
blade wider than the other). To reduce the risk
RIHOHFWULFVKRFNWKLVSOXJLVLQWHQGHGWRÀWLQD
polarized outlet only one way. If the plug does
QRWÀWIXOO\LQWKHRXWOHWUHYHUVHWKHSOXJ,ILW
VWLOOGRHVQRWÀWFRQWDFWDTXDOLÀHGHOHFWULFLDQWR
install the proper outlet. Do not modify the plug
in any way.
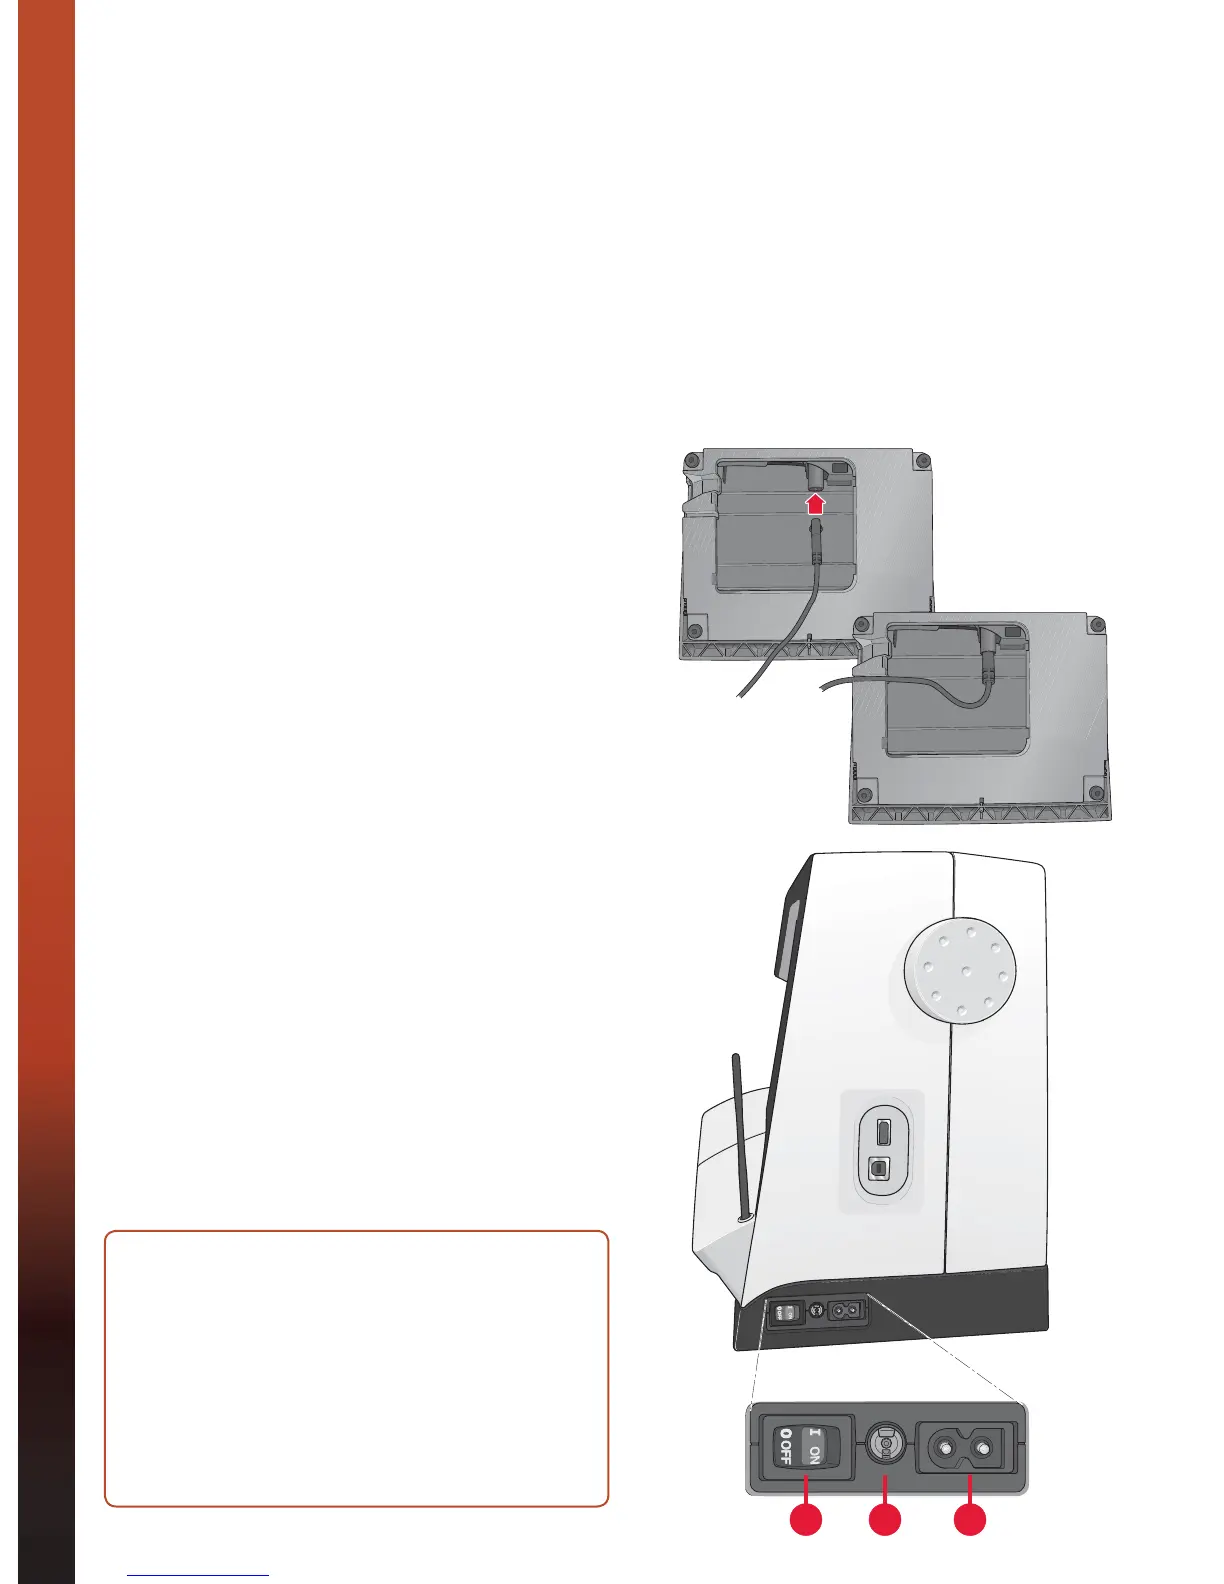
&RQQHFWLQJWKHIRRWFRQWUROFRUG
$PRQJWKHDFFHVVRULHV\RXZLOOÀQGWKHIRRWFRQWURO
cord. Connecting the foot control cord to the foot
FRQWUROLVRQO\QHFFHVVDU\WKHYHU\ÀUVWWLPH\RXDUH
going to use the machine.
1. Take out the foot control cord. Turn the foot
control over. Connect the cord to the socket
inside the open space on the underside of the foot
control as shown.
3XVKÀUPO\WRPDNHVXUHLWLVSURSHUO\FRQQHFWHG
3. Pull the cord into the slot to the left of the socket
to ensure that the foot control will rest evenly on
WKHÁRRU
Connect the power cord
and foot control
Note: Before plugging in the foot control, check to ensure
that it is type “FR5” (see underside of foot control).
1. Connect the foot control cord to the front socket
on the bottom right side of the machine (A).
2. Connect the power cord to the rear socket on the
bottom right side of the machine (B). Plug the
cord into a wall socket.
3. Press the ON/OFF switch to ON to turn on
power and light (C).