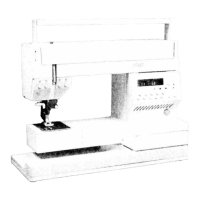
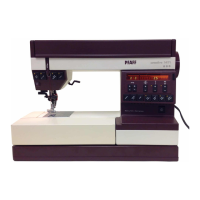
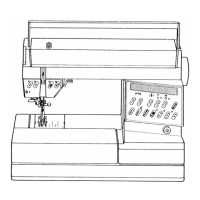
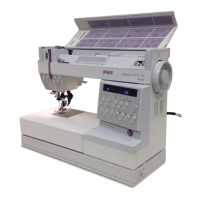
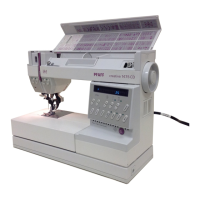
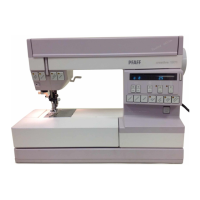
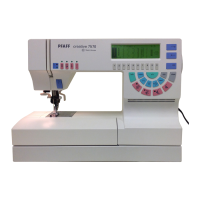
Do you have a question about the Pfaff creative 1469 and is the answer not in the manual?
Avoid finger injuries from the needle when sewing.
Unplug the machine before maintenance, cleaning, or part changes.
Use only a 15-watt light bulb in the sewing lamp.
Connect power cord and foot control to machine and power source.
Push master switch 108; the sewing light illuminates.
Open free arm cover 131 and remove bobbin case.
Release latch A to take out the bobbin.
Thread guides 136 and 138 for winding from a second spool.
Ensure thread slot points right when placing bobbin on spindle.
Set needle high, disengage mechanism, pass thread.
Wind bobbin, push left, remove, cut thread.
Insert bobbin A into case, draw thread through slot B and eye C.
Check tension by moving bobbin case; adjust screw D.
Raise latch A, push case onto stud B with cutout C upwards.
Place spool on pin, use unreeling discs D/E as needed.
Follow arrows through slots A, B, lever 137, slot B, and guide.
Thread the needle from front to back.
Hold upper thread, lay threads left, close free arm cover.
Swing work support 109 back against the free arm.
Place fabric under the sewing foot.
Raise lever 119 for thick fabric; lower to sew or darn.
Depress pedal to control sewing speed; deeper press means faster sewing.
Normal setting 3-5. Adjust using dial 135. Check with zigzag stitch.
Normal range 3-5. Use zigzag stitch to check. Threads should interlock.
Draw threads into slot A on presser bar and pull down to cut.
Apply language-specific labels to the electronic control keys.
Light 113 flashes when bobbin thread is low; goes off when full bobbin inserted.
Key 114 controls needle position (up/down) when machine stops.
Key 115 selects half or top sewing speed.
Key 117 performs tie-off at start/end, or memorizes buttonhole length.
Key 116 enables continuous reverse or temporary reverse sewing.
Apply language-specific labels to the creative computer keyboard keys.
Enter program number using keys 121. Select alphabets/numbers with left/right keys.
Range 0-6 mm. Key 107 selects width, letter size, and straight-stitch needle position.
Key 106 sets stitch length (0-6mm) for programs without display A light.
Key 106 sets pattern length (mm) for programs with display A light.
Enter programs with keys 121, save with key 143. Numbers appear in display 104.
Use "corrector" key 142 to erase the last saved program in a combination.
Store up to 16 programs or 48 letters/numbers. Programs can be mirrored.
Use key 125 to scroll through stored programs; pressing again stops display.
Key 141 "repeat" returns a program combination to its starting position.
Push key 129. Display A lights up, limits stitch width to 4mm.
Push key 128 to return an in-progress pattern to the starting point.
Push key 127. Machine sews pattern, ties off start/end. Completes pattern if key pressed mid-sew.
Push key 126. Display A lights up. Selected program is mirrored.
Program 00 uses center needle position for straight stitch.
Use key 107 to vary needle position in 13 steps from left to right.
Program 10 is zigzag stitch with needle in center position.
Set stitch width between 0.5-6.0mm using key 107.
Loosen screw A, remove needle, insert new needle, tighten screw.
Open cover 131, slide control towards C (dropped) or B (sewing).
Lift out work support A, open lid, remove accessory box C.
Compartment B under box stores feet, needles, bobbins.
Push button A to release; lower lifter and fit stud B into slots C to attach.
Use holes E and screw D to attach an edge guide.
Unplug, push down housing, turn bulb towards A to remove; install new bulb by pushing up and turning towards B.
Tilt needle plate, clean feed dog and hook area with brush.
Apply drop of oil to hook raceway occasionally.
Master switch activates light. Turns off machine and erases memory.
Memory erases on power loss. Program 00 resets; combinations need re-saving.
Entered programs activate after machine stops and foot control is pressed.
Disengage mechanism for winding. Re-engage carefully to avoid high speed.
Machine may run warmer due to electronic components; this is normal.
Pull plug, turn fuse holder counter-clockwise, replace fuse, push in and turn clockwise.
Fuse type FF2A. 110V machines have no fuse.
Connect blue wire to N/black terminal, brown wire to L/red terminal.
Use a 3-ampere fuse with a 13-ampere plug.
Causes: Needle insertion, wrong needle, bent/blunt, threading, needle too thin. Remedies: Check insertion, use correct/new needle, check threading, select needle per chart.
Causes: Previous reasons, strong tension, poor thread quality. Remedies: Regulate tension, use good thread.
Causes: Needle not fully inserted, bent, wrong thickness, hits plate, bobbin case issue. Remedies: Insert new needle, guide fabric lightly.
Causes: Tension adjustment, thread quality, uneven bobbin winding, thread loops. Remedies: Check tensions, use quality thread, wind bobbin properly, check threading.
Cause: Lint, dropped feed dog. Remedy: Clean lint, move feed dog control left.
Cause: Thread ends in hook raceway. Remedy: Remove thread ends, oil raceway.
Cause: Dirt on sensors. Remedy: Clean sensor area carefully.
Cause: Machine not sewing entered program. Remedy: Switch off/on, re-enter program.
Do not sew without fabric. Switch off at master switch when leaving machine, especially with children.
Causes: Needle insertion, wrong needle, bent/blunt needle, threading, needle too thin. Remedies: Check insertion, use correct/new needle, check threading, select needle per chart.
Causes: Reasons from above, strong tension, poor thread quality. Remedies: Regulate tension, use quality thread.
Causes: Needle not fully inserted, bent, wrong thickness, hits plate, bobbin case issue. Remedies: Insert new needle, guide material lightly.
Causes: Tension adjustment, thread quality, uneven bobbin winding, thread kinks. Remedies: Check tensions, use quality thread, wind bobbin properly, check threading.
Cause: Lint between feed dog teeth, dropped feed dog. Remedy: Clean lint, move feed control left.
Cause: Thread ends in hook raceway. Remedy: Remove thread ends, oil raceway.
Cause: Dirt on sensors. Remedy: Clean sensor area carefully.
Cause: Machine doesn't sew entered program. Remedy: Switch off/on, re-enter program.
Never sew without fabric. Switch off machine when leaving, especially with children.
| Buttonhole Styles | 4-step |
|---|---|
| Needle Positions | Variable |
| Max Stitch Length | 6 mm |
| Max Stitch Width | 6 mm |
| Free Arm | Yes |
| Stitch Options | Utility, Decorative, Quilting |
| Included Accessories | bobbins, needles, seam ripper, screwdriver |
