1
2
3
4
1
2
3
5
3:7
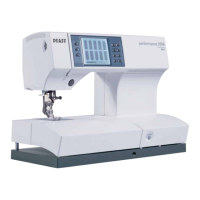
Operating your performance 2058
Sewing menu
The sewing menu is divided into three sections:
1. Status bar, where the activated sewing functions are shown. The
status bar is always active and automatically updated when a
function is activated or deactivated.
2. Action field, where the selected stitch is displayed.
3. Function field, with sewing functions and stitch parameter settings.
The figure in the upper left corner of the function field indicates the
selected stitch number.
Icon status
1. Inactive, the function can not be activated.
2. Active, the function can not be deactivated.
3. Inactive, the function can be activated.
4. Active, the function is selected and can be deactivated.
Altering the stitch settings
Needle position. For straight stitches. Touch the icon and move
the needle position with the function field buttons (5). There are 19
needle positions available. The + button moves the needle in nine
steps to the right. The - button moves the needle in nine steps to the
left.
Stitch width. Touch the icon and change the stitch width with the
function field buttons (5).
Stitch length. Touch the icon and change the length of the stitch
with the function field buttons (5).
Pattern length. For decorative stitches, buttonholes, satin stitches,
scalloped edges and some utility stitches. Touch the icon and
increase or reduce the length of the stitch with the function field
buttons (5).
Balance. Touch the icon and fine tune the stitch balance with the
function field buttons (5).
Density. For satin stitches, scalloped edges and buttonholes.
Touch the icon and change the stitch density with the function
field buttons (5), without changing the length of the pattern or
buttonhole.
Side to side mirroring. Touch the icon to mirror a stitch or a
sequence side to side.
End to end mirroring. Touch the icon to mirror a stitch or a
sequence end to end.
Add a stitch to a sequence. The stitch sequence menu appears
automatically by touching the icon.
 Loading...