25
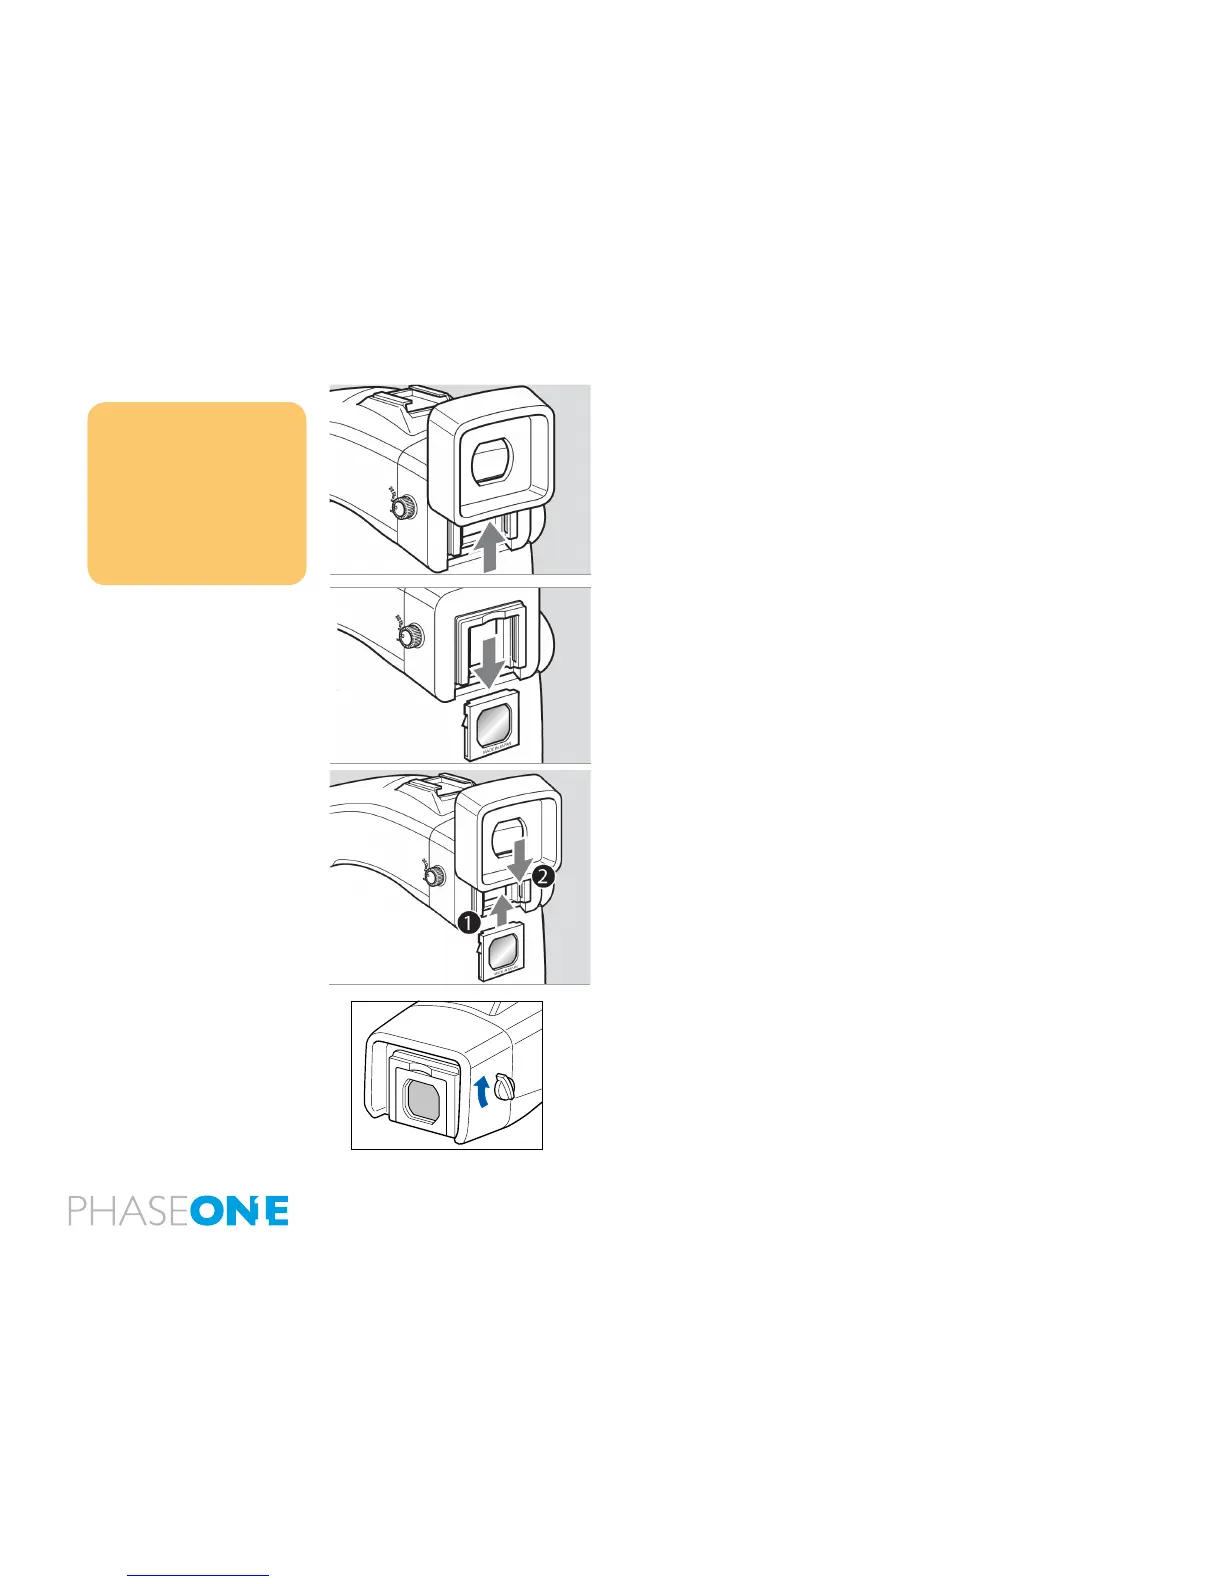
Replacing the Diopter Correction Lens
1.Press the Eyepiece Lock, which is located in a gap between the
Eyepiece and the Diopter Correction lens. (Turn the camera upside
down to gain easy access to it). Now remove the rubber Eyepiece by
sliding it upwards
2. Remove the lens supplied with the nder by pulling it downward.
3. Remove the existing diopter by sliding downwards using the ngernail
groove and detach. Insert a new diopter by aligning it to the base of the
diopter holder and sliding it upwards into place. Finish by reattaching
the rubber eyecup.
NOTE:
If there is dirt or dust on the lens
surface, remove it with a blower or
sweep it off gently with a lens brush.
If there are ngerprints or dirt on
the lens surface, wipe them off with
a piece of clean, soft gauze.
Using solvents could discolor the
correction lens frame.
2.16 Eyepiece Shutter
Close the eyepiece shutter when there is a strong light source behind
the camera or when pressing the shutter release button without looking
through the viewnder. (This prevents exposure error due to light
entering from the viewnder.)
Turn the eyepiece shutter lever in the direction of the arrow.