Operation Guide 250ML Lighting Control Consoles
41 OPERATION
S1 - Edit Time
This will allow the editing of all parameters of the sub that was selected as well as editing the item in Preview.
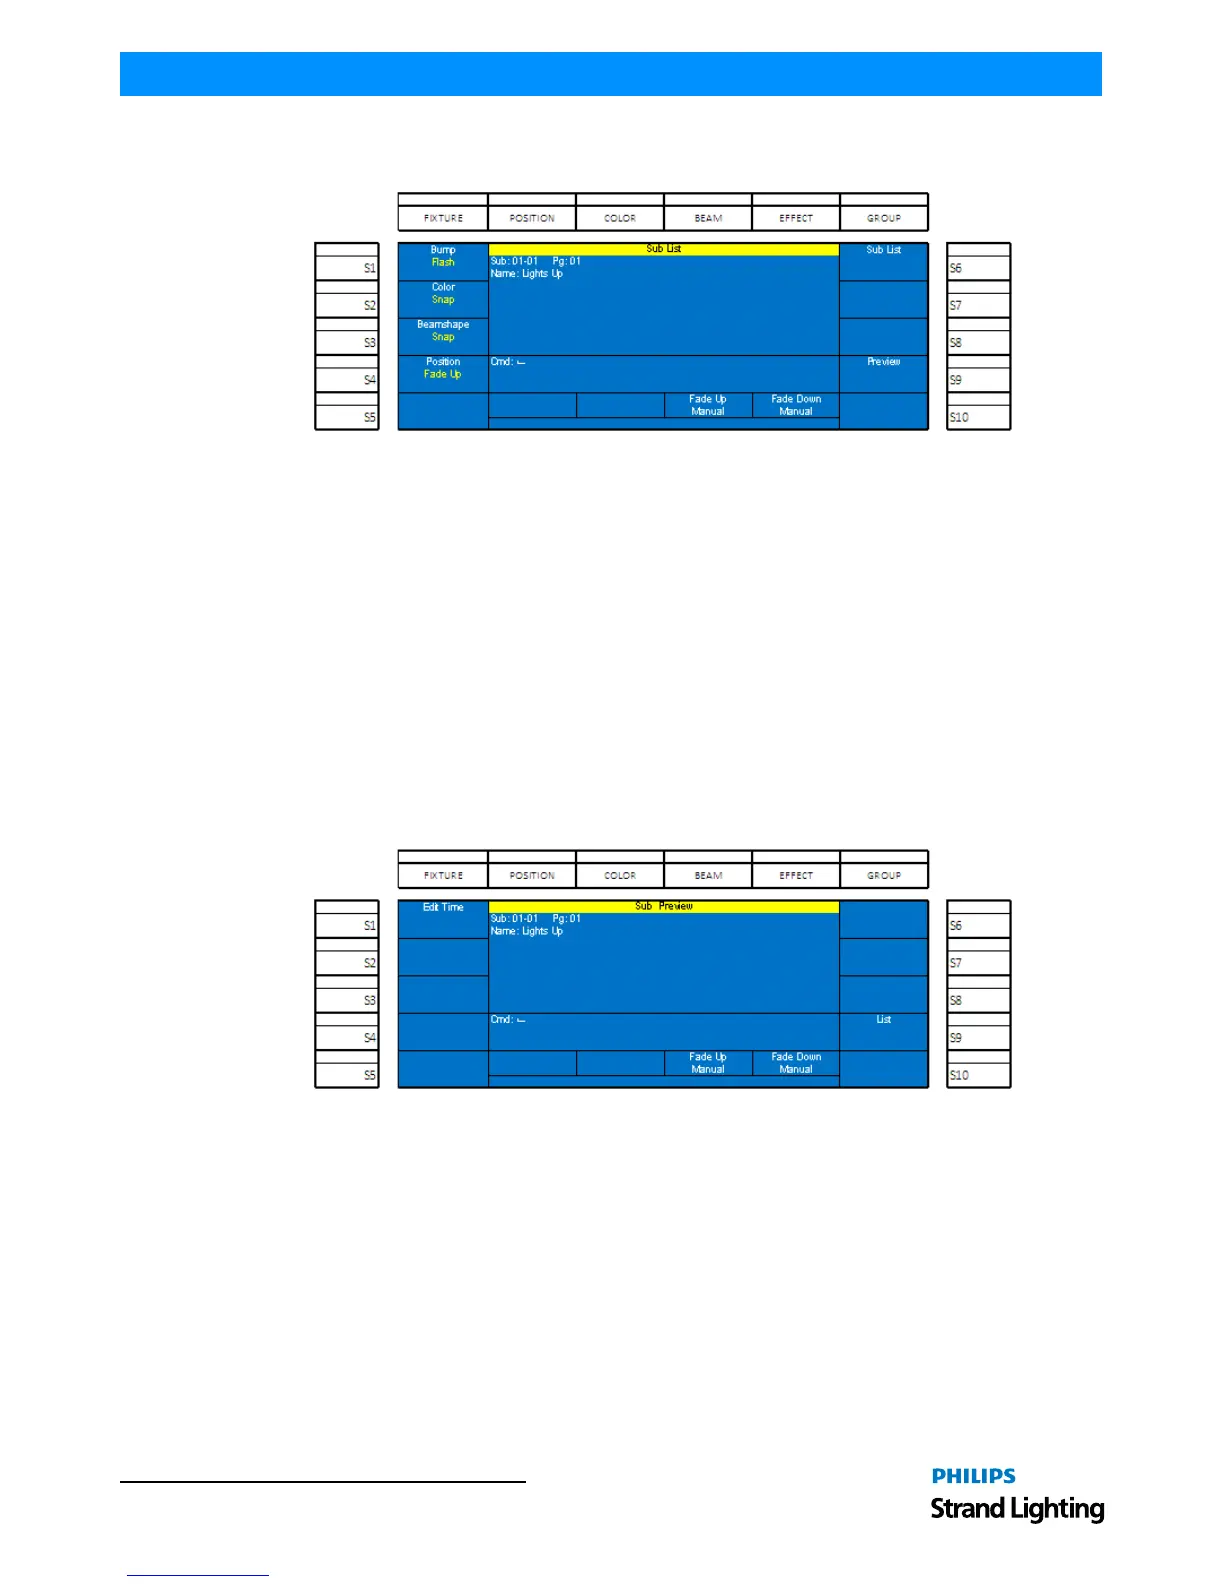
Figure 58: Sub List Preview Screen
• (S1 - Bump): changes how the bump button functions. Options are Off, Flash, Solo, Latch, Flash+Solo, and Go/
Run. See Submaster Options for more information.
• (S2 - S4: Color, Beam and Position): changes how the attribute family plays back when activated. Options are
Snap, Fade Up and Fade Down. See "Submaster Options" on page 31 for more information.
• (S6 - Sub List): This button functions as both the [ENTER] key for accepting changes and returns the screen to the
main Sub List screen options.
• (S9 - Preview): Allows previewing and editing the content of the submaster. See "Cue/Submaster Preview" on
page 39 for more info.
While in Sub Preview, the monitor will appear with a grey background. That's the indication that you are in preview.
Editing can be done at this point. A simple example of editing levels while in preview:
[CHANNEL] [ON] [S9-LIST]
After the channels' levels have been changed, pressing (S9-List) is the equivalent to the [ENTER] key to update the
item.
Figure 59: Sub Preview Screen
Encoder C/D - Fade Up / Fade Down: rotating the encoder to change the fade up / down times. Press (S9-List) to
accept the edits.
Editing a Submaster Effect
Once an effect is stored as a submaster, it can be edited without the need to recreate the look onstage and rerecord.