Palettes 46
250ML Lighting Control Consoles
Operation Guide
• If the data in a palette gets changed or updated, then all of the faders and cues are automatically updated.
Recording a Palette
The process of recording a palette allows the storage of position, color and beam information into an easily accessible
state.
The following is the process to record a palette:
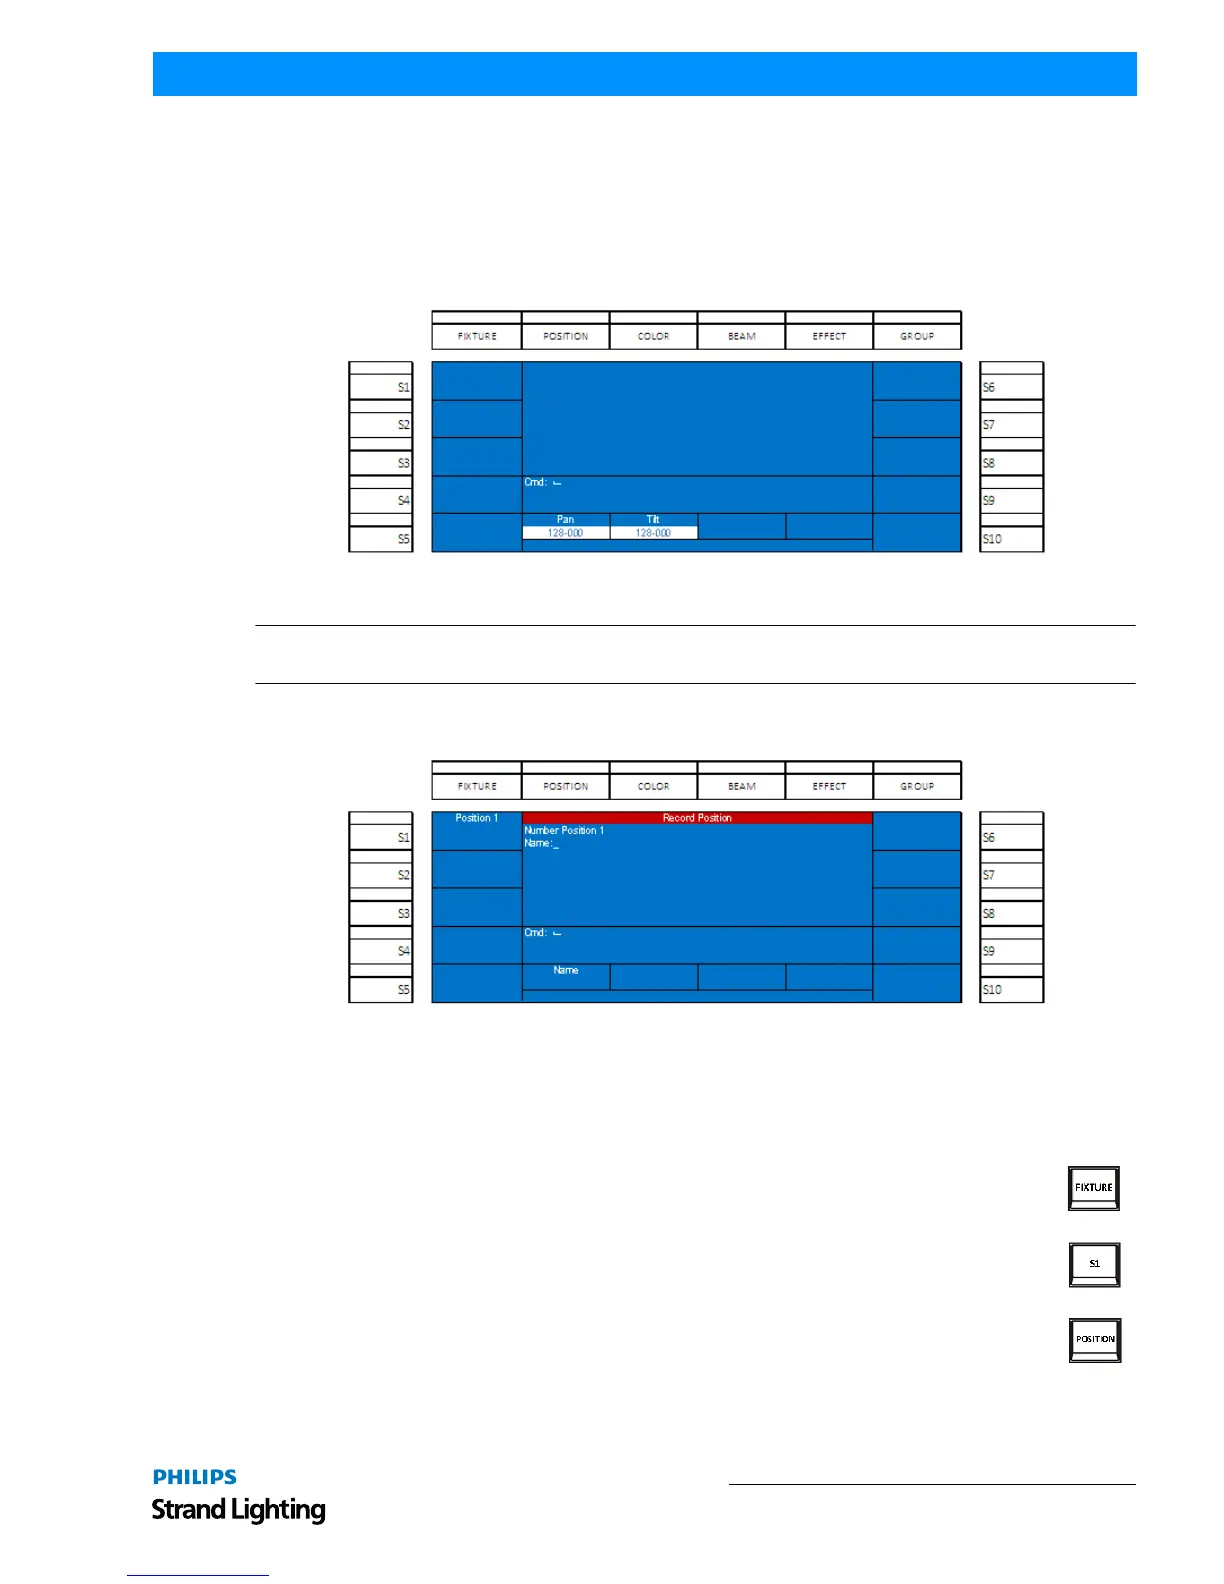
Adjust the parameters that are to be stored. The parameter's data will appear in a white box.
Figure 68: Recording a Palette
Note: This screen shot shows the typical parameters of pan and tilt. If you are using color mixing fixtures and
recording color or beam parameters, the attributes will be different.
Press the [RECORD] key. Then press the proper attribute family button (position, color or beam) above the color
screen. The screen shot below show recording position as an example.
Figure 69: Recording a Palette - Position Example
Use Encoder A to assign a Name to the palette. (Note, this step is optional.)
To complete the recording process, press [ENTER]
The recording position(s) will now appear and be accessed by the S keys.
Applying A Palette
Once palettes have been recorded, they can be access and applied by first selected the fixture(s).
Pressing FIXTURE then S1 key or any combination of the S keys to select the appropriate fixtures.
Now select the appropriate attribute family. Example, press the POSITION key.
Then select the appropriate S key to access the desired palette. The image below shows that two position
palettes have been stored. Position 1 has no name, while Position 2 has been labeled "Chair". The
fixture(s) have been placed in Position 1 by pressing S1 key.