35
English
Weak channel installation
his function lets you add the channels that were not added by the
autoprogram
ue to t
e recept
e con
t
on at t
e
n
t
a
setup
ress
on t
e remote contro
an
en use
to se
ect
Setu
>
nsta
ation
>
hannel
>
ea
c
anne
nsta
ation
e
/
o
e
ect c
anne
n
ut
ox, t
en use
/
to se
ect a
anne
you want to memor
ze
3
se
o se
ect
Search
, t
en
ress
sp
ay w
e c
ange
to
tore
from
earch
w
en t
e c
anne
s found, then press
ress
to ex
t
Note
n most cases,
ta
c
anne
s are not
roa
cast on t
e
c
anne
on w
c
t
e
a
ear on
our
.
o a
ta
c
anne
s
ou nee
to
now t
e
c
anne
on w
c
he di
ital channel is bein
broadcast. E.
. If there is a di
ital channel 9.1 which is bein
roadcast on RF channel 25,
ou need to enter 25 while
erformin
a weak channel
nstallation. To fi nd out the RF channel on which a
articular di
ital channel is bein
roa
cast,
ease contact
our
oca
serv
ce
rov
e
.
nsta
n
ta
c
anne
s us
n
ea
c
anne
insta
atio
mi
ht not work for direct
able connections and if the di
ital si
nal is too weak for the TV to
rocess
Installation mode
ress
on t
e remote contro
an
t
en use
/
/
o
e
ect
Setu
>
nsta
ation
>
hannel
>
nsta
ation mo
e
2
se
/
to se
ect, t
en
ress
3
ress
to ex
t
Uninstall channels
ose c
anne
s can st
e se
ecte
w
t
e
um
er
utton
ress
on t
e remote contro
an
t
en use
/
/
o
e
ect
Setu
>
nsta
ation
>
ninsta
c
anne
2
se
/
o se
ect t
e c
anne
you want to remove, t
en press
ou w
not
e a
e to se
ect t
e c
anne
a
a
n us
n
H + / −
o react
vate a remove
c
anne
use
/
an
t
en press
3
ress
to ex
t
Return your settings to default values
When you return picture and sound settings to their default values the
channel installation settings are not affected
ress
on t
e remote contro
an
t
en use
/
/
o
e
ect
Setu
>
nsta
ation
>
Reset
V setting
>
Start no
ress
to reset t
e p
cture an
soun
sett
ngs
3
ress
to ex
t
7 Install channels
he fi rst time
ou set u
our TV,
ou are
rom
ted to select a menu
anguage and to install TV and digital radio channels (if available). This
hapter provides instructions on how to reinstall and fi ne-tune channels
Selecting your menu language
ress
on t
e remote contro
an
t
en use
/
/
o
se
ect
Setu
>
nsta
atio
>
anguage
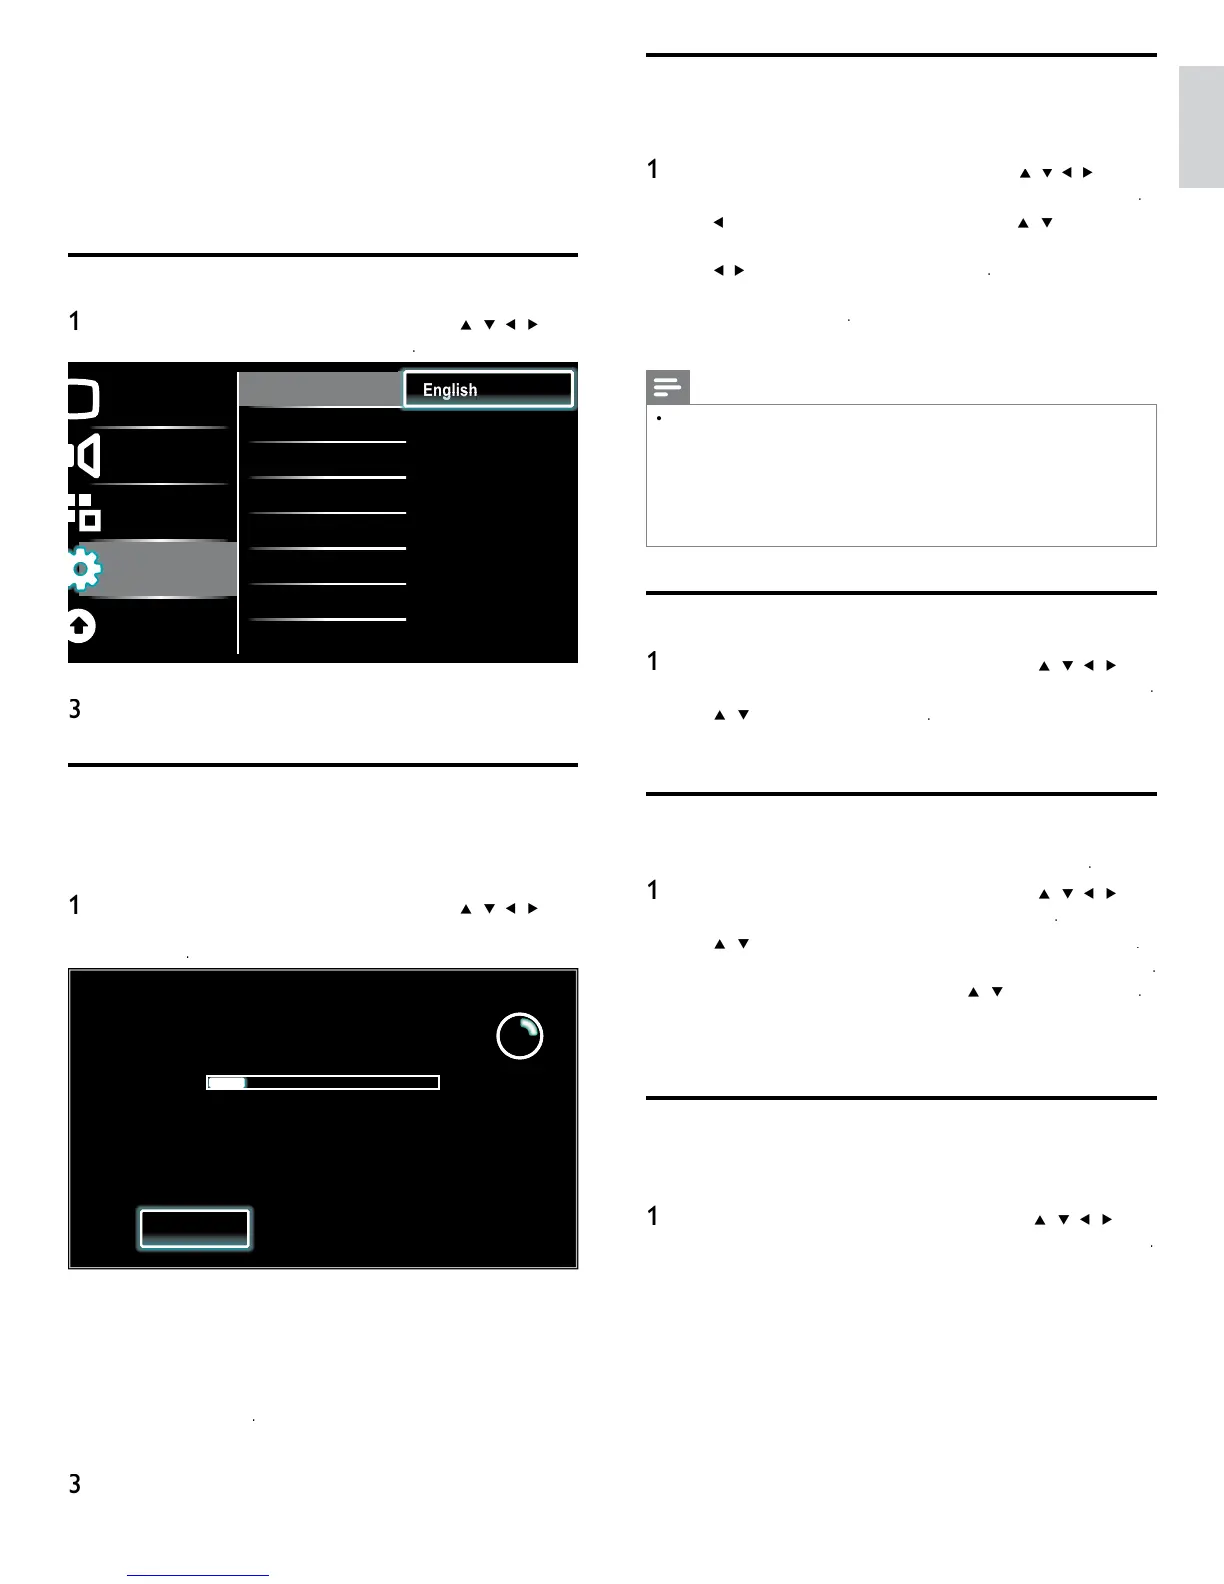
Picture
Sound
Features
Installation
Software update
Language
Channels
Preferences
Network
Clock
DivX(R) Video on Demand
DivX(R): Deregistration ...
Reset AV settings
English
Français
Español
2 Select a language and then press
to confi rm your choice
ress
to ex
t
Autoprogram
If you switch wires (e.g., between antenna and CATV) or if you move
he unit to a different area after the initial setting, you will need to
perform autoprogram
ress
on t
e remote contro
an
t
en use
/
/
o
se
ect
Setu
>
nsta
atio
>
hannel
>
utoprogram
>
Start no
System searching. Please wait...
Digital channels found: 0
Analog channels found: 0
Auto programming may take more than
20 minutes to complete.
Stop
ress
to start t
e
nsta
at
on
If you run
utoprogram
w
en you
ave
oc
e
c
anne
s, a
message appears as
ng to enter your
.
nter your
n or
e
o comp
ete t
e
nsta
at
on
If you have forgotten your PIN, reset it as described in ‘Changing
our PIN
on page 26
en autoprogramm
ng
s comp
ete, t
e
owest memor
ze
anne
w
e
sp
aye
o
ow t
e on-screen
nstruct
ons to com
ete t
e
nsta
at
on