Fitting an APM2 in an APM100 Enclosure
Instructions
15
MKT-0262 MPC-1748 Rev 02/13
APM2 Rough-In Installation Guide
2.2.2 Ensure Existing APM1 Enclosure Is Prepared For APM2 Unit
1. Make sure the wall surface around the existing enclosure is flat and clean with no wall damage or holes
beyond the electrical box.
2. A full 5.18" of the center of the existing enclosure will be occupied by the APM2 unit when it is installed.
Any wires or tubing in this region of the electrical box should be moved to the outer perimeter of the
enclosure so the APM2 can slide in without obstructions. You may need to use the knockouts on either
sides, tops or bottom as shown below.
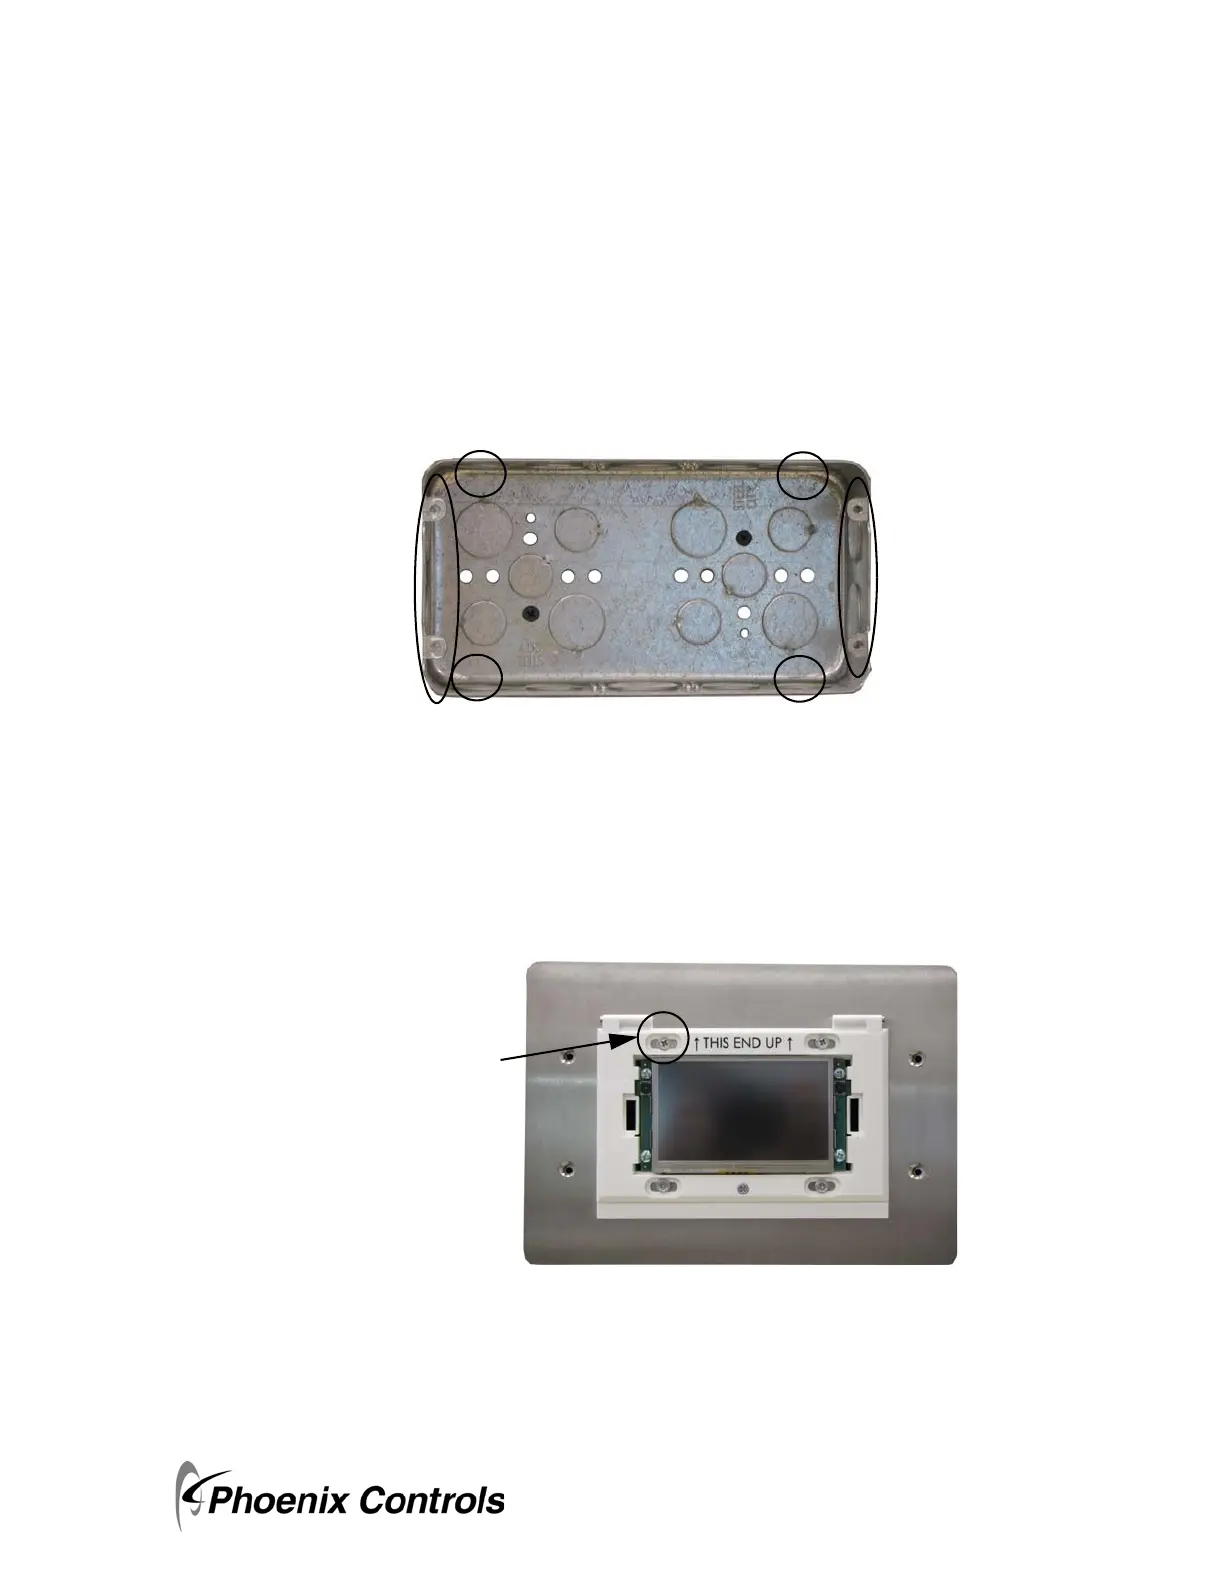
Figure 2-2. APM100 Knockout Locations
2.2.3 Attach the Base APM2 Unit
Mount the base APM2 unit to the adapter plate using the four supplied phillips head screws. Leaving screws
slightly loose adjust the cover so that it is square. Securely tighten so that the back of the cover is tight to the
finish wall surface.
Figure 2-3. Installing APM2 to the Adapter Plate
Four phillips head
screws provided
 Loading...