- 3 -
` Augmentation et renforcement du
– nombre de contacts de sécurité instanta-
nés par le raccordement d'un bloc d'ex-
tension de contacts PNOZsigma par le
biais d'un connecteur
– nombre de contacts de sécurité tempori-
sés ou instantanés par le câblage d'un
bloc d'extension de contacts ou de con-
tacteurs externes
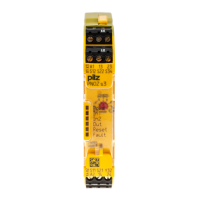
Montage
419461003
Grundgerät ohne Kontakterweiterungs-
block montieren:
` Stellen Sie sicher, dass der Abschluss-
stecker seitlich am Gerät gesteckt ist.
Grundgerät und Kontakterweiterungsblock
PNOZsigma verbinden:
` Entfernen Sie den Abschlussstecker seitlich
am Grundgerät und am Kontakterweite-
rungsblock.
` Verbinden Sie das Grundgerät und den Kon-
takterweiterungsblock mit dem mitgeliefer-
ten Verbindungsstecker bevor Sie die Geräte
auf der Normschiene montieren.
Montage im Schaltschrank
` Montieren Sie das Sicherheitsschaltgerät in
einen Schaltschrank mit einer Schutzart von
mindestens IP54.
` Befestigen Sie das Gerät mit Hilfe des Rast-
elements auf der Rückseite auf einer Norm-
schiene (35 mm).
` Bei senkrechter Einbaulage: Sichern Sie das
Gerät durch ein Halteelement (z. B. Endhalter
oder Endwinkel).
` Vor dem Abheben von der Normschiene das
Gerät nach oben oder unten schieben.
Installation
Install base unit without contact expander
module:
` Ensure that the plug terminator is inserted at
the side of the unit.
Connect base unit and PNOZsigma contact
expander module:
` Remove the plug terminator at the side of the
base unit and at the contact expander mod-
ule.
` Connect the base unit and the contact ex-
pander module to the supplied connector
before mounting the units to the DIN rail.
Installation in control cabinet
` The safety relay should be installed in a con-
trol cabinet with a protection type of at least
IP54.
` Use the notch on the rear of the unit to attach
it to a DIN rail (35 mm).
` When installed vertically: Secure the unit by
using a fixing element (e.g. retaining bracket
or end angle).
` Push the unit upwards or downwards before
lifting it from the DIN rail.
Montage
Installer l'appareil de base sans bloc d'ex-
tension de contacts :
` Assurez-vous que la fiche de terminaison est
insérée sur le côté de l'appareil.
Raccorder l'appareil de base et le bloc d'ex-
tension de contacts PNOZsigma :
` Retirez la fiche de terminaison sur le côté de
l'appareil de base et sur le bloc d'extension
de contacts.
` Avant de monter les appareils sur le rail DIN,
reliez l'appareil de base et le bloc d'exten-
sion de contacts à l'aide du connecteur four-
ni.
Montage dans une armoire
` Montez le bloc logique de sécurité dans une
armoire électrique ayant un indice de protec-
tion d'au moins IP54.
` Montez l'appareil sur un rail DIN à l'aide du
système de fixation situé sur la face arrière
(35 mm).
` Si l'appareil est monté à la verticale : sécuri-
sez-le à l'aide d'un élément de maintien
(exemple : support terminal ou équerre termi-
nale).
` Avant de retirer l'appareil du rail DIN,
poussez l'appareil vers le haut ou vers le bas.
Verdrahtung
117585931
Beachten Sie:
` Angaben im Abschnitt „Technische Daten“
unbedingt einhalten.
` Die Ausgänge 13-14, 23-24 sind unverzöger-
te Sicherheitskontakte, die Ausgänge 37-38,
47-48 sind rückfallverzögerte Sicherheits-
kontakte.
` Vor die Ausgangskontakte eine Sicherung
(s. techn. Daten) schalten, um das Ver-
schweißen der Kontakte zu verhindern.
` Berechnung der max. Leitungslänge I
max
im
Eingangskreis:
R
lmax
= max. Gesamtleitungswiderstand
(s. techn. Daten)
R
l
/ km = Leitungswiderstand/km
` Leitungsmaterial aus Kupferdraht mit einer
Temperaturbeständigkeit von 60/75 °C ver-
wenden.
` Sorgen Sie an allen Ausgangskontakten bei
kapazitiven und induktiven Lasten für eine
ausreichende Schutzbeschaltung.
583577611
` Bei U
B
48 – 240 V AC/DC: S21 mit Schutzlei-
tersystem verbinden
Wiring
Please note:
` Information given in the “Technical details”
must be followed.
` Outputs 13-14, 23-24 are instantaneous
safety contacts, outputs 37-38, 47-48 are
delay-on de-energisation safety contacts.
` To prevent contact welding, a fuse should be
connected before the output contacts (see
technical details).
` Calculation of the max. cable runs l
max
in the
input circuit:
R
lmax
= max. overall cable resistance (see
technical details)
R
l
/ km = cable resistance/km
` Use copper wire that can withstand
60/75 °C.
` Sufficient fuse protection must be provided
on all output contacts with capacitive and in-
ductive loads.
` With U
B
48 – 240 VAC/DC: Connect S21 to
the protective earth system
Raccordement
Important :
` Respectez impérativement les données indi-
quées dans la partie "Caractéristiques tech-
niques".
` Les sorties 13-14, 23-24 sont des contacts
de sécurité instantanés, les sorties 37-38,
47-48 sont des contacts de sécurité tempo-
risés à la retombée.
` Protection des contacts de sortie par des fu-
sibles (voir les caractéristiques techniques)
pour éviter leur soudage.
` Calcul de la longueur de câble max. I
max
sur
le circuit d'entrée :
R
lmax
= résistance max. de l'ensemble du
câblage (voir les caractéristiques techni-
ques)
R
l
/km = résistance du câblage/km
` Utilisez uniquement des fils de câblage en
cuivre résistant à des températures de
60/75 °C.
` Assurez-vous du pouvoir de coupure des
contacts de sortie en cas de charges capaci-
tives ou inductives.
` U
B
48 - 240 V AC/DC : Reliez S21 à la barre
de terre commune.
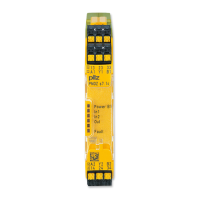
Betriebsbereitschaft herstellen Preparing for operation Mettre l'appareil en mode de marche
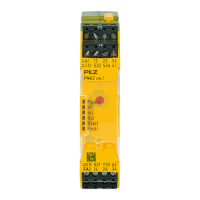
Betriebsarten und Verzögerungszeit
599372811
Die Betriebsart und die Verzögerungszeit wer-
den an den Drehschaltern am Gerät eingestellt.
Öffnen Sie dazu die Abdeckung auf der Front-
seite des Geräts.
WICHTIG
Verstellen Sie die Drehschalter nicht wäh-
rend des Betriebs. Ansonsten erscheint
eine Fehlermeldung, die Sicherheitskon-
takte öffnen und das Gerät ist erst wieder
betriebsbereit, nachdem die Versorgungs-
spannung aus- und wieder eingeschaltet
wurde.
Operating modes and delay time
The operating mode and delay time are set via
the rotary switches on the unit. You can do this
by opening the cover on the front of the unit.
NOTICE
Do not adjust the rotary switch during oper-
ation, otherwise an error message will ap-
pear, the safety contacts will open and the
unit will not be ready for operation until the
supply voltage has been switched off and
then on again.
Modes de fonctionnement et temporisation
Le mode de fonctionnement et la temporisation
se règlent sur le sélecteur de l'appareil. Ouvrez
le capot de protection sur la face avant de l'ap-
pareil.
IMPORTANT
Ne modifiez pas le sélecteur en cours de
fonctionnement. Sinon, l'appareil signale
un défaut et les contacts de sécurité
s'ouvrent. L'appareil n'est alors prêt à re-
fonctionner qu'après avoir coupé puis re-
mis en marche la tension d'alimentation.
R
lmax
R
l
/ km
I
max
=
R
lmax
R
l
/ km
I
max
=
R
lmax
R
l
/ km
I
max
=

 Loading...