EasyManua.ls Logo

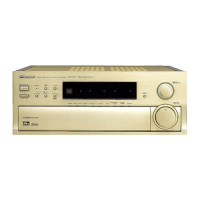
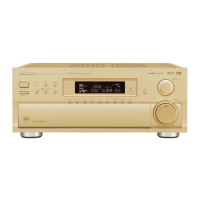
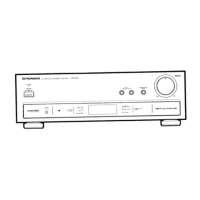
Pioneer VSA-E07 - Service Manual

Pioneer VSA-E07
25 pages
Print Icon
To Next Page IconTo Next Page
Loading...
ORDER NO.
PIONEER CORPORATION 4-1, Meguro 1-chome, Meguro-ku, Tokyo 153-8654, Japan
PIONEER ELECTRONICS SERVICE, INC. P.O. Box 1760, Long Beach, CA 90801-1760, U.S.A.
PIONEER ELECTRONIC (EUROPE) N.V. Haven 1087, Keetberglaan 1, 9120 Melsele, Belgium
PIONEER ELECTRONICS ASIACENTRE PTE. LTD. 253 Alexandra Road, #04-01, Singapore 159936
PIONEER CORPORATION 1999
RRV2203
T – ZZK SEPT. 1999 Printed in Japan
CONTENTS
1. CONTRAST OF MISCELLANEOUS PARTS
........
2
2. PCB CONNECTION DIAGRAM
............................
9
3. SCHEMATIC DIAGRAM
.....................................
10
4. REMOTE CONTROL UNIT
.................................
20
THIS MANUAL IS APPLICABLE TO THE FOLLOWING MODEL(S) AND TYPE(S).
AUDIO/VIDEO MULTI-CHANNEL AMPLIFIER
VSA-E07
Type
Model
Power Requirement
The voltage can be converted by
VSA-E07
the following method.
HY
AC220-230V
AC240V,
HV
AC230V
AC240V,
: Alter the wiring of the Power-supply block at the primary winding of Power-transformer referring to the "Line Voltage Selection" described
in Service Manual.
Model No. Order No. Remarks
VSX-908RDS-G/HY RRV2166
This service manual should be used together with the following manual(s):

Other manuals for Pioneer VSA-E07

Questions and Answers

  • B
    boltonkennethAug 15, 2025
    What to do if my Pioneer VSA-E07 power does not turn ON?
    • C
      cody89Aug 15, 2025
      First, ensure the power plug is securely connected to the wall outlet. Then, check that the main power button is set to the ON position (_). If the issue persists, the protection circuit might be activated; disconnect the power plug from the outlet, wait a few seconds, and then plug it back in.
  • K
    kpriceAug 18, 2025
    Why is my Pioneer Amplifier not responding to the remote control?
    • A
      Aaron GarciaAug 18, 2025
      Several factors could be the reason. Start by replacing the remote control batteries. Ensure you are within 7 meters and 30° of the remote sensor on the front panel. Remove any obstacles between the amplifier and the remote control. Avoid strong light shining onto the unit’s remote control signal sensor window. Check if a cord is connected to the CONTROL• IN terminal and ensure it's connected to the correct jack.
  • J
    James MillerAug 21, 2025
    Why is there no sound output when a function is selected on my Pioneer VSA-E07 Amplifier?
    • M
      Micheal KirbyAug 21, 2025
      Several factors could be at play. First, make sure all components are correctly connected. Check if the sound is muted and, if so, press the MUTE button on the remote control. Ensure the master volume is adequately adjusted. Also, verify that the TAPE 2 MONITOR button is not activated. Finally, confirm that the correct speakers are selected by pressing the SPEAKERS (A/B) button and that the DIGITAL/ANALOG switch is properly set.
  • E
    ericahallAug 25, 2025
    What to do if there is no sound from surround or center speakers of Pioneer VSA-E07 Amplifier?
    • Y
      Yvette RobersonAug 26, 2025
      The issue might stem from incorrect speaker settings, low rear and/or center levels, or disconnected speakers. Connect the speakers. Also you can check the speaker levels.
  • M
    mcculloughsamuelAug 27, 2025
    What to do if my Pioneer Amplifier unit does not respond when the buttons are pressed?
    • A
      Anthony GibsonAug 27, 2025
      The issue might be caused by static electricity due to dry air. Try disconnecting the power plug from the outlet, waiting a few seconds, and then plugging it back in.
  • I
    ihallAug 30, 2025
    What to do if the subwoofer output is very low on Pioneer VSA-E07 Amplifier?
    • L
      lweberAug 30, 2025
      The settings might be routing the signal away from the subwoofer. To increase the signal to the subwoofer, set it to PLUS or choose SMALL for the FRONT speakers.
  • S
    Sarah DuarteSep 2, 2025
    Why does sound only come from some components and not digital components on my Pioneer VSA-E07?
    • I
      ilawrenceSep 2, 2025
      This could be due to an incorrect SIGNAL SELECT setting. Set SIGNAL SELECT to "AUTO" according to the type of connections made. Alternatively, the digital inputs may be assigned incorrectly, or not at all. Ensure the digital input settings are correctly configured.
  • C
    colemanaustinSep 5, 2025
    What to do if no sound is output or there is noise when playing DTS software on Pioneer Amplifier?
    • A
      Adam SuttonSep 5, 2025
      First, ensure that SIGNAL SELECT is not set to "ANALOG". Make digital connections and set SIGNAL SELECT to "DIGITAL". If the issue persists, the problem might be with the DVD player. Set the digital volume level of the player to full, or to the neutral position.
  • C
    Casey HicksSep 8, 2025
    Why is the sound output intermittent when playing DTS software on my Pioneer VSA-E07?
    • F
      froststephenSep 8, 2025
      The disc being played back might have a large amount of information. Use the STANDARD mode to get the best results.
  • G
    gomezmadisonSep 12, 2025
    Why is the display dark on my Pioneer VSA-E07 Amplifier?
    • H
      halebillySep 12, 2025
      The FL DIMMER button may have been pushed. Press FL DIMMER on the front panel repeatedly to return to the default setting.

Summary

Contrast of Miscellaneous Parts

PCB Assemblies Contrast

Details on PCB assemblies and their part numbers for different models.

Complex Assembly Contrast

Contrast for complex assemblies, listing part numbers for different models.

Front and Vamp Assembly Contrast

Contrast for front and vamp assemblies, showing part numbers.

V-Amp Assembly Contrast

Contrast for V-Amp assemblies, detailing part numbers.

Display Assembly Contrast

Contrast for display assemblies, listing part numbers.

Packing Section Parts

List of parts related to packing, including operating instructions.

Exterior Section Parts

Heat Sink Section Parts

Details of parts within the heat sink section.

Front Panel Section Parts

List of components for the front panel section.

Exploded Views

Exterior Section Exploded View

Diagram showing the exploded view of the exterior section and its components.

Front Panel Section Exploded View

Diagram illustrating the exploded view of the front panel section.

Contrast of PCB Assemblies

External In (Extra-5.1) Assembly Contrast

Comparison of External In (Extra-5.1) assemblies, listing part numbers.

A-Pinjack Assembly Contrast

Contrast for A-Pinjack assemblies, detailing part numbers and remarks.

Connection Assembly Contrast

Comparison of Connection assemblies, showing part numbers.

V-Amp Assembly Contrast

Contrast for V-Amp assemblies, listing part numbers.

Main Control Assembly Contrast

Regulator Assembly Contrast

Contrast for Regulator assemblies, showing part numbers.

Trans 2-2 Assembly Contrast

Comparison of Trans 2-2 assemblies, listing part numbers.

Video Assembly Contrast

S-Video Assembly Contrast

Comparison of S-Video assemblies, listing part numbers.

Display Assembly Contrast

Contrast for Display assemblies, showing part numbers.

Rotary Encoder Assembly Contrast

Primary Assembly Contrast

Contrast for Primary assemblies, detailing part numbers.

Digital I;O Assembly Contrast

Comparison of Digital I/O assemblies, listing part numbers.

Volume Assembly PCB Parts List

PCB Connection Diagram

Volume Assembly PCB Connection Diagram

Diagram showing PCB connections for the Volume Assembly (Side A and Side B).

Schematic Diagram

Main Control Assembly Schematic Diagram (1;3)

Schematic diagram for the Main Control Assembly, part 1 of 3.

Main Control Assembly Schematic Diagram (3;3)

Schematic diagram for the Main Control Assembly, part 3 of 3.

V-Amp Assembly Schematic Diagram (1;2)

Schematic diagram for the V-Amp Assembly, part 1 of 2.

Regulator, Trans 1 & Trans 2-2 Schematic Diagram

Schematic diagrams for Regulator, Trans 1, and Trans 2-2 assemblies.

Phone;Video, Display, Rotary Encoder & Volume Schematic

Schematics for Phone/Video, Display, Rotary Encoder, and Volume assemblies.

Remote Control Unit (AXD7217;CU-VSA032)

Remote Control Exploded Views and Parts List

Exploded views and a detailed parts list for the remote control unit.

Remote Control Schematic Diagram

Schematic diagram for the remote control unit.

Remote Control PCB Diagram

Printed circuit board diagram for the remote control unit.

Pioneer VSA-E07 Specifications

Amplifier Section IconAmplifier Section
continuous power output (stereo mode)130 W + 130 W (DIN 1 kHz, THD 1 %, 6Ω)
continuous power output (surround mode)130 W + 130 W / 130 W center (DIN 1 kHz, THD 1 %, 6Ω)
rated power output100 W + 100 W (20 Hz-20 kHz, THD 0.09 %, 8Ω)
input sensitivity/impedance (phono mm)4.7 mV/47 kΩ
input sensitivity/impedance (others)335 mV/47 kΩ
phono overload level120 mV (T.H.D. 0.1 %, 1 kHz)
frequency response (phono mm)20 Hz to 20, 000 Hz ±0.3 dB
frequency response (others)5 Hz to 100, 000 Hz dB–3
output level/impedance335 mV/1 kΩ
tone control (bass)± 6 dB (100 Hz)
tone control (treble)± 6 dB (10 kHz)
loudness+3 dB (100 Hz/10 kHz)
signal-to-noise ratio (phono mm)80 dB
signal-to-noise ratio (others)101 dB
Video Section (S jack) IconVideo Section (S jack)
input sensitivity/impedance1 Vp-p/75 Ω luminance, 0.268 Vp-p/75 Ω chrominance
output level/impedance1 Vp-p/75 Ω luminance, 0.268 Vp-p/75 Ω chrominance
frequency response5 Hz to 10 MHz dB–3
signal-to-noise ratio65 dB
isolation55 dB (3.58 MHz)
Video Section (Composite) IconVideo Section (Composite)
input sensitivity/impedance1 Vp-p/75 Ω
output level/impedance1 Vp-p/75 Ω
frequency response5 Hz to 10 MHz dB+0–3
signal-to-noise ratio65 dB
isolation55 dB
Power IconPower
power requirements (UK model)AC 230 V, 50/60 Hz
power requirements (European model)AC 220 - 230 V, 50/60 Hz
power consumption500 W
power consumption in standby mode1.0 W
AC outlets (SWITCHED)Total 100 W MAX.
AC outlets (UNSWITCHED)100 W MAX.
Weight and Dimensions IconWeight and Dimensions
dimensions420 (W) × 173 (H) × 470 (D) mm
weight17.2 kg

Related product manuals