THE NEW PIPER AIRCRAFT, INC.
PA-32-301FT / 301XTC
MAINTENANCE MANUAL
PAGE 16
Jun 1/03
5C22
74-10-00
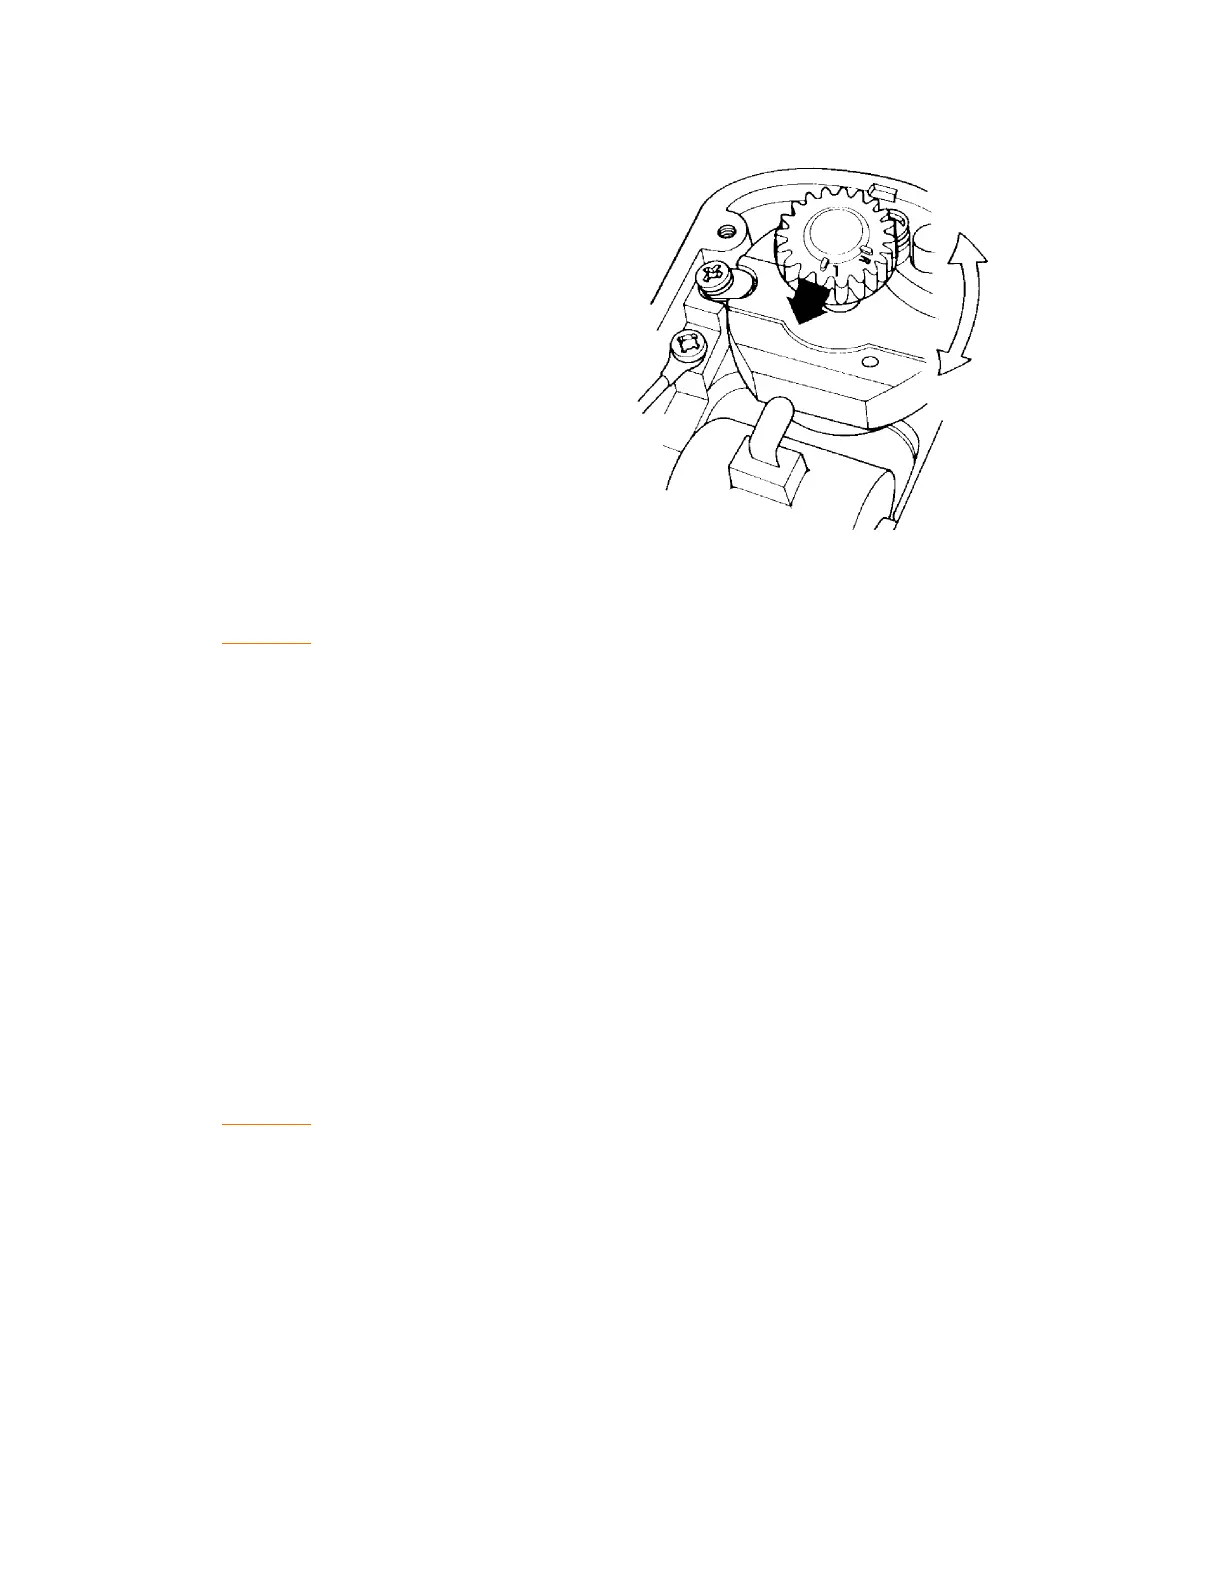
(15) Align the "L" or "R" (depending on the
rotation of the magneto—look at data
plate) on the rotor gear so that it
points up, toward the high tension lead
of the coil. Secure rotor shaft to
prevent rotation during assembly.
Alignment of rotor gear is critical. (See
Figure 14.)
(16) Align the "L" or "R" hole in the
distributor gear with the "L" or "R" in
the distributor block. Use "L" for left-
hand rotation and "R" for right-hand
rotation magnetos.
CAUTION: DO NOT ROTATE MAGNETO ROTOR SHAFT WITH THE T-118 TIMING PIN
INSERTED IN THE DISTRIBUTOR BLOCK. IF ROTOR SHAFT IS ROTATED
WITH TIMING PIN INSERTED, THE MAGNETO MUST BE DISASSEMBLED
AND INSPECTED FOR DISTRIBUTOR BLOCK AND GEAR DAMAGE.
(17) Lock the distributor gear in place with the T-118 timing pin through the appropriate hole in the
block and gear. Then:
(a) Place distributor block spacers on magneto frame.
(b) Place distributor block on magneto frame. The distributor gear and rotor gear are properly
meshed when the index mark on the rotor gear aligns with the index mark on the
distributor block.
(c) Secure distributor block to frame with screws provided.
(18) Connect condenser wire
(a) Connect condenser wire to the remaining terminal of the contact assembly.
(b) Attach the terminal with the lead pointing left.
(19) In 6XT S/N’s 3255001 & up only (i.e. - pressurized magnetos), install the distributor housing
gasket.
(20) Insert the top boss of the distributor housing into its mating pilot on the magneto frame.
CA
UTION: MAKE SURE THE CARBON BRUSH IS CONTAINED WITHIN THE
DISTRIBUTOR SHAFT DURING ASSEMBLY. IF THE CARBON BRUSH
CATCHES ON THE SIDE OF THE DISTRIBUTOR SHAFT, THE COIL STRAP
WILL BE BENT INTO THE WRONG POSITION DURING ASSEMBLY.
(21) Gently rotate the distributor housing onto the magneto frame.
(22) Secure the housing with three long screws and one short screw. Torque all four to 24 in-lbs.
(23) Remove T-118 timing pin.
Rotor Gear Alignment
Figure 14