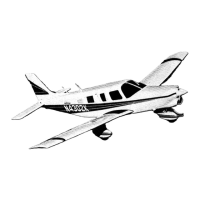
LANCE
II SERVICE
MANUAL
5. Separate the primary control cable (14 or 15) at the turnbuckle (12 or 16)
located in the
floor opening aft of
the main spar.
6. Remove
the cable pulleys (8) attached
to the lower section of the
control
column
tee bar assembly by removing
the pulley attachment bolt
(21).
7. Move the cable guard (20) located under the pulley cluster (9) below the fuel
selector by removing the cotter pin from the exposed end of the guard and sliding it to the
left or right as required.
8. Remove the cotter pins
used as cable guards at the pulley
(10) in the forward
area of the floor opening
aft of the main
spar.
9. Disconnect the cable (14 or
15) from the control chain (4)
at the control
column
tee bar assembly by removing
the cotter pin, nut, bolt and bushing
(23) that
connect the
two together. Secure the chains
in some manner to prevent them from
unwrapping from around the sprockets.
10. Draw the
cable back through
the floor tunnel.
c.
The primary control
cable (13 or
17) in either wing
may be removed
by the
following procedure:
1. Remove
the access
plate to
the aileron
bellcrank (6)
located on
the underside
of
the wing forward of the inboard end of the aileron.
2. If not
previously disconnected,
separate the
cable at
the turnbuckle
(12 or
16)
located in the floor opening aft of the main spar.
3. Disconnect
the pulley
guard cotter
pin from pulley
(28).
4.
Disconnect
the
cable from
the forward
end
of the
aileron bellcrank
by removing
the
cotter
pin, nut,
washer
and
bolt.
5. Draw
the
cable
from the
wing.
d. Either
balance cable (18
or 19) may be
removed by the
following procedure:
1. Separate
the balance
cable
at the
turnbuckle
(24) in
the right
side of
the floor
opening
aft of the
main spar.
2. If
the left
balance
cable is
to be removed,
remove
the
cotter
pin used
as a cable
guard
at the
pulley (
1) in the
center
of the
floor opening.
3.
Remove
the access
plate
to the
aileron bellcrank
(6) located
on the
underside
of
the
wing forward
of the
inboard end
of the
aileron.
4. Disconnect
the cable
from the
aft end
of the
aileron bellcrank
by removing
the
cotter pin,
nut, washer
and bolt.
5.
Draw
the cable
from
the wing.
5-8. INSTALLATION
OF AILERON
CONTROL
CABLES.
(Refer
to Figure
5-2.)
a.
The
installation
of either
the
right
or left
primary
control
cable
(14 or
15)
that is
located
in the
fuselage
may
be
accomplished
as follows:
1.
Draw
the
cable
through
the
fuselage
floor
tunnel.
2. Connect
the cable
to the
end of the
control
chain (4)
and secure
using
bushing,
bolt,
nut and
cotter
pin
(23).
3. Place
the cable
around
the pulley
(9)
that is located
in
the tunnel,
below
the fuel
selector.
Install
cable
guard
(20) and
secure
with
cotter
pin.
4. Position
cables
and install
the
cable pulleys
(8)
that attach
to the
lower
section
of
the tee
bar
assembly.
Secure
with
bolt,
washer
and
nut (21).
5. Place
the cable
around
the pulley
(10)
that is
located
in the floor
opening
just
aft of
the main
spar and
install
cotter
pin cable
guards.
6.
If the
primary
control
cable
in the
wing
is installed,
connect
the control
cable
ends
at the
turnbuckle
(12 or
16) located
in the
floor opening
aft
of the
main spar.
Issued:
1/3/78
F20SURFACE
CONTROLS
IF20-

 Loading...


