EasyManuals Logo

Piper PA-32RT-300T User Manual

Piper PA-32RT-300T
568 pages
To Next Page IconTo Next Page
To Previous Page IconTo Previous Page
Page #432 background imageLoading...
Page #432 background image
LANCE
II SERVICE
MANUAL
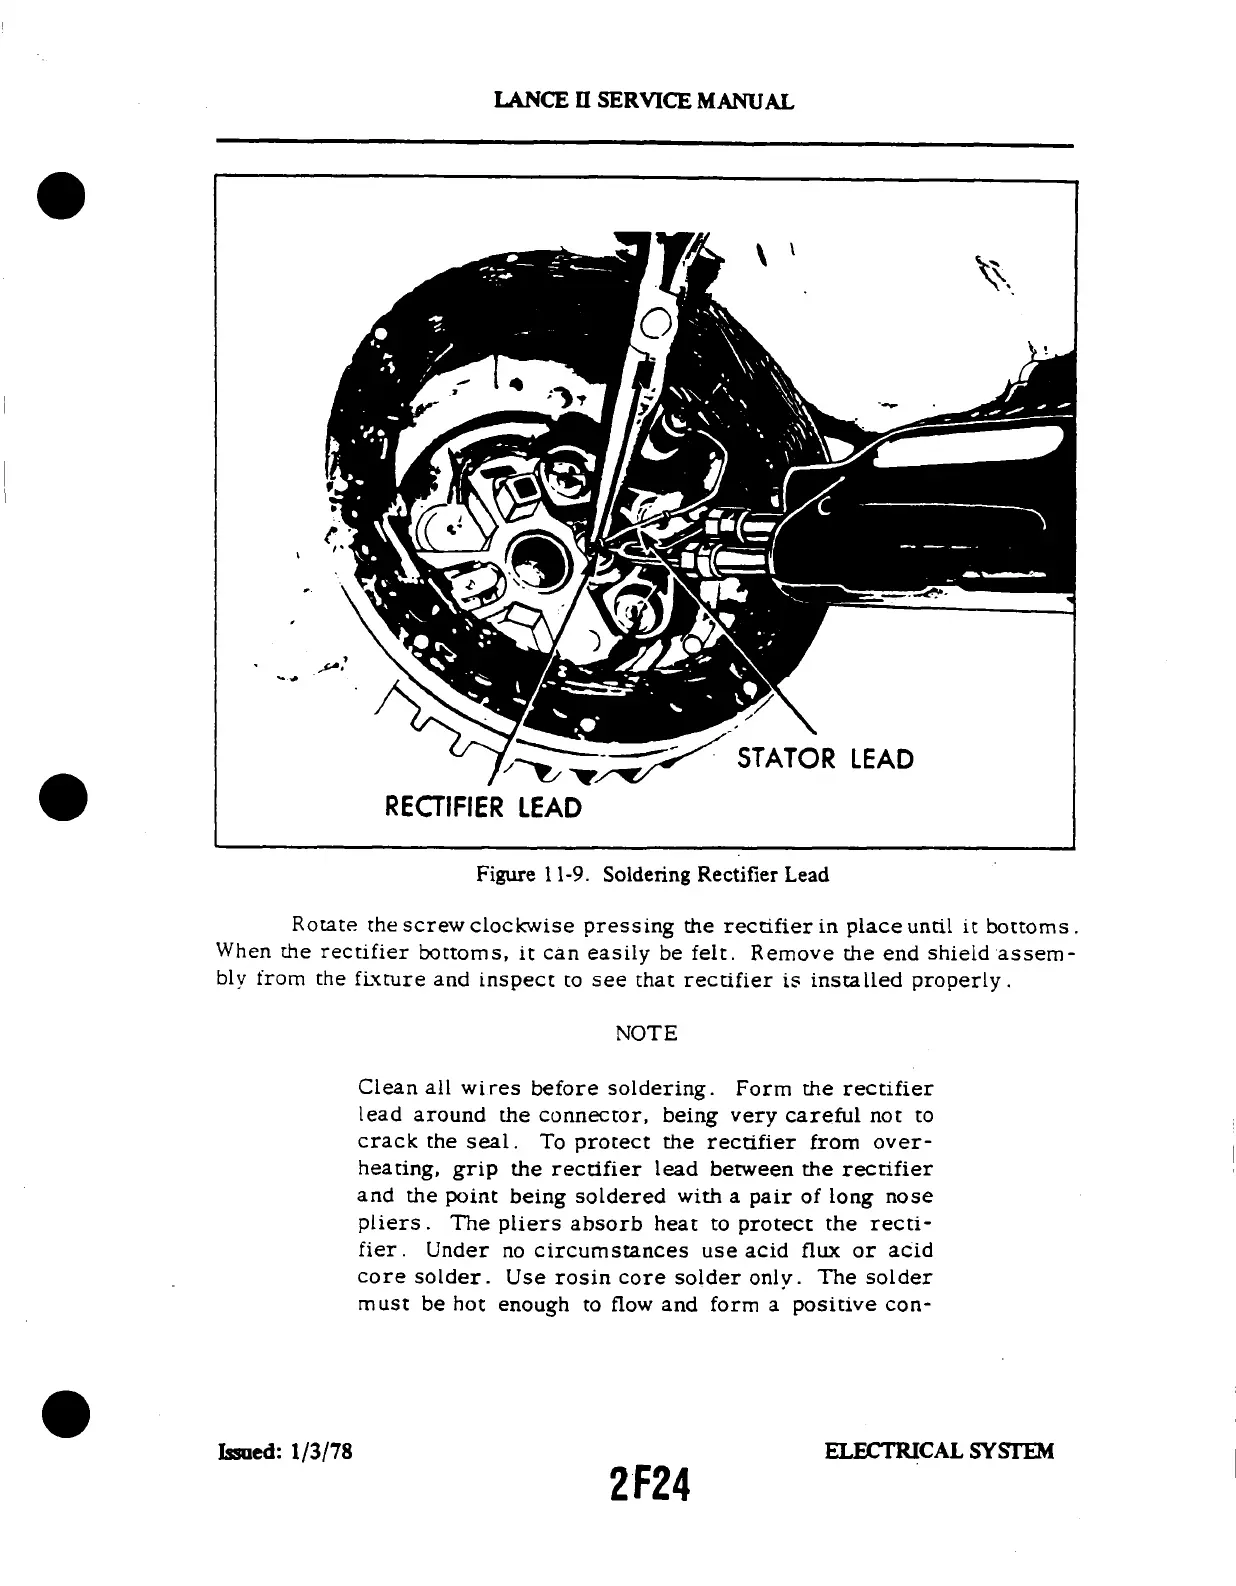
RECTIFIER LEAD
Figure
11-9. Soldering
Rectifier Lead
Rotate the
screw clockwise
pressing
the
rectifier in
place until
it bottoms.
When the
rectifier bottoms,
it can easily be
felt. Remove
the end shield assem-
bly
from the fixture
and inspect
to see that rectifier
is installed
properly.
NOTE
Clean
all wires
before soldering.
Form
the rectifier
lead around
the connector, being
very careful not to
crack
the seal.
To protect
the rectifier
from over-
heating, grip the
rectifier lead between
the rectifier
and the point being soldered with a pair of long nose
pliers. The pliers absorb heat to protect the recti-
fier. Under no circumstances use acid flux or acid
core solder.
Use rosin core
solder only. The solder
must be hot enough
to flow and form a positive
con-
Issued: 1/3/78
ELECTRICAL SYSTEM
2F24

Table of Contents

Questions and Answers:

Question and Answer IconNeed help?

Do you have a question about the Piper PA-32RT-300T and is the answer not in the manual?

Piper PA-32RT-300T Specifications

General IconGeneral
BrandPiper
ModelPA-32RT-300T
CategoryAircrafts
LanguageEnglish

Related product manuals