User’s Manual of IVS-H125 Series
16
Figure 2-2 Mounting the Chassis in a Rack
2.3.3 Wall Mount Installation
There are two wall holes on the rear of IVS-H125 and IVS-H125P that allows the video
server can be easily installed for wall mounting. To install the IVS-H125 and IVS-H125P on
the wall, please follows the instructions described below.
1. To measure the holes spaces and screw the screws on the wall.
2. To hitch the IVS-H125 with screws to fix the video server on the wall.
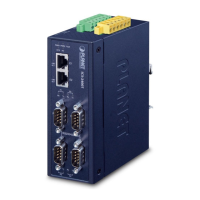
2.3.4 [Optional] - DIN-Rail Mount Installation
There are two DIN-Rail holes on the right and left sides of the
IVS-H125 and IVS-H125P that allows the video server can be
easily installed with DIN-Rail mounting. The PLANET optional
DIN-Rail mounting Kit – RKE-DIN can be ordered separately.
When need to replace the wall mount application with DIN-Rail
application on the IVS-H125 and IVS-H125P, please refer to following figures to screw the
DIN-Rail on the video server. To hang the IVS-H125 AND IVS-H125P, follow the below steps:

 Loading...