Page 11
ENGLISH
Polaris
®
PB4SQ™ Booster Pump
|
Installation and Operation Manual
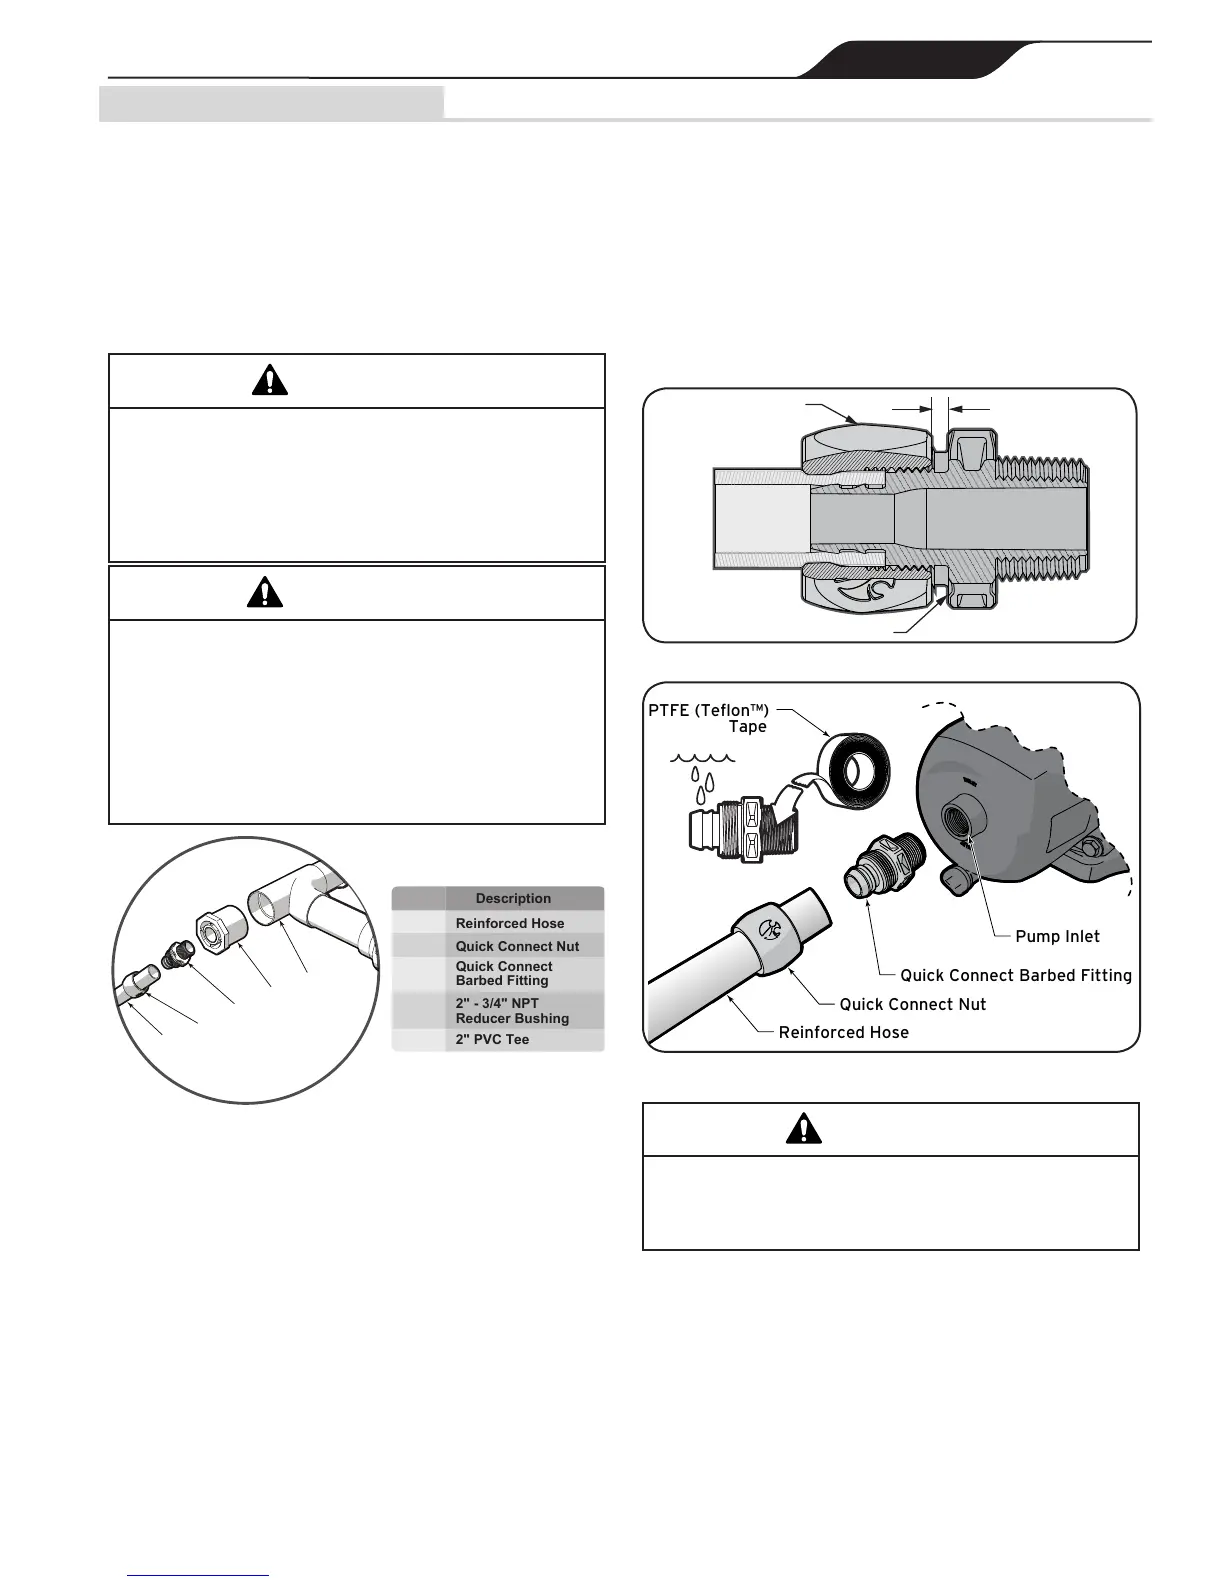
4.4 Plumbing Connections
1. Disconnect power to the ltration system at the breaker.
2. Install a 2" PVC tee downstream from the lter and
upstream from any sanitation or chlorination equipment.
See Figure 7.
3. Connect one leg of the tee to the pool return line.
4. On the open leg of the tee install a PVC 2" to 3/4"
NPT reducer bushing. Be sure to use approved PVC
cement. DO NOT INSTALL with open leg facing up.
See Figure 7.
The pump is not self priming and must be lled
with water from an upstream lter pump. Never
run the booster pump without water. Running the
pump “dry” for any length of time can cause severe
damage to both the pump and motor and will void
the warranty
CAUTION
PVC cement and primer can produce vapors that
can be hazardous to your health. Use PVC cement
to join pipes only in a well ventilated area where
vapors cannot accumulate.
Pipe dope should NEVER be used on barb threads.
Pipe dope will severely weaken the plastic, causing
leakage and may cause the plastic to fracture. DO
NOT OVERTIGHTEN
WARNING
Callout
A
B
C
D
E
Description
Reinforced Hose
Quick Connect Nut
Quick Connect
Barbed Fitting
2" - 3/4" NPT
Reducer Bushing
2" PVC Tee
Figure 7. Plumbing Transition Components
5. Apply 4-6 wraps of PTFE (Teon™) tape to the tapered
threads on all four of the barbed ttings. Be sure to wrap
the tape in the opposite direction that the male threads will
be turning in order to create a water tight seal. See Figure 9.
6. Install the quick connect barbed tting into the
reducer bushing.
7. Cut the reinforced hose to length. Make sure the cut is
square and clean.
8. Slide the quick connect nut over the reinforced hose.
See Figure 9.
9. Use water to lubricate the barbs. See Figure 9.
10. Slide the hose over the barbs until a snug t is achieved.
See Figure 8.
11. Tighten the quick connect nuts onto the barbed connector
hand tight only. DO NOT OVERTIGHTEN.
12. Install a second quick connect barbed tting at the pump
suction inlet. See Figure 9.
13. Repeat steps 6-11 to install the reinforced hose
at the pump inlet.
14. Install the third quick connect barbed tting
at the pump outlet.
15. Repeat steps 6-11 to install the reinforced hose
at the pump outlet.
Connector
Barb
Reinforced
Hose
Nut Gap
Figure 8. Quick Connect Fitting
Quick Connect Barbed Fitting
Figure 9. Quick Connect Installation
Be careful not to overtighten any pipe tting on the
inlet or outlet of the booster pump. Overtightening
can cause the housing to crack.
CAUTION
16. Run the Reinforced hose to the dedicated return line.
17. Make sure the dedicated return line has a
female 3/4" NPT tting.
18. Install the fourth quick connect barbed tting at the
dedicated return line.
19. Repeat steps 6-11 to install the reinforced hose at the
dedicated return line.
 Loading...