13
Table of Contents To navigate between hyperlink topics using a keyboard, select ALT+◄ or ALT+►.
SETUP & PRE-OPERATION
▲ Ensure that the generator is OFF and on a level surface for all setup and pre-operation checks.
▲ When working with a battery, read and comply with all Battery Safety Alerts and warnings.
Your generator ships from the factory in a pre-operation state. In this section, to enable generator startup, you
will complete the following steps: 1) Connect and 2) charge the 12V battery completely, 3) add engine oil, and 4)
add fuel.
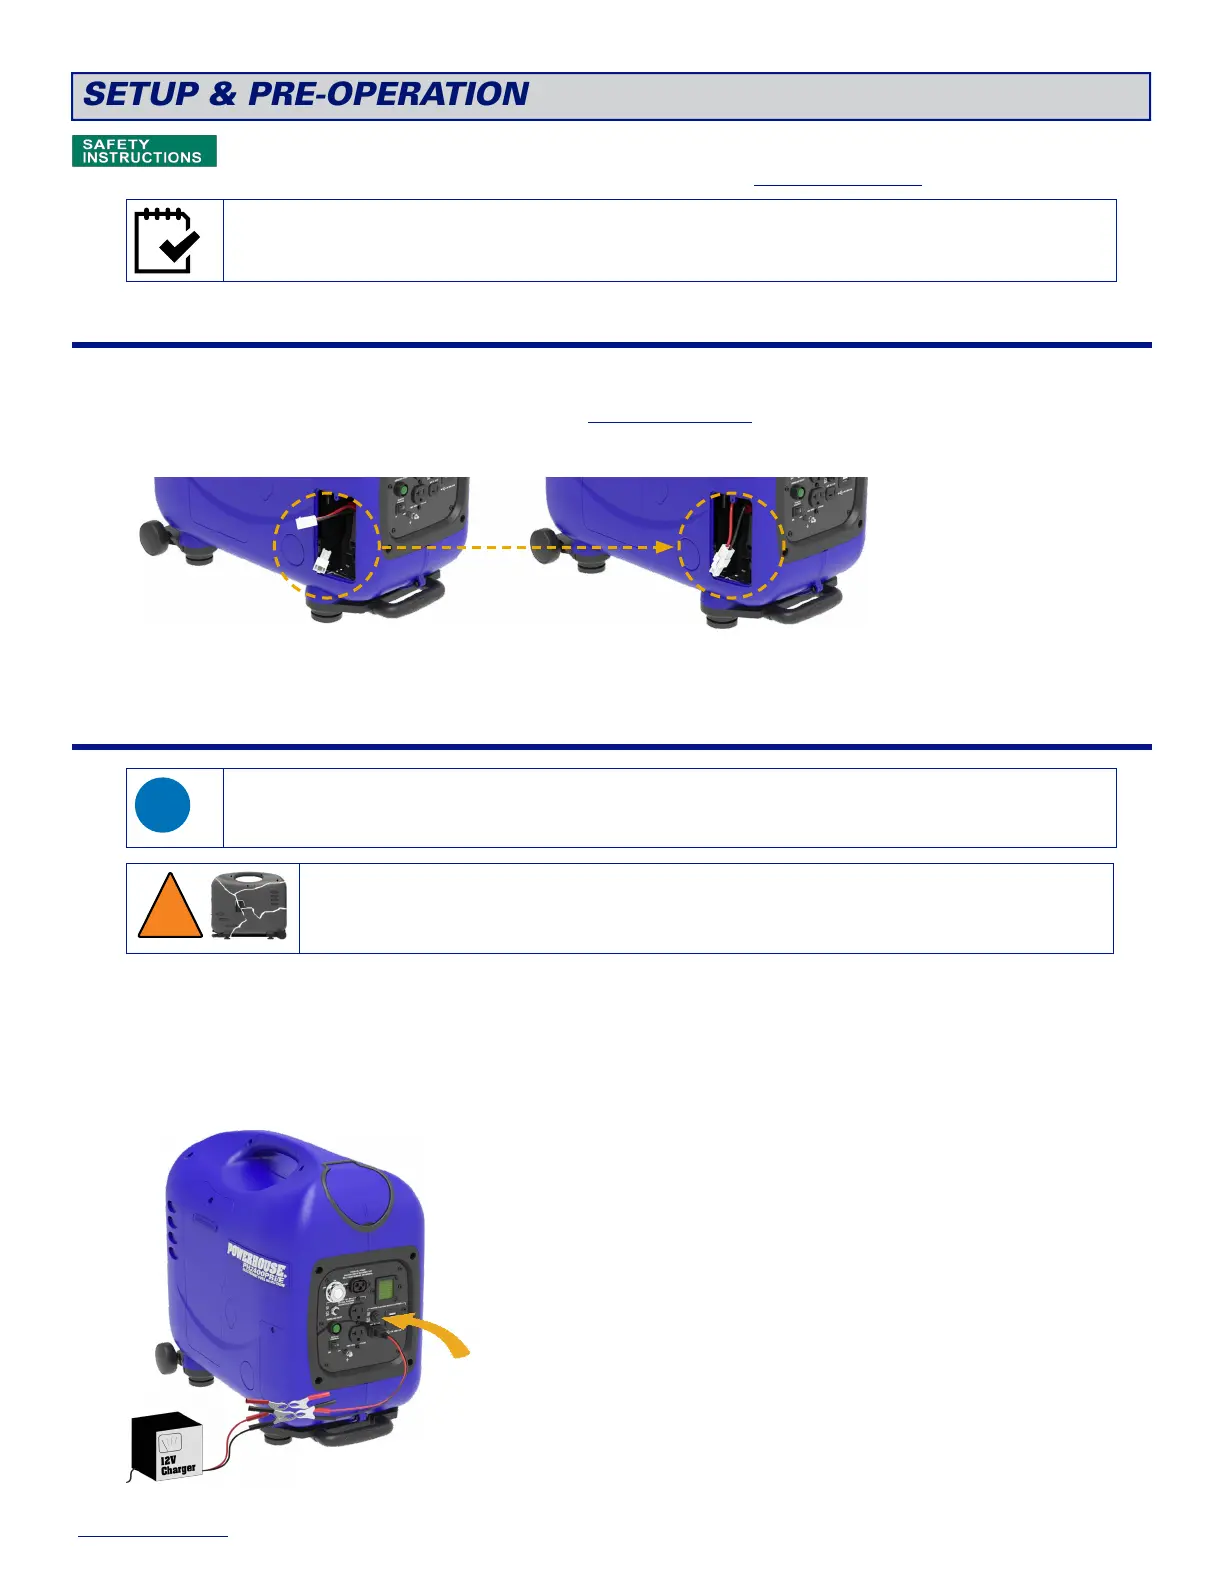
Connecting the 12V Battery
To connect the 12V battery:
1. On the left side of the generator, remove the screw and the Battery Access Door.
2. Plug the quick connect cable into the wiring harness.
3. Reinstall the battery access door and screw back onto the generator.
Charging the 12V Battery
The generator does not have to be running to back-charge the battery, and there are no special control panel
settings to enable the battery to charge.
▲ Do not use a battery charger that exceeds 12V 5A, which may cause the battery to swell and burst
leading to personal injury and property damage.
▲ To prevent over-charging, use a battery charger with an automatic shut-off feature.
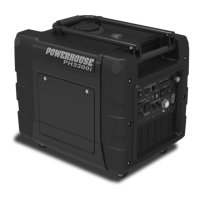
To charge the 12V battery:
1. Choose an option to connect battery charging cables.
To connect an external 12V (max 5A) battery charger to the DC receptacle:
a. Connect the positive and negative alligator clips to the corresponding wires on the 12V charger.
b. Plug the T-style end of the charging cable into the DC receptacle.