5
Please remove both of the foam supports holding the printer in place and
make certain that you can grasp the
frame firmly, and then lift the printer out of the carton.
Now you can see the top of the printer along with more boxes inside. The large box with the black wire is the
accessory box. This contains the dual extruder heads, SD card, and other important components. Don't
remove the accessory box or its contents yet. Note: Do not lift the box by the black cable! Doing so could cause
damage to the component.
Please remove the protective wrap and you can now open the accessory box and remove the accessory sleeve. You
will find the dual extruder heads in the protective packaging along with the black cable, carefully remove it and
place it on your work surface. Remove the cardboard packing material and take the accessory box from the
printer, set it aside for later.
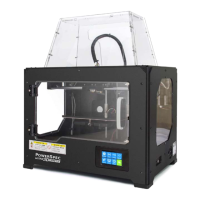
The build platform should now be visible. It is an aluminum plate covered in a thin polyamide film. This is the
surface that your objects will be printed on. Note: Remember to not remove this film.
The next step is to raise the build platform; there are two ways to do this:
1. Turn the screw which is behind the rotating platform.
2. Grasp the printing platform with one hand on each side raising it slowly while keeping it level.
Stop once the platform is just a little below the bronze nozzle.
Now you can see two empty boxes, you can easily take them out after removing the remaining packaging.