5.23 Elliptical Fitness Crosstrainer
Page 57
Procedure 7.12 - Replacing a Speed Sensor Assembly
Procedure
1. Set the on/off switch in the “off” position.
WARNING
Before continuing with this procedure, review the Warning and Caution statements listed in
Section One, Things You Should Know.
2. Remove the left and right cover sections as described in Procedure 7.1.
3. Disconnect the speed sensor cable from the lower PCA. (See Diagram 7.4 or Diagram 7.5).
4. For serial codes DF and SK, remove the hardware that secures the speed sensor assembly
to the drive unit. remove the speed sensor. See Diagram 7.14.
5. For serial code AA23, unsnap the speed sensor from the speed sensor clip and remove the
speed sensor. See Diagram 6.4.
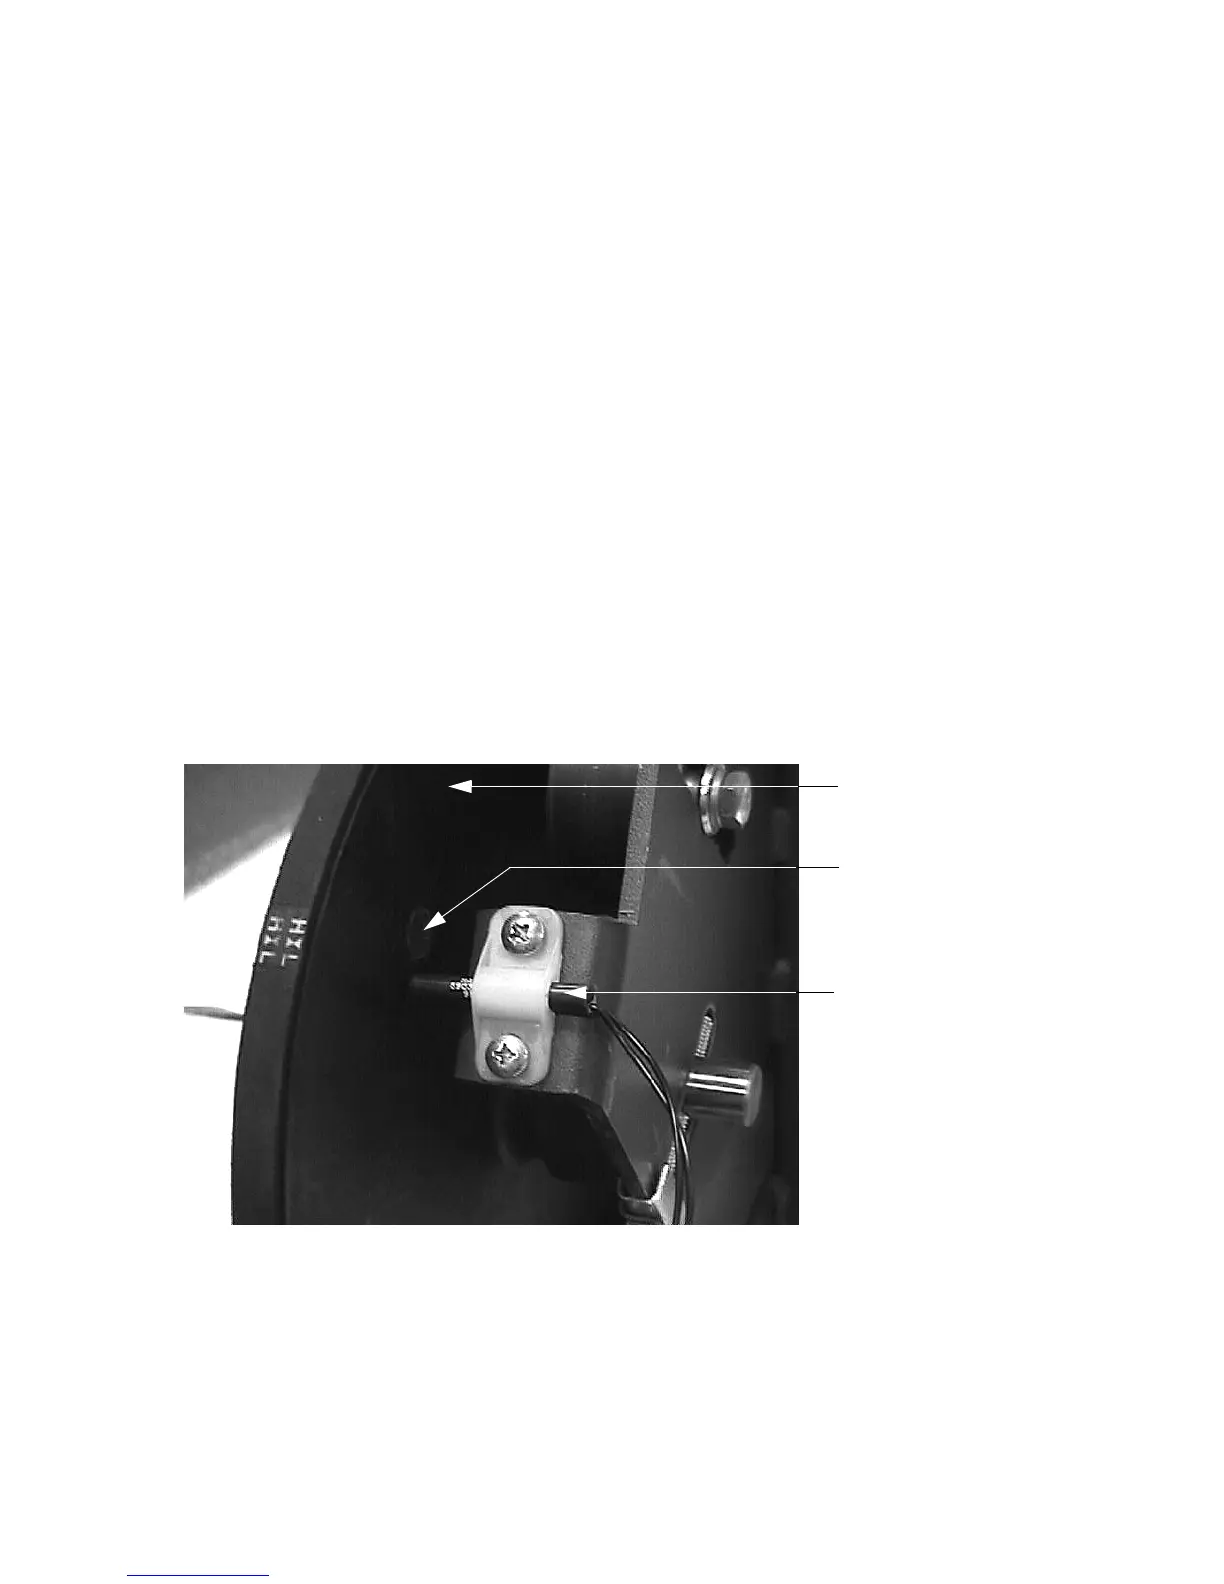
Diagram 7.14- Speed Sensor (serial codes DF and SK)
6. For serial codes DF and SK, position the speed sensor at its mounting position and set the
gap between the end of the speed sensor and the step up pulley at approximately 1/8 inch.
Replace the hardware that secures the speed sensor to the drive unit. Torque the speed
sensor screws to 27 in./lbs.
7. For serial code AA23, snap the replacement speed sensor into the speed sensor clip. See
Diagram 6.4.
Step
S
Step Up Pulley
Magnet
Speed Sensor