EasyManua.ls Logo

Precor PVS User Manual

Precor PVS
80 pages
To Next Page IconTo Next Page
To Previous Page IconTo Previous Page
Page #31 background imageLoading...
Page #31 background image
Beginning the Assembly 29
3. Attach the ferrite clamp on the audio cable to the display
console, near the headphone jack on the left side.
Note: Ferrite not required for PEP assembly.
4. Gather the cables together, including the RCA cable for
the optional PEP feature if purchased, and align the cables
along the neck of the integrated controller.
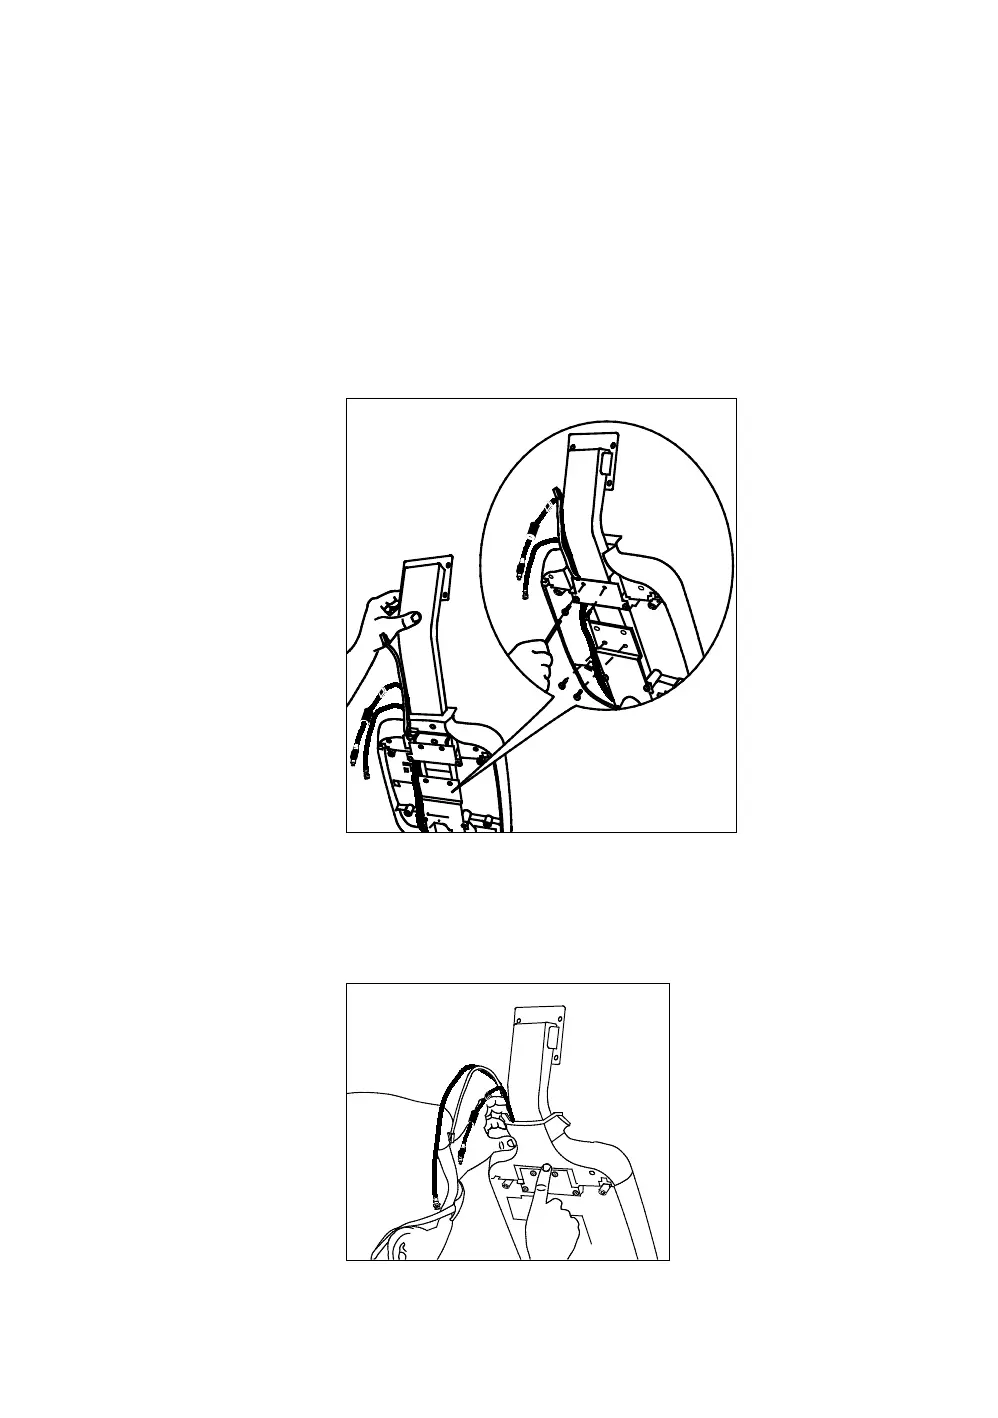
5. Hold the cables out of the way as you slide the bracket
into position and align the four mounting holes. Insert four
socket head screws and four washers and wrench tighten
using a ³⁄₁₆-inch hex key. Torque to 70 inch-pounds.
Figure 23: PVS bracket positioning
6. Attach the transition cover. Insert the base of the cover
first and apply pressure to the upper portion. It should
easily snap it into place.
Figure 24: Transition cover attachment

Other manuals for Precor PVS

Questions and Answers:

Precor PVS Specifications

General IconGeneral
BrandPrecor
ModelPVS
CategoryDigital Photo Frame
LanguageEnglish

Summary

Preliminary Information

Edition and Legal Information

Details on document edition, copyright, trademarks, and IP notices.

Important Safety Instructions

Essential guidelines and precautions for safe product use.

Electrical Recommendations and Service

Power connection guidelines and service information.

Chapter 1: Beginning the Assembly

Installation Requirements and Hardware Kit

Lists tools, hardware, and components needed for assembly.

EFX Equipment Rewiring and Cable Routing

Steps for rewiring EFX equipment and routing PVS cables.

Treadmill Equipment Rewiring and Cable Routing

Steps for rewiring treadmill equipment and routing PVS cables.

Attaching PVS and Entertainment Options

Instructions for attaching the PVS and optional entertainment features.

Installing Headphone Jack and Related Components

Steps for installing the headphone jack and ensuring proper connections.

Chapter 2: Setting Up the PVS

System Settings Overview and Master Reset

Overview of system settings, categories, and master reset procedures.

Viewing and Configuring System Settings (US Models)

Accessing and adjusting channel, picture, and audio settings for US models.

Configuring PVS Setup Menu Options

Configuring detailed subcategories like Caption, Auto Power, and Lock.

Viewing and Configuring System Settings (EU Model)

Accessing and adjusting settings for EU models.

Chapter 3: Personal Entertainment Player (PEP) Guide

Using the PVS with iPod Integration

Procedures for using the PVS and PEP for TV and iPod integration.

Replacing the iPod Cable

Steps to replace the iPod cable if the connection becomes unreliable.

Chapter 4: Troubleshooting the PVS

Power, Captioning, and Audio Issues

Solutions for power, closed captioning, and audio problems.

Video Display and TV Reception Issues

Diagnosing and resolving issues with picture quality, bars, and TV reception.

iPod Content Playback Issues

Resolving issues with iPod content not playing or displaying on the PVS.

Chapter 5: Product Maintenance

Cleaning the PVS Screen

Recommended procedures for cleaning the PVS screen to maintain functionality.

Chapter 6: Limited Warranty Information

Warranty Coverage and Periods

Details the warranty duration and coverage for product components.

Warranty Conditions and Exclusions

Outlines the conditions, restrictions, and exclusions for the product warranty.