Building your MINI+
Original Prusa MINI+ semi-assembled 17
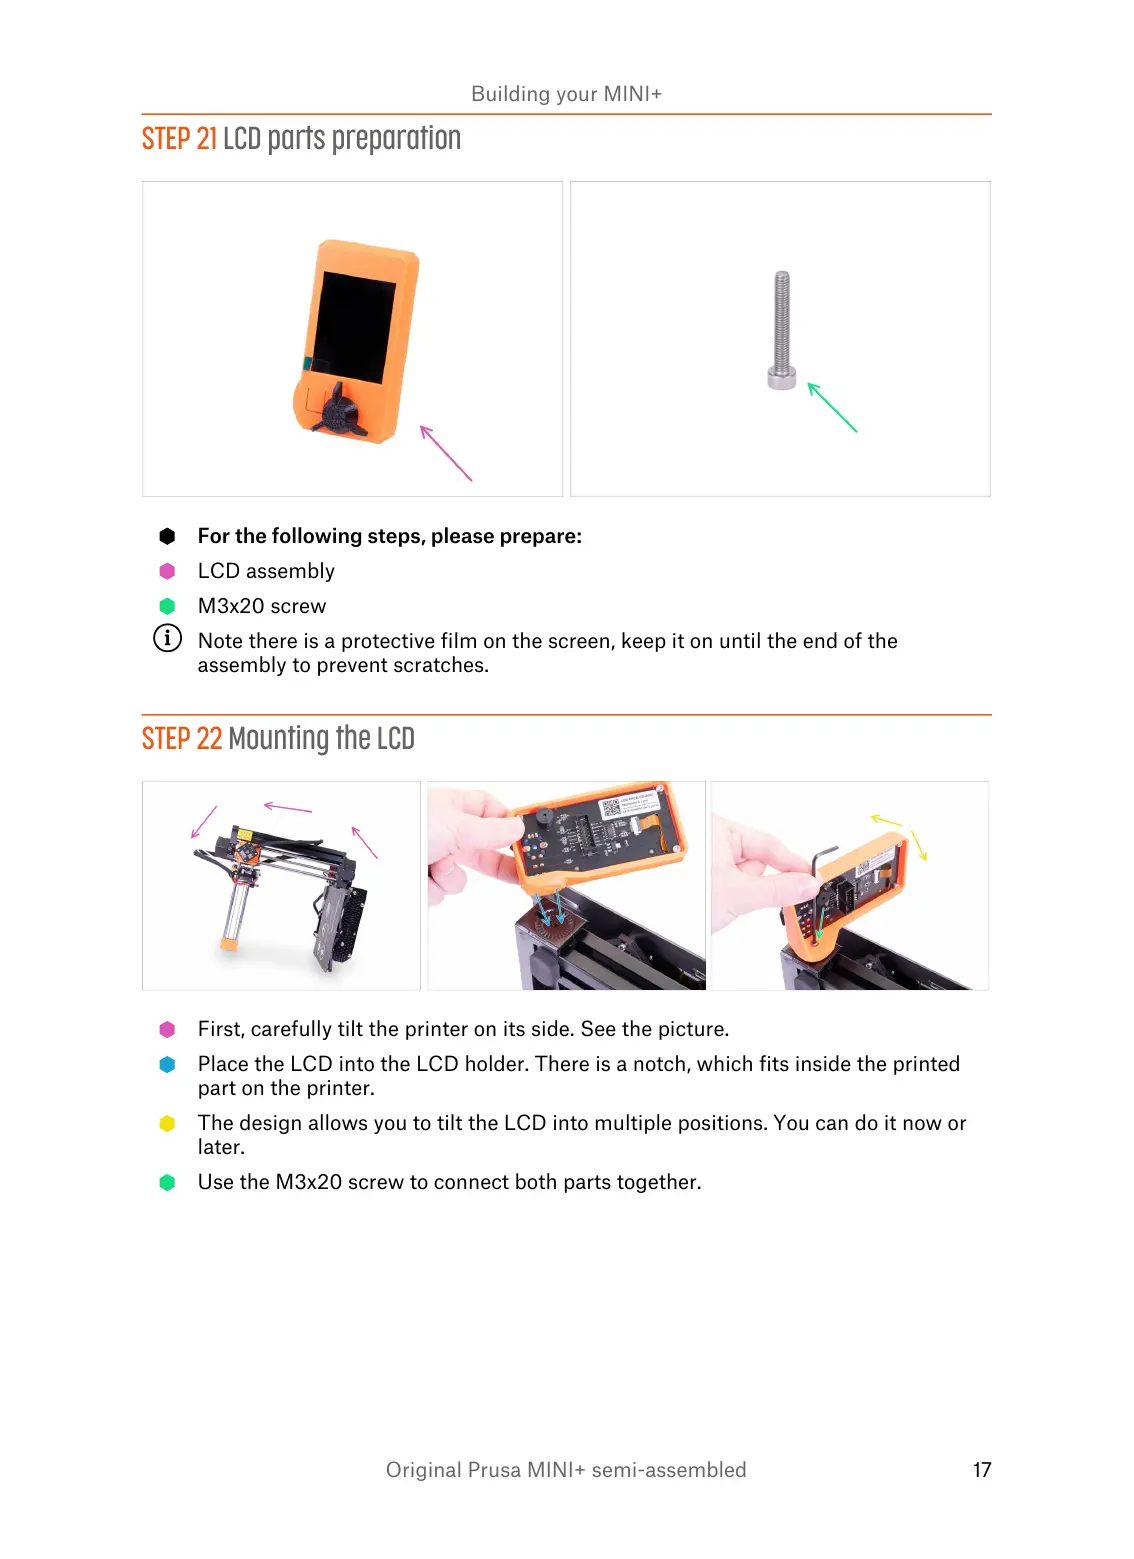
STEP 21 LCD parts preparation
For the following steps, please prepare:
LCD assembly
M3x20 screw
Note there is a protective film on the screen, keep it on until the end of the
assembly to prevent scratches.
STEP 22 Mounting the LCD
First, carefully tilt the printer on its side. See the picture.
Place the LCD into the LCD holder. There is a notch, which fits inside the printed
part on the printer.
The design allows you to tilt the LCD into multiple positions. You can do it now or
later.
Use the M3x20 screw to connect both parts together.