3
INSTALLATION
Notes:
Choose the mounting location where
the unit will not interfere with the
normal driving function of the driver.
Before finally installing the unit,
connect the wiring temporarily and
make sure it is all connected up
properly and the unit and the system
work properly.
Use only the parts included with the
unit to ensure proper installation. The
use of unauthorized parts can cause
malfunctions.
Consult with your nearest dealer if
installation requires the drilling of holes
or other modifications of the vehicle.
Install the unit where it does not get in
the driver’s way and cannot injure the
passenger if there is a sudden stop,
like an emergency stop.
If installation angel exceeds 30°from
horizontal, the unit might not give its
optimum performance.
Avoid installing the unit where it would
be subject to high temperature, such as
from direct sunlight, or from hot air,
from the heater, or where it would be
subject to dust, dirt or excessive
vibration.
DIN FRONT-MOUNT
Installation Opening
This unit can be installed in any dashboard
having an opening as shown below:
Installing the unit
Be sure you test all connections first, and
then follow these steps to install the unit.
1. Make sure the ignition is turned off, and
then disconnect the cable from the
vehicle battery’s negative (-) terminal.
2. Disconnect the wire harness and the
antenna.
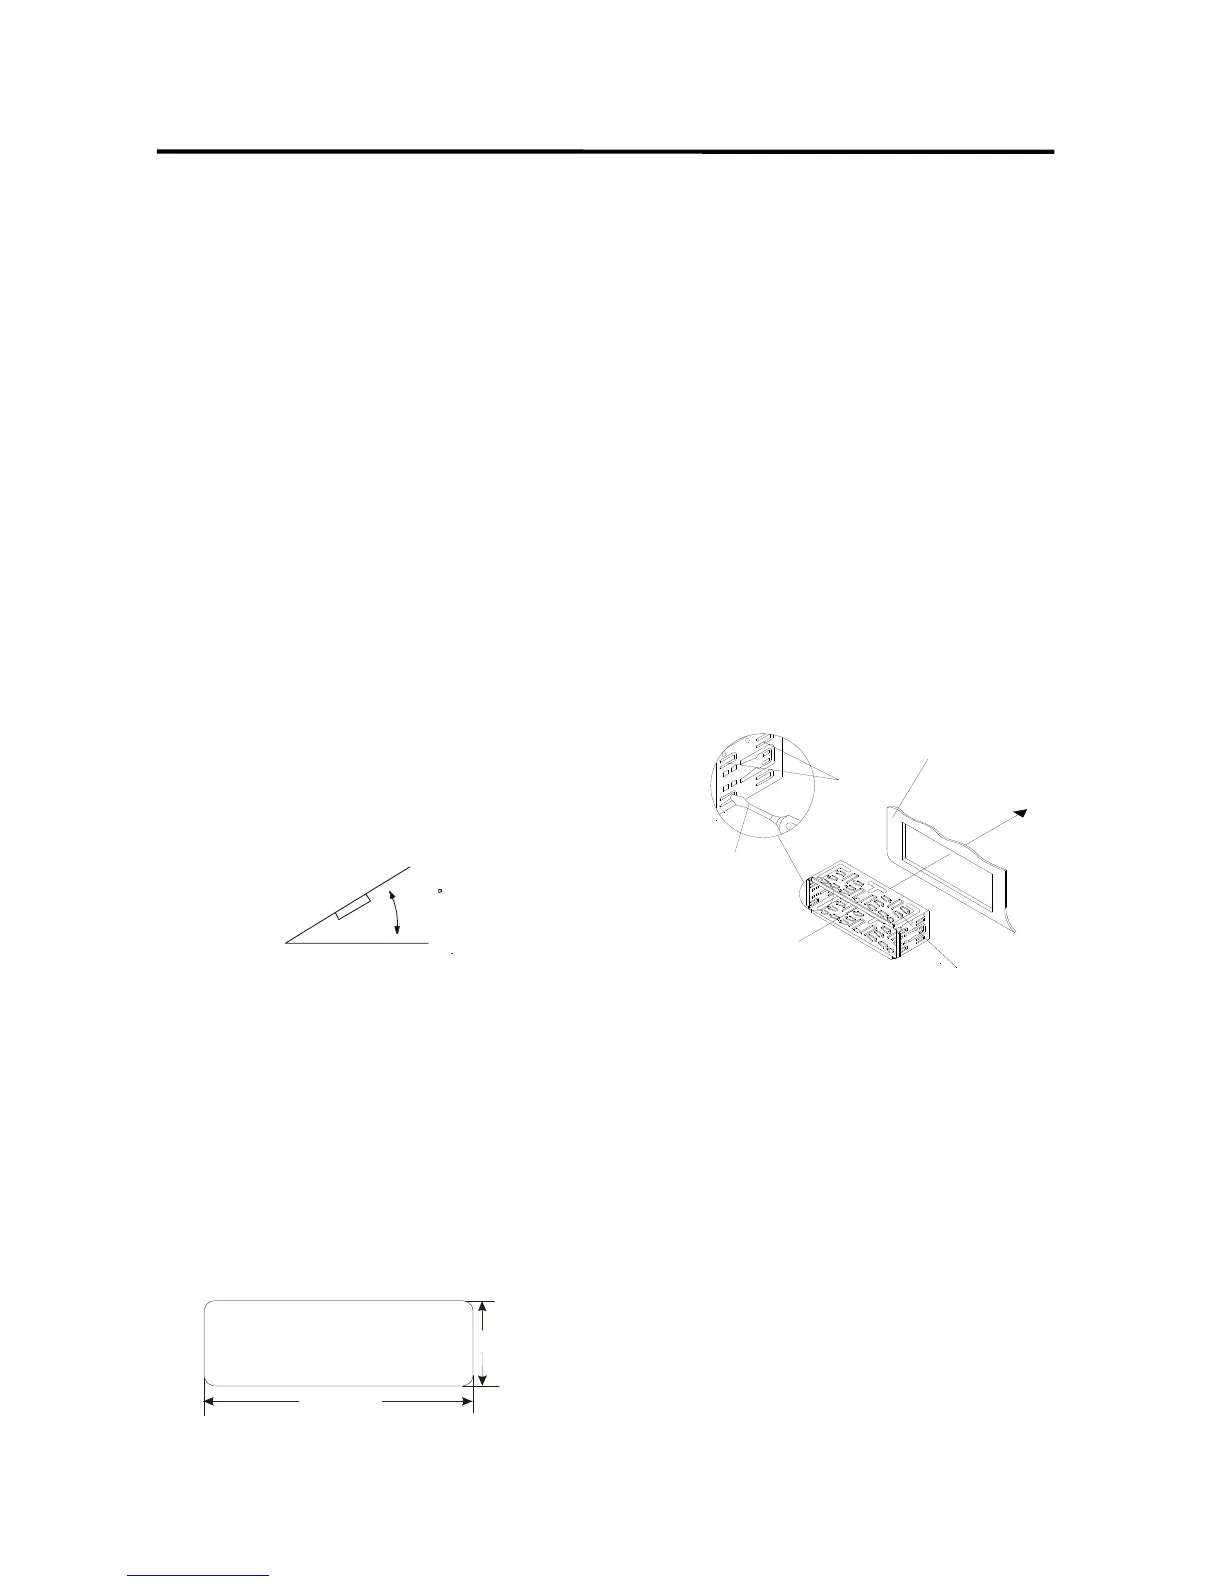
3.
Mount the sleeve by inserting the sleeve
into the opening of the dashboard and
bend open the tabs located around the
sleeve with a
screwdriver. Not all tabs will be able to
make contact, so examine which ones
will be most effective. Bending open the
appropriate tabs behind the dashboard
to secure the sleeve in place.
Tabs
Screwdriver
Sleeve
Dashboard
4. Reconnect the wire harness and the
antenna and be careful not to pinch any
wires or cables.
5. Slide the unit into the sleeve until it
locks into place.
6. To further secure the unit, use the
supplied metal strap to secure the back
of the unit in place. Use the supplied
hardware (Hex Nut (M5mm) and Spring
Washer) to attach one end of the strap
to the mounting bolt on the back of the
unit. If necessary, bend the metal strap
to fit your vehicle’s mounting area. Then
use the supplied hardware (Tapping
30
53mm
182mm