28
3. Slide the light shield cover to the closed position.
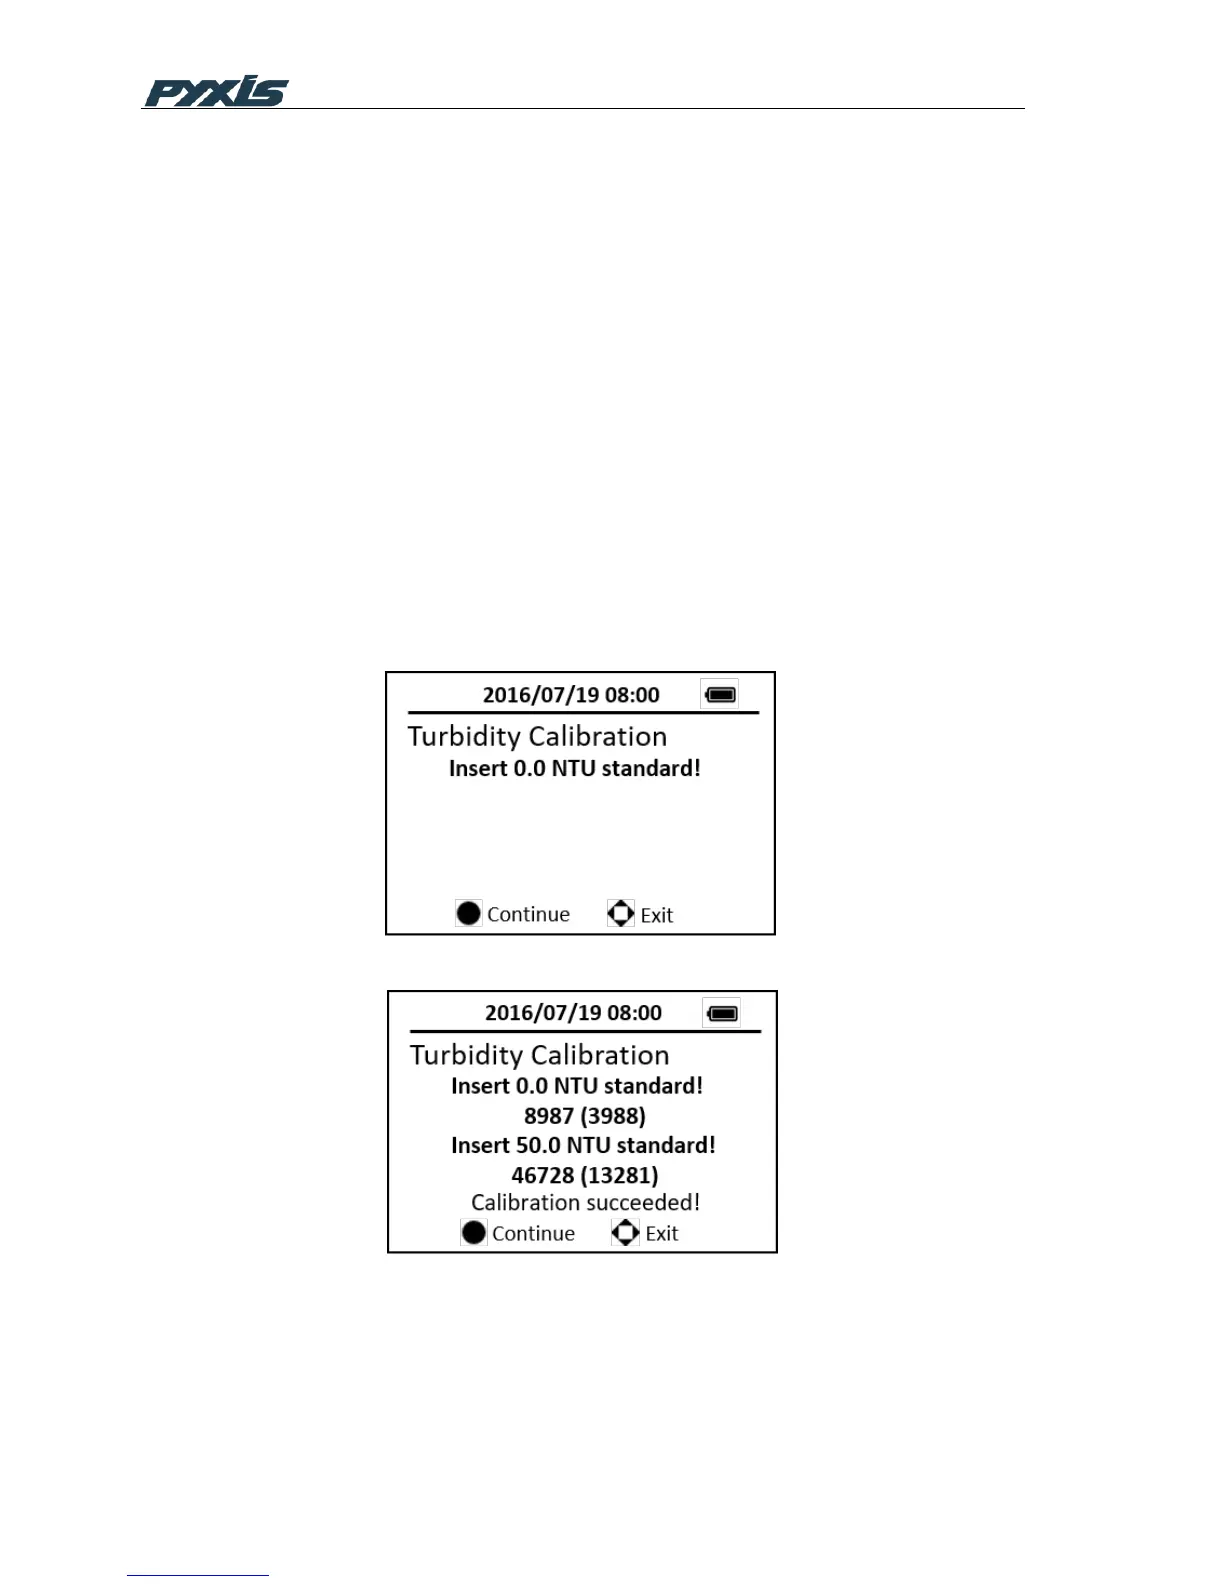
4. Press the CAL on the main page, then choose the Turbidity calibration and
press the OK button to launch the Turbidity calibration page. (Figure 20)
5. Press the OK key to measure the deionized water
6. Fill the 10 ml sample vial to above 10 ml mark with the 50 NTU standard.
Insert the sample vial to the sample vial compartment.
7. Press the OK key to measure the 50 NTU standard. Low range turbidity
calibration is successful
8. Press the OK key to continue high range turbidity calibration. If high range
turbidity calibration not required, press any other keys to exit. (Figure 21)
9. Fill the 10 ml sample vial to above 10 ml mark with the 100 or 200 NTU
standard. Insert the sample vial to the sample vial compartment.
10. Follow the message prompts, use the upper or down key to switch the
standard between 100 NTU and 200 NTU.
11. Press the OK key to measure the selected standard. High range turbidity
calibration is successful. (Figure 22)
12. Press any keys to exit.
Figure 20 Turbidity Calibration-1
Figure 21 Low Range Calibration